This page is under construction. I’ll be adding flowers as the season progresses.
The Flowers….
Here are some of the beautiful flowers I grow here on the farm, along with pictures and notes or comments.
Hellebores
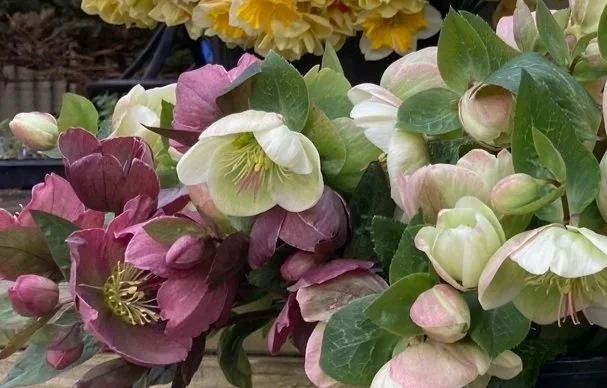
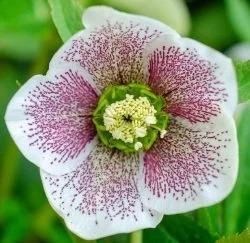
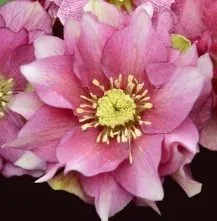
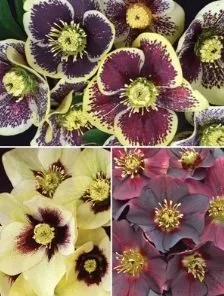
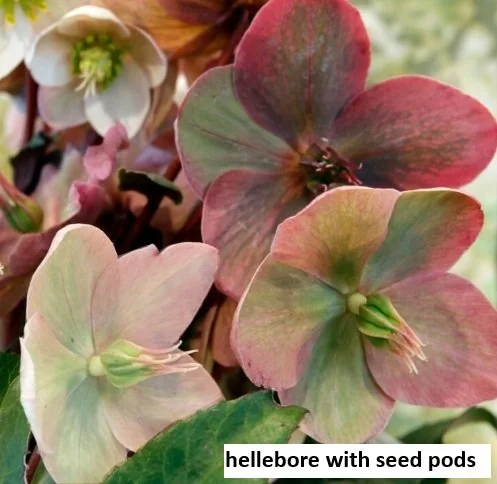
Hellebores, also known as Lenten Rose, are one of the first flowers to bloom for me. Like most flowers, there are many different varieties with different bloom times, colors, shapes and sizes. The colors are usually white/cream, pink, yellow, green, maroon and dark, almost black. I’ve never seen orange or purple shades. There are very short varieties at only 6 inches and also taller varieties at over 2 feet. The blooms can also be single or double, rounded or pointed, solid color or bicolor. Bloom time is normally mid winter to early spring.
Hellebores grow in part to full shade and love the cool/cold weather. Most of the varieties I grow usually bloom just before my daffodils around the end of March. They are perennial so they come up every year on their own. They are evergreen, meaning they don’t lose their leaves or die back to the ground in winter, however, the leaves that survive the winter are usually tattered and worn. They are cut back in the spring to improve appearance as new leaves emerge.
Hellebores are very unique because their blooms do not consist of petals like other flowers. The ‘bloom petals’ that you see are actually the sepals. In most flowers the sepal is the leafy portion under the bloom, collectively called the calyx. Because of this, they have a crazy long bloom period in the garden, literally lasting for months.
Looking at the pictures, you can see young hellebores that still have yellow pollen in the center. When harvested at this early stage, they will not last very long in a vase and will need special care in order to get them to stand up straight without wilting. I use a solution called ‘Quick Dip’ and also score the stem to let in more water. (Scoring the stem is when you take a sharp blade and make a shallow slice on the lower portion of the stem that will be below the water in a vase.) As the blooms age, they lose the pollen, usually turn a green or antique pink color, and seed pods develop. You can see seed pods just starting to develop in one of the pictures. When they reach this stage, they will literally last 2-3 weeks or more in a vase and even longer in the garden. Love that!
I buy most of my hellebores at Bluestone Perennial as live plants. I highly recommend them. They have great products and excellent customer service.
Daffodils
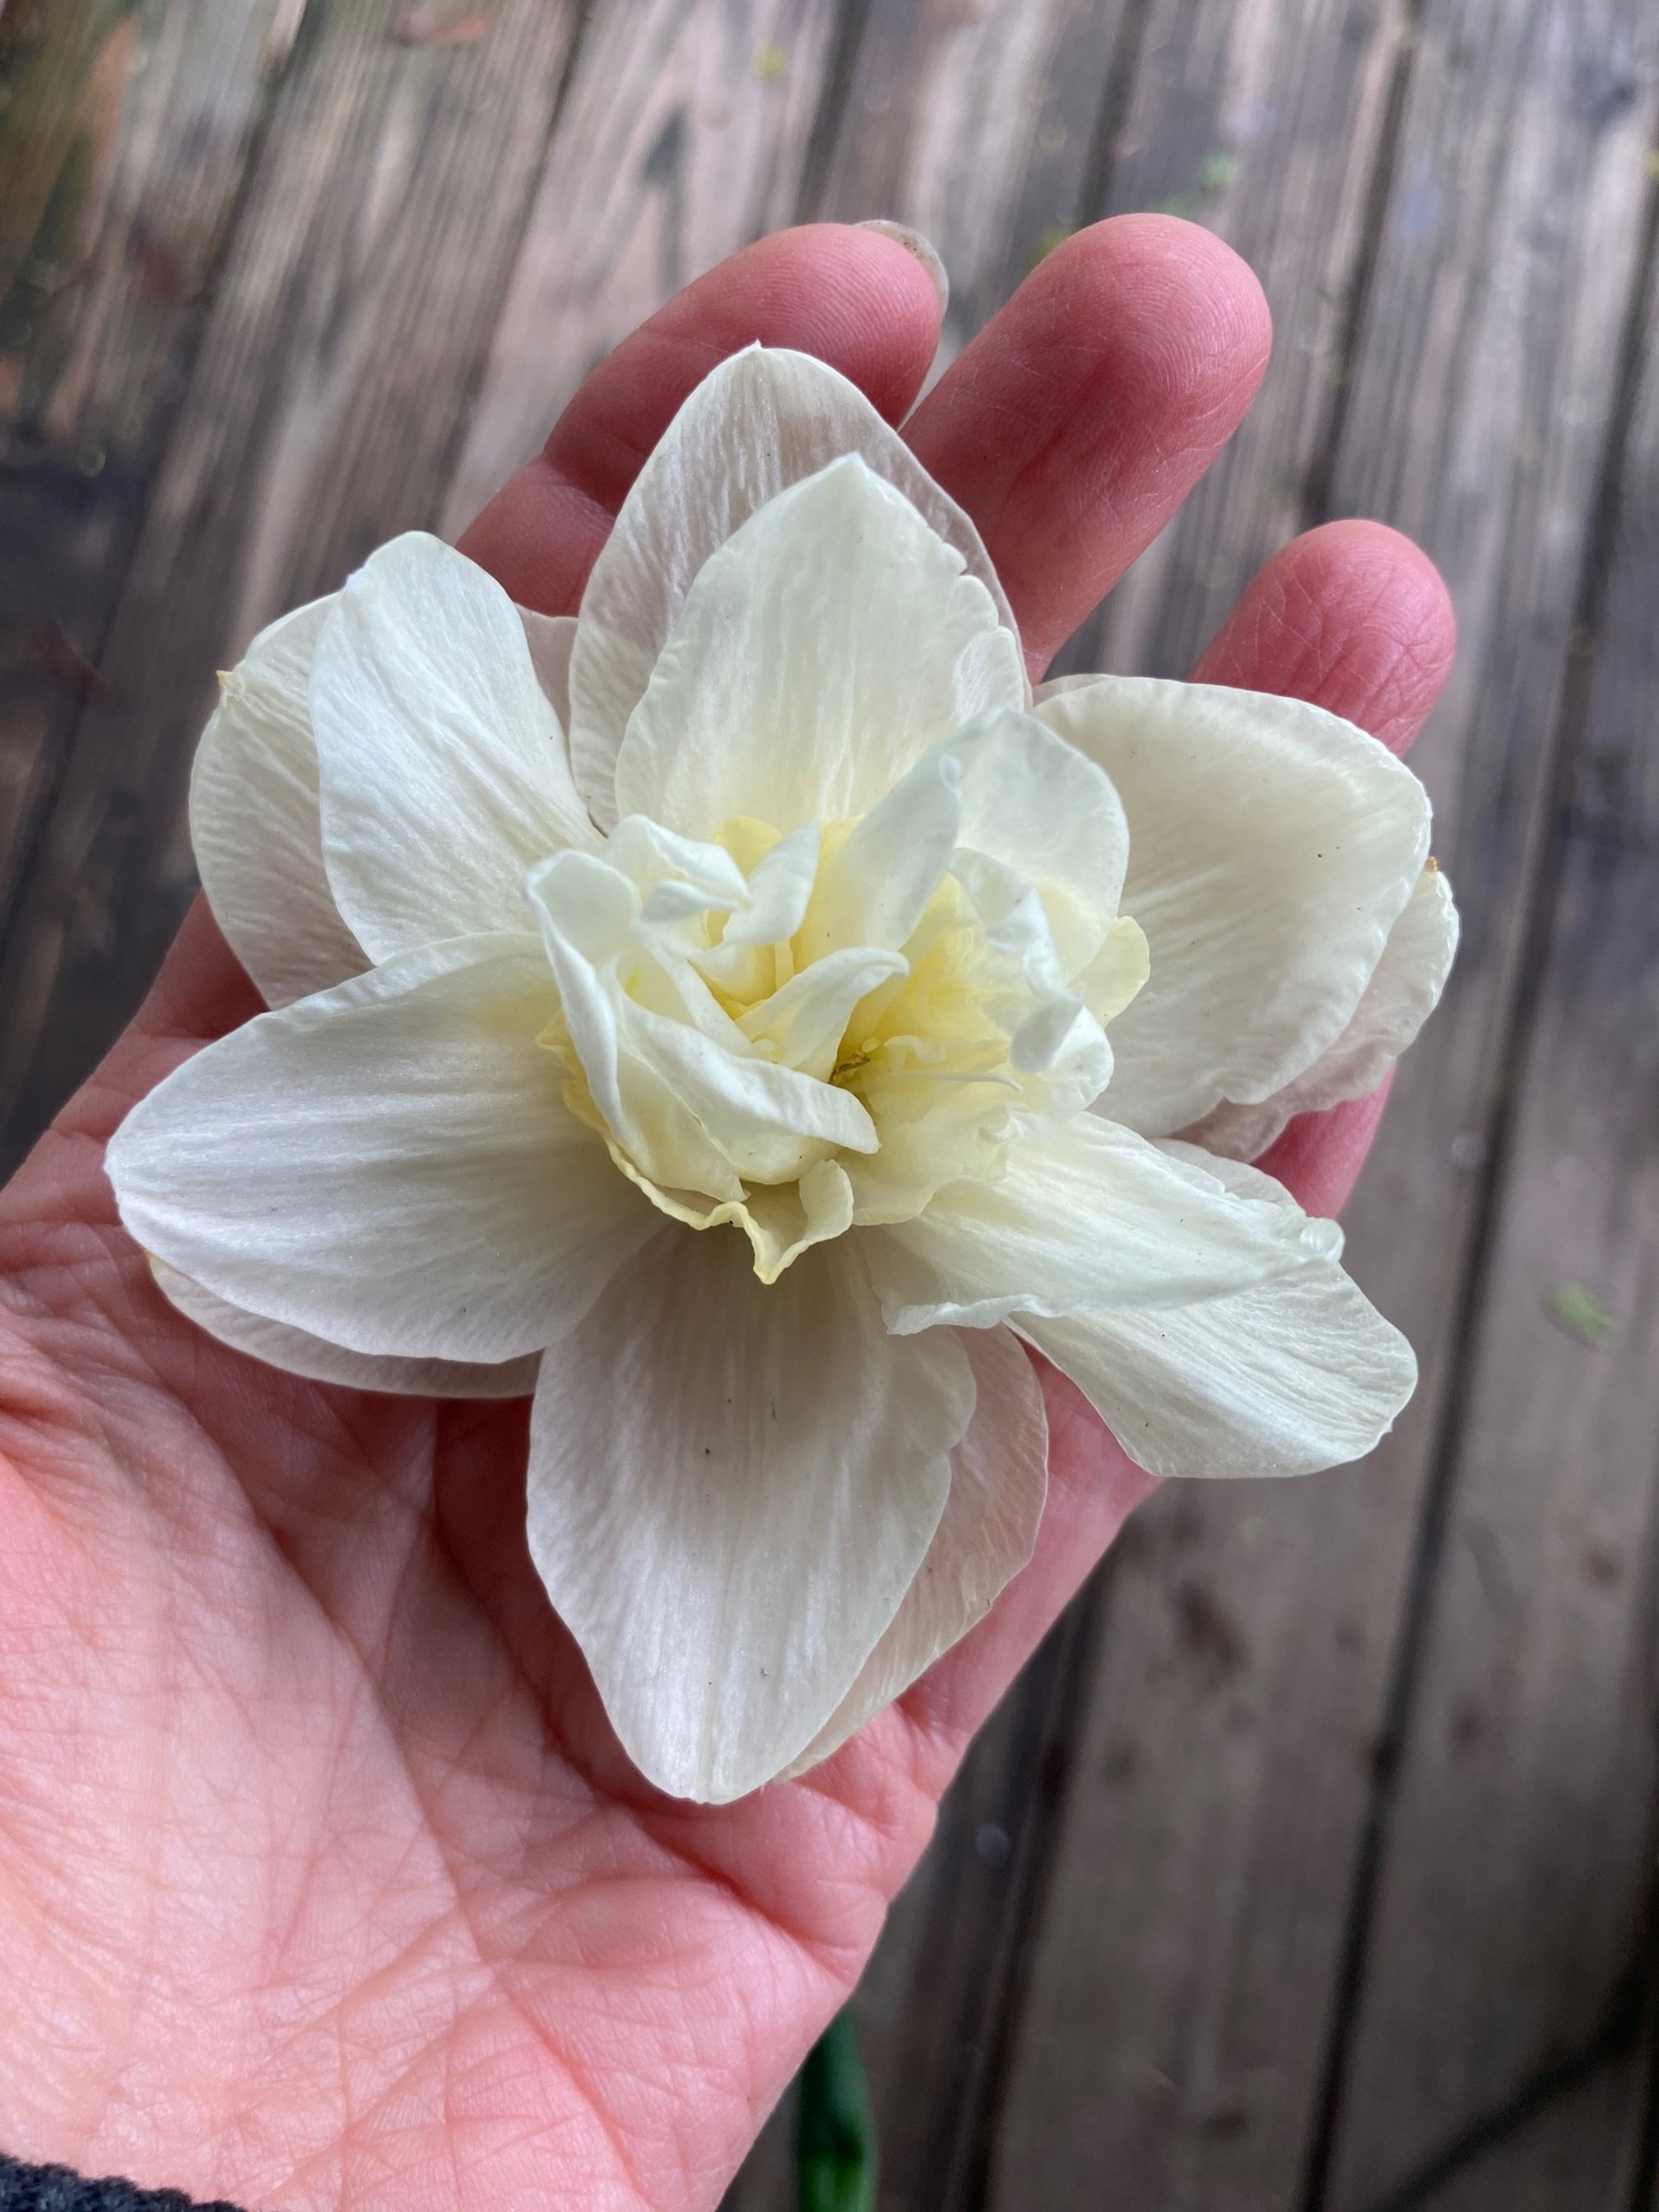
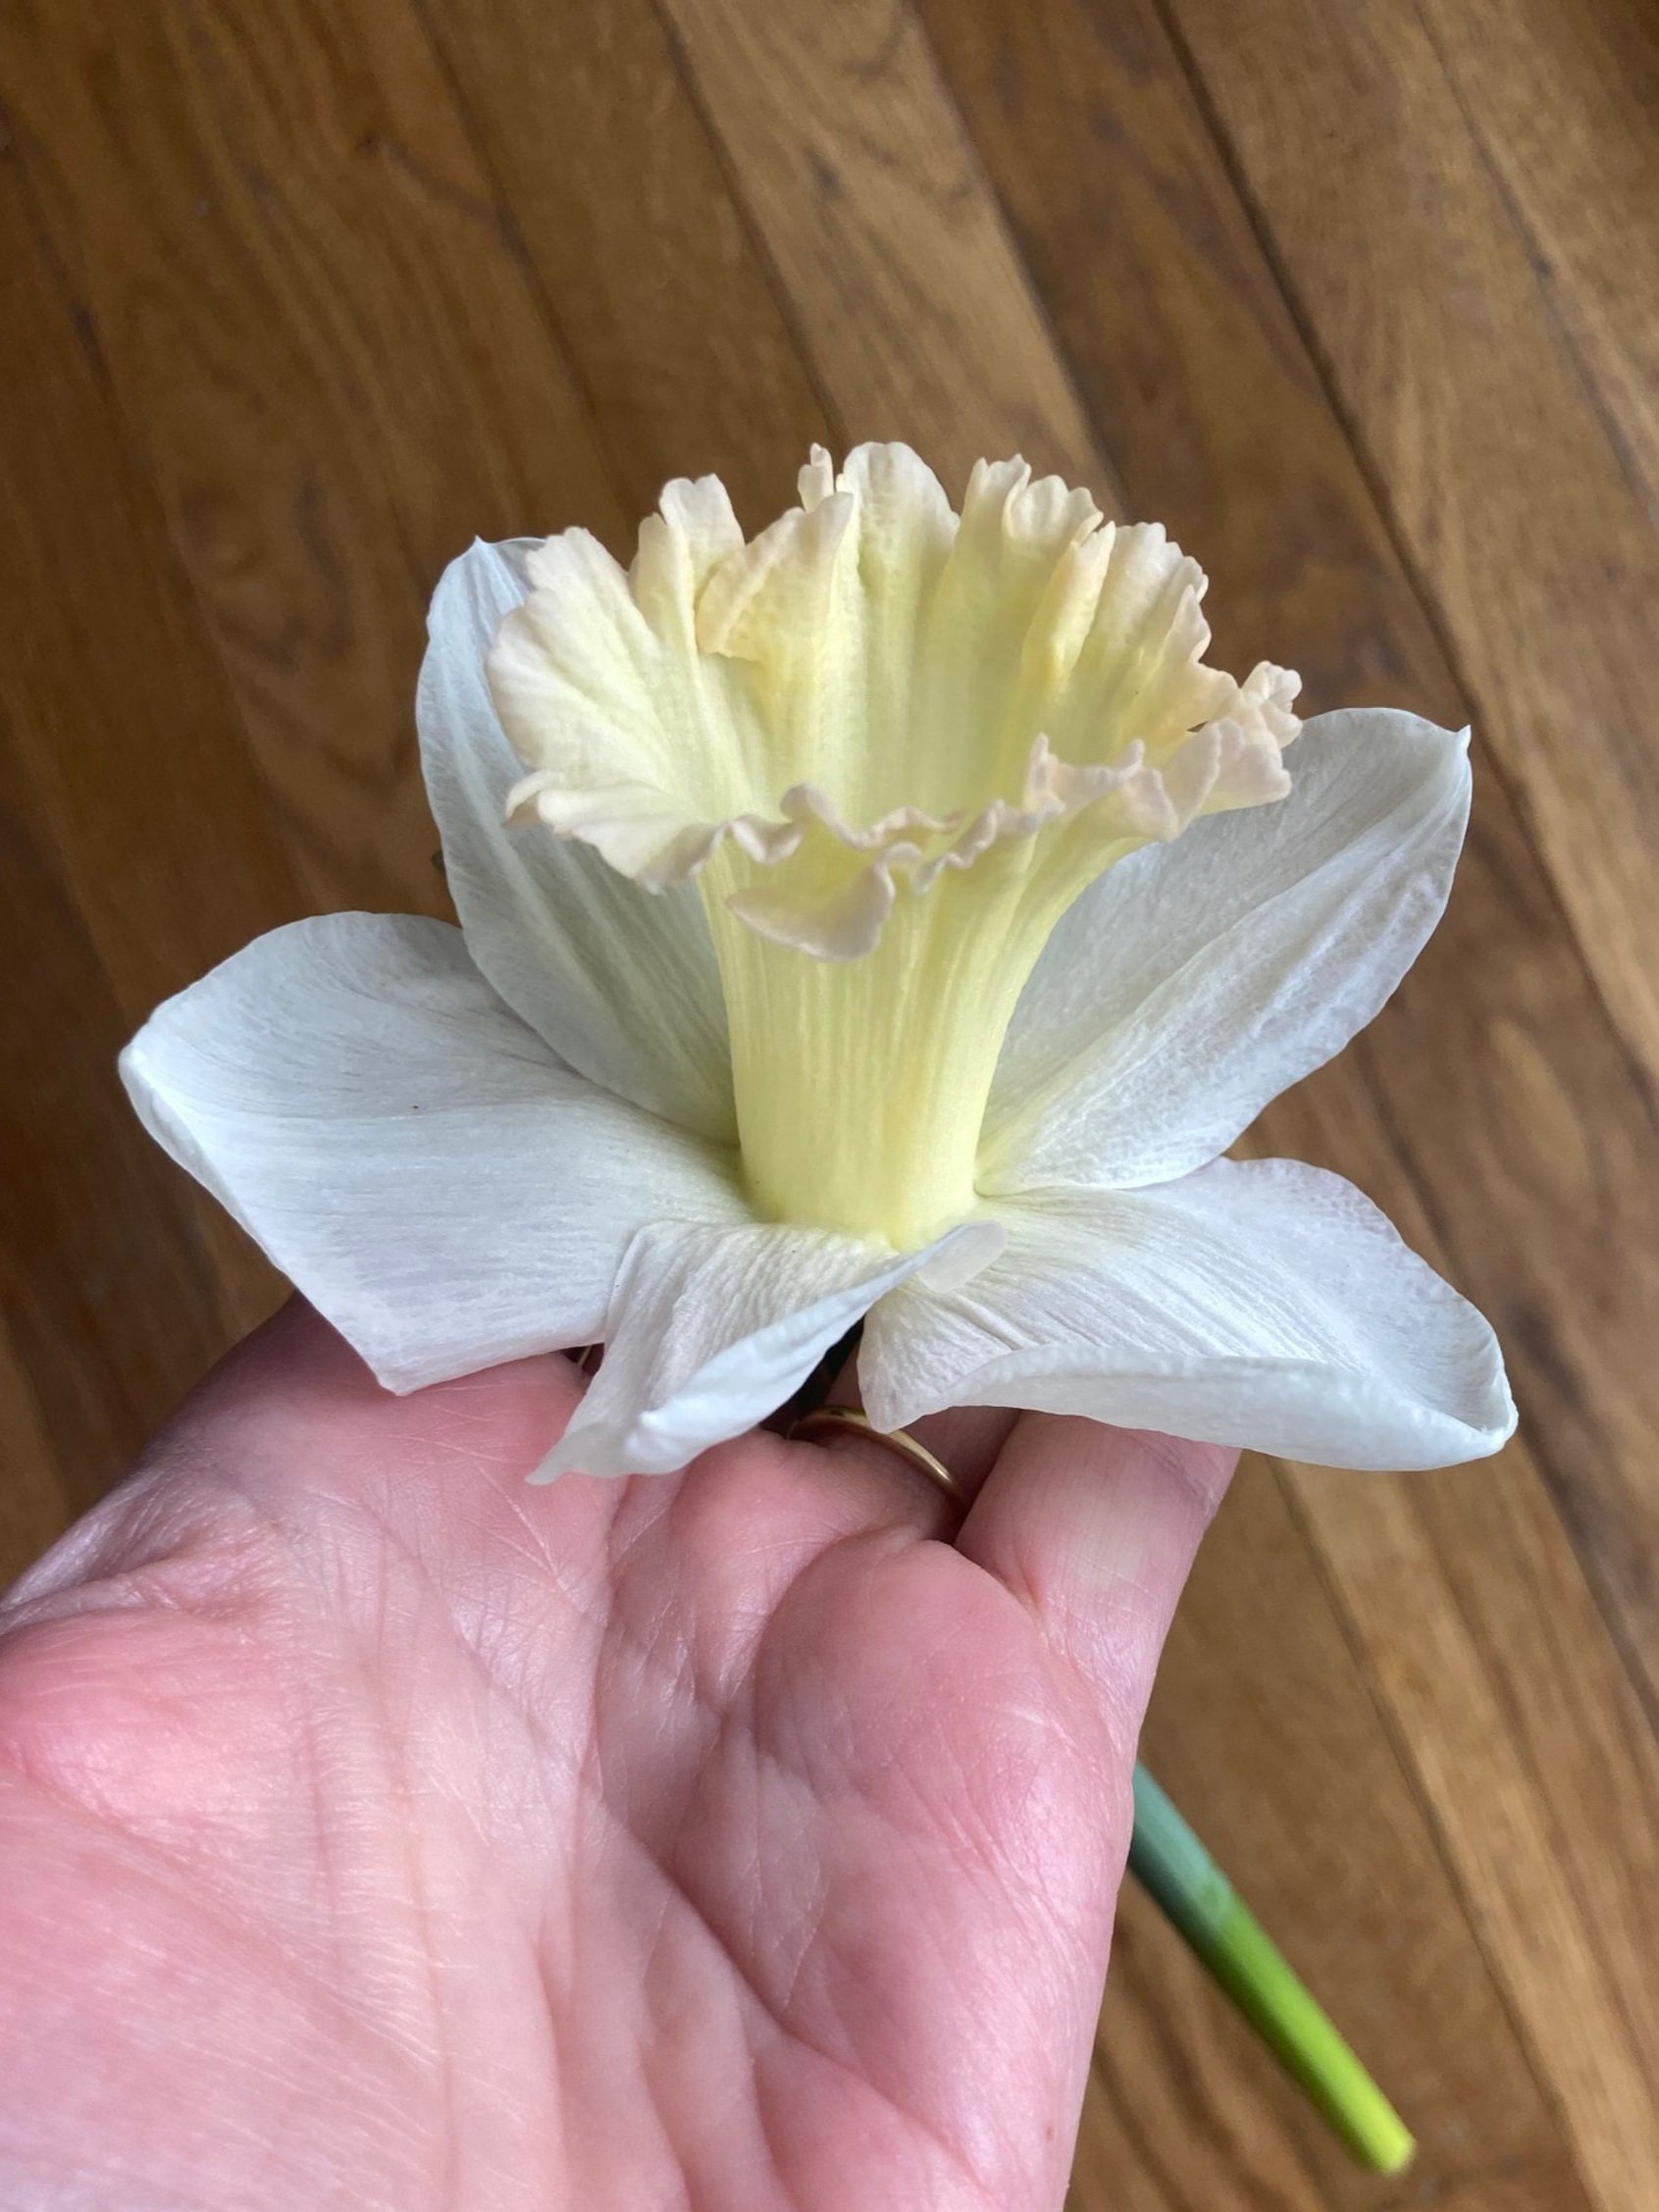
After the hellebores bloom, the daffodils are the next flower that come up for me in early spring, usually around the beginning to middle of April. Most of mine are specialty daffodils, not the traditional yellow cup and petals, although I did get some of those in a mix I bought. Specialty daffodil flowers are gorgeous and enormous! They’re HUGE, most over 3 inches across. They cover my hand.
Daffodils are a perennial bulb so they come up on their own every spring. They are an easy flower - plant them and forget them. I’ve never had any pest issues and deer and rabbit leave them alone. They are long lasting in the garden. I have some that I dug up and brought with me when we moved. They are at least 20 years old. They quickly multiply and fill in an area. Although they like a sunny location, you can sometimes plant them under trees because when these are blooming, there are no leaves to create shade.
There are many different types of daffodils. Some of my favorites are the double, large cupped, and split corona also called butterfly daffodils. Unfortunately, I don’t know the names of a lot of these varieties because I bought a mix so they weren’t individually marked.

buckets of daffodils

daffodils on top and bottom right, hellebores on bottom left


Peonies…..
It’s official, I’m obsessed with peonies! I love the smell, the bloom structure with all those fluffy petals, and I love all the different varieties and colors. I want to grow them all!
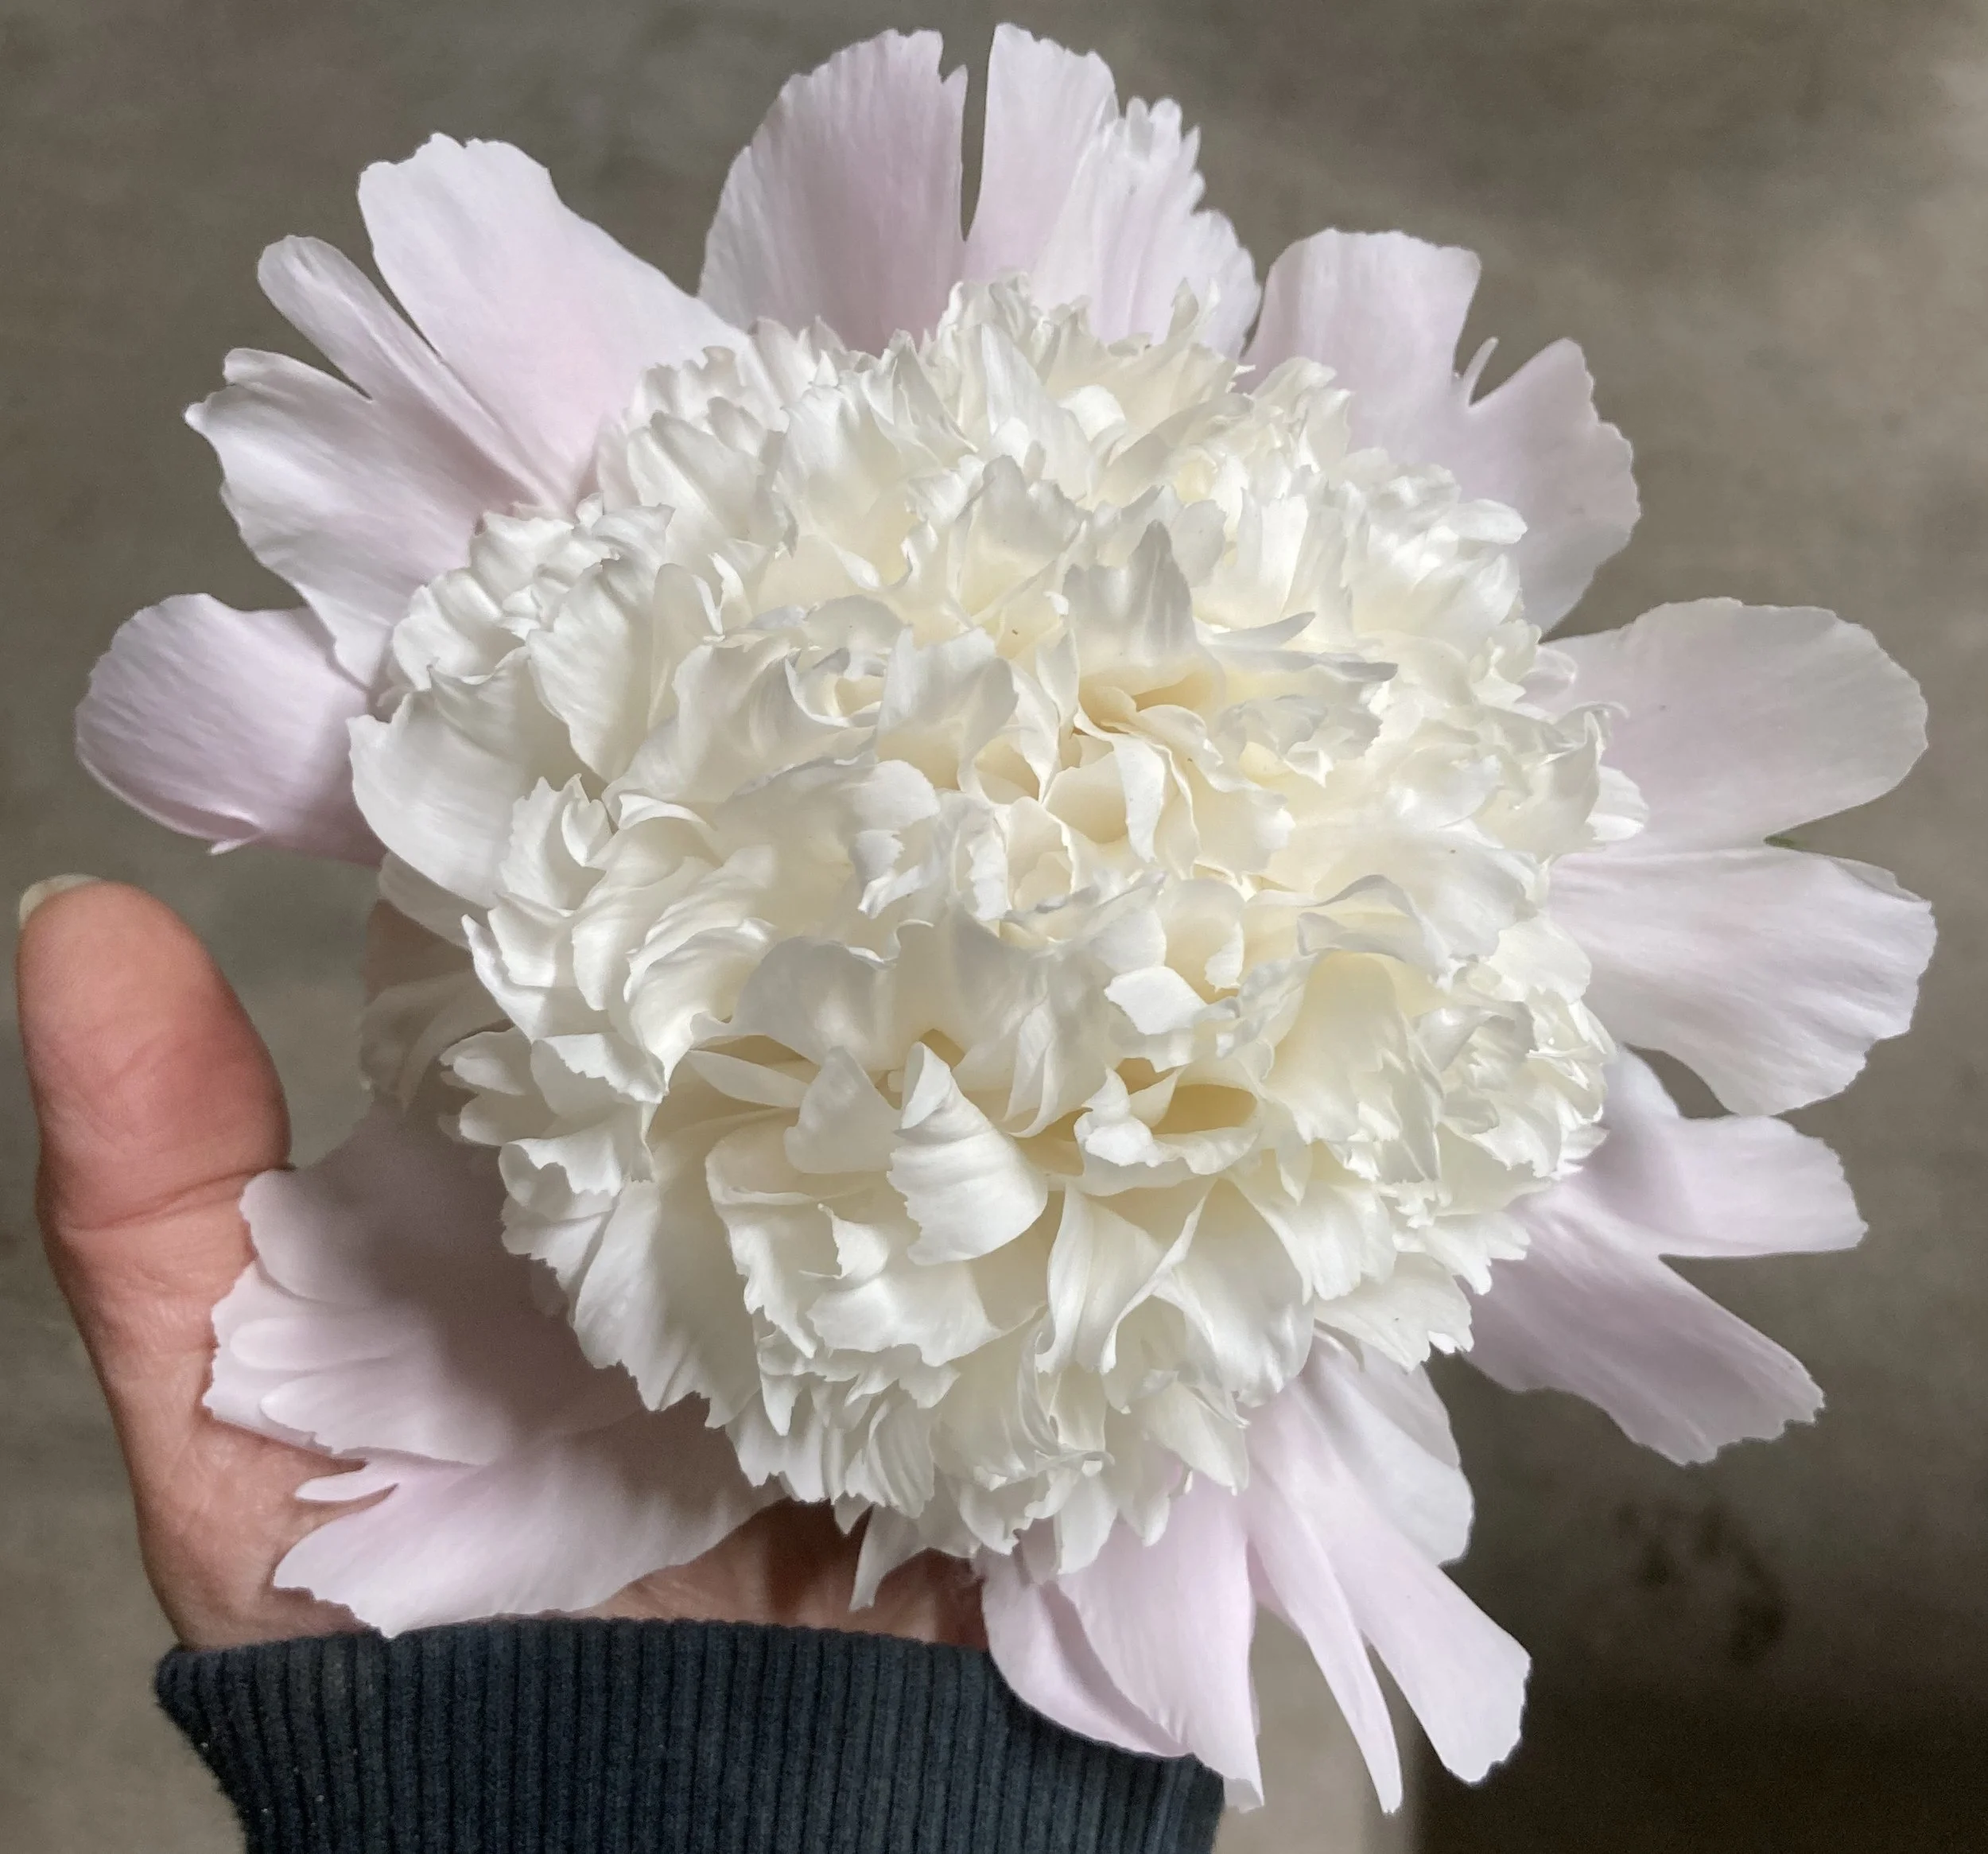
I was lucky enough to have some gorgeous, established peonies here when we moved in. I’m not sure of the varieties, but I have some that are all white, some light pink, dark pink and one that has a white fluffy center with a blush pink collar. These peonies are stunning….and huge, measuring 4-'6 inches across. They’ve been growing here on my farm for over 80 years. My neighbor’s grandparents lived here many years ago. He remembers these peonies from when he was young, he’s now in his 80s. How cool is that!?! Imagine the changes they’ve endured, the things they’ve seen, and the stories they could tell.
Along with the original peonies that have been here for years, I’ve also added a few new varieties including raspberry sundae, red charm, coral sunset, all that jazz, and scrumdiddlyumptious, which must have been diddlyicious because it got eaten by something. With no leaves to regenerate the tuber, it didn’t come back, but I have 10 more coming this spring (2026). They are gorgeous. I can’t wait to see them in bloom.
One of the great things about peonies is that you can harvest them when they’re in the “marshmellow” stage and store them in a cooler or refrigerator for weeks, even months if done correctly. This helps to extend my peony season.


gorgeous peonies from plants that are over 80 years old!

light pink and dark pink peonies in wrapped bouquets

light pink peonies in mason jar bouquets - these were some of the first bouquets I sold in the spring of 2022
Yarrow
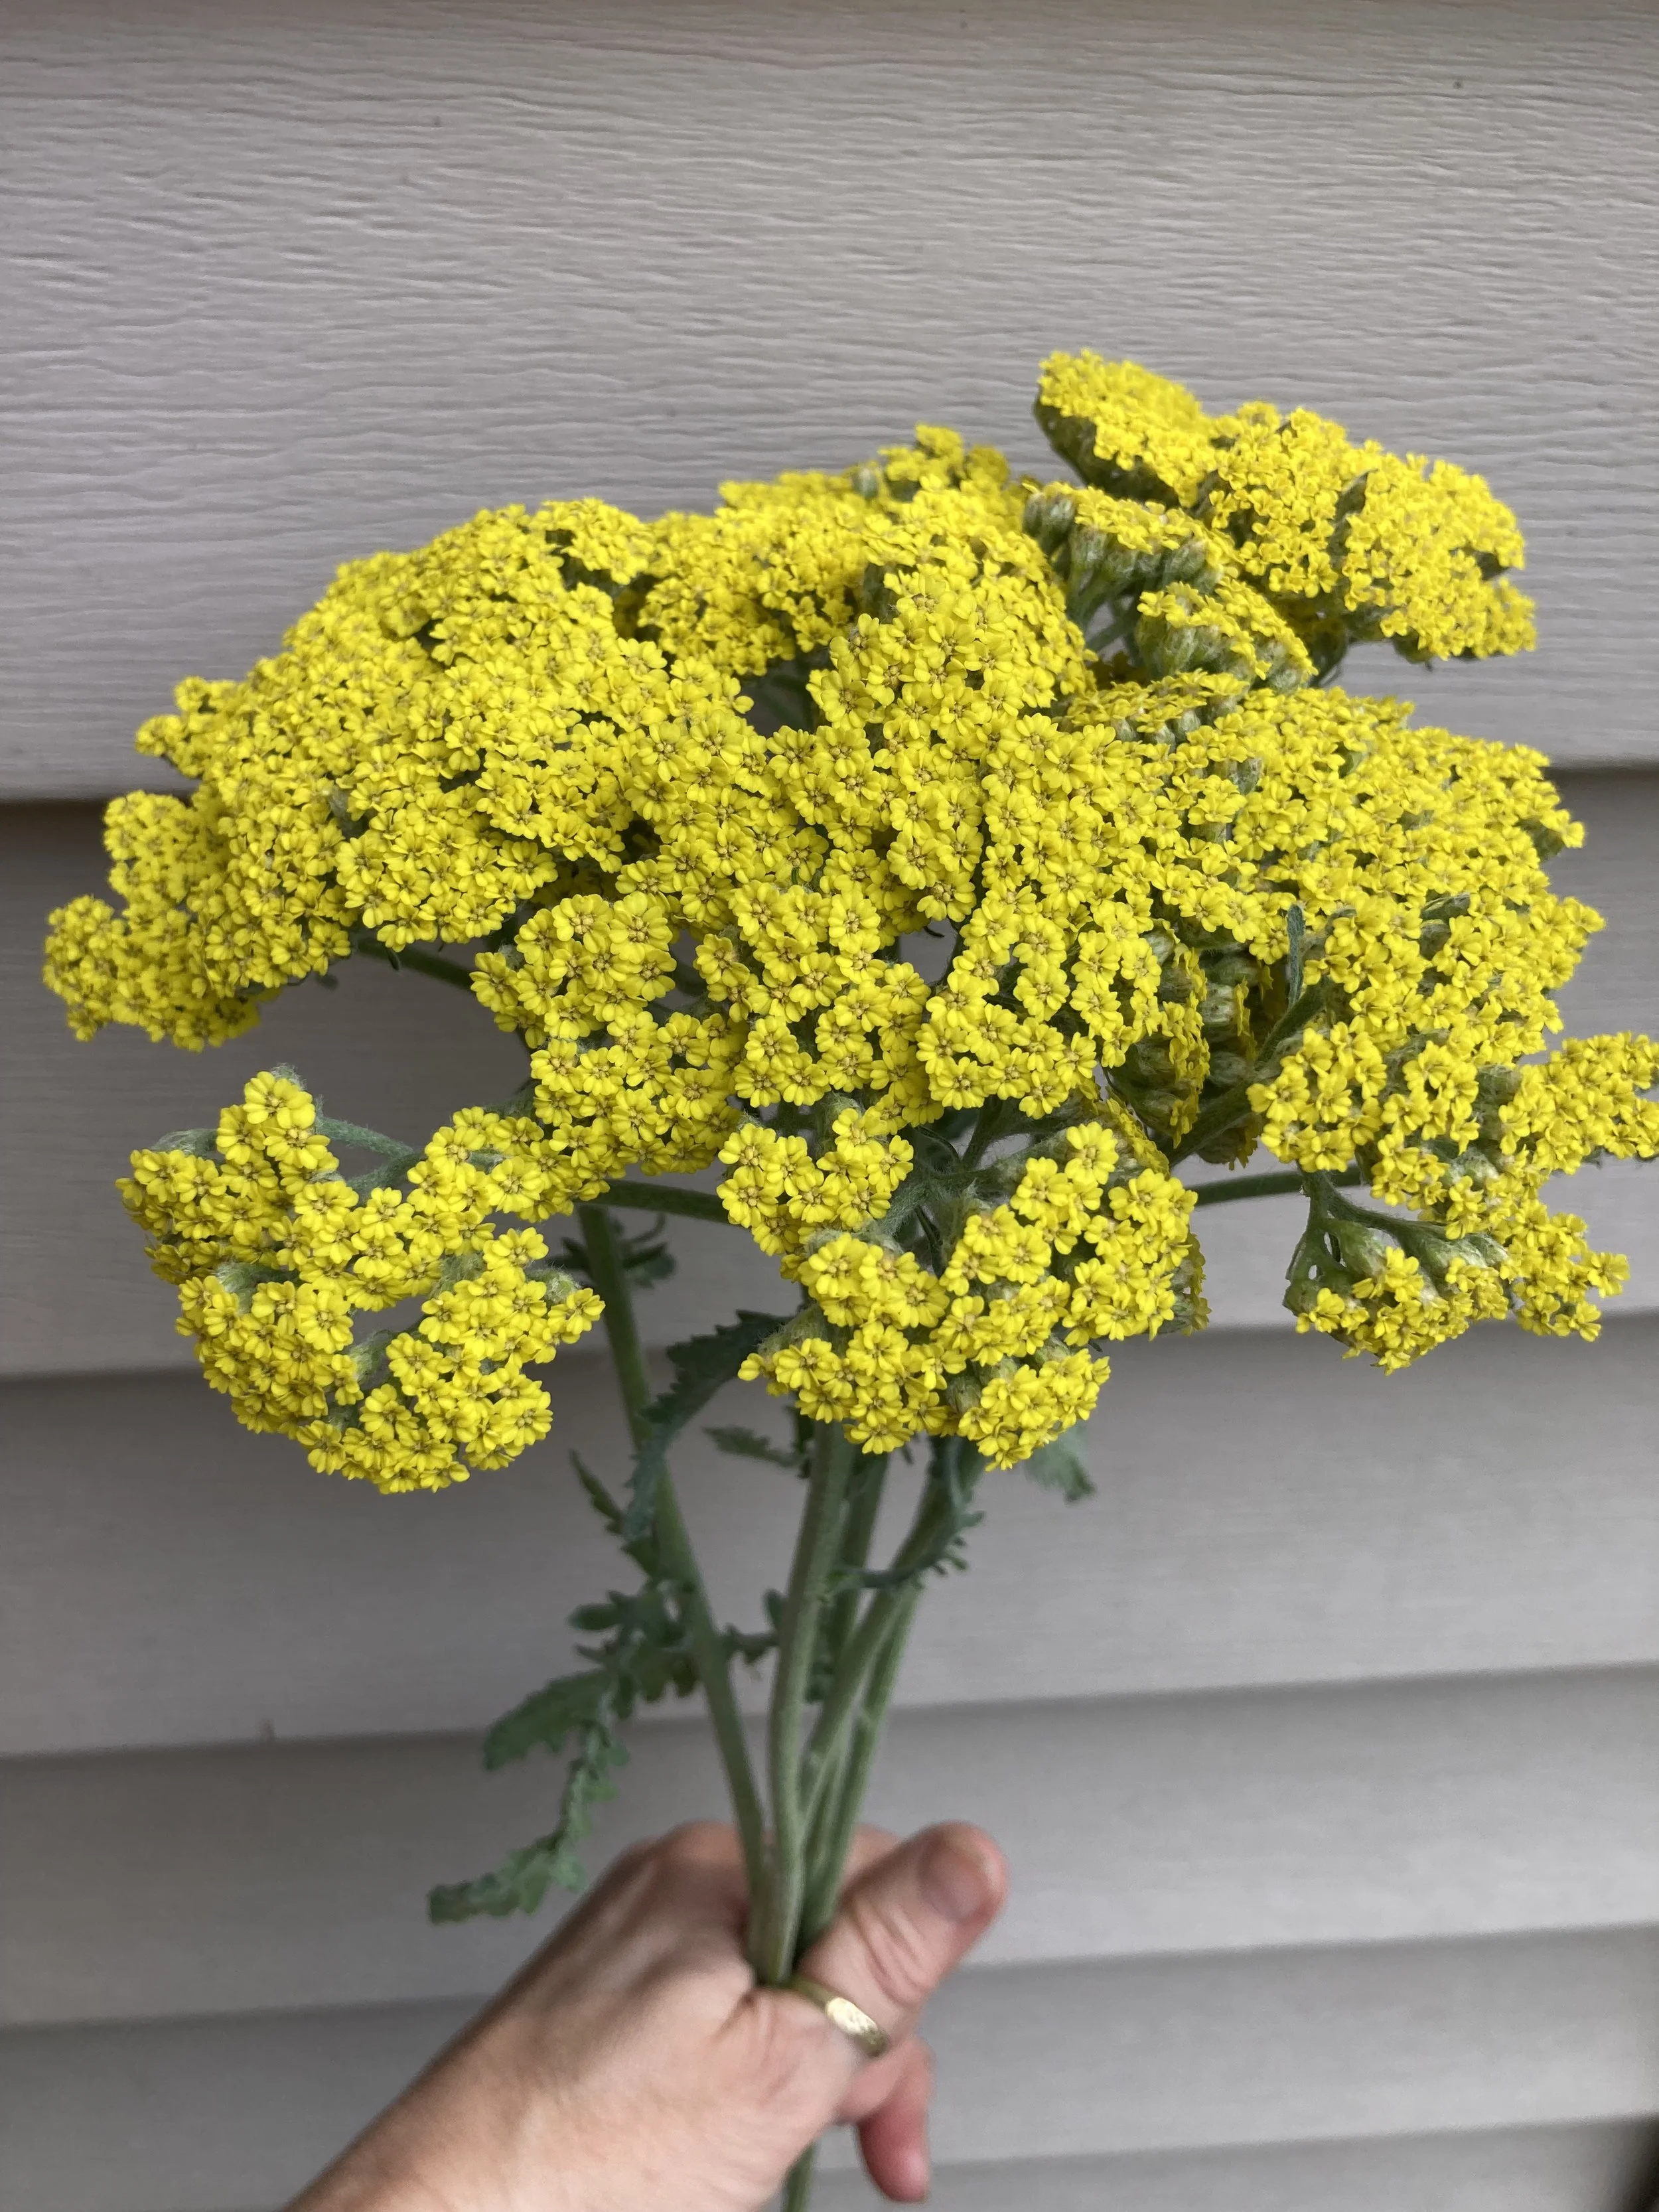
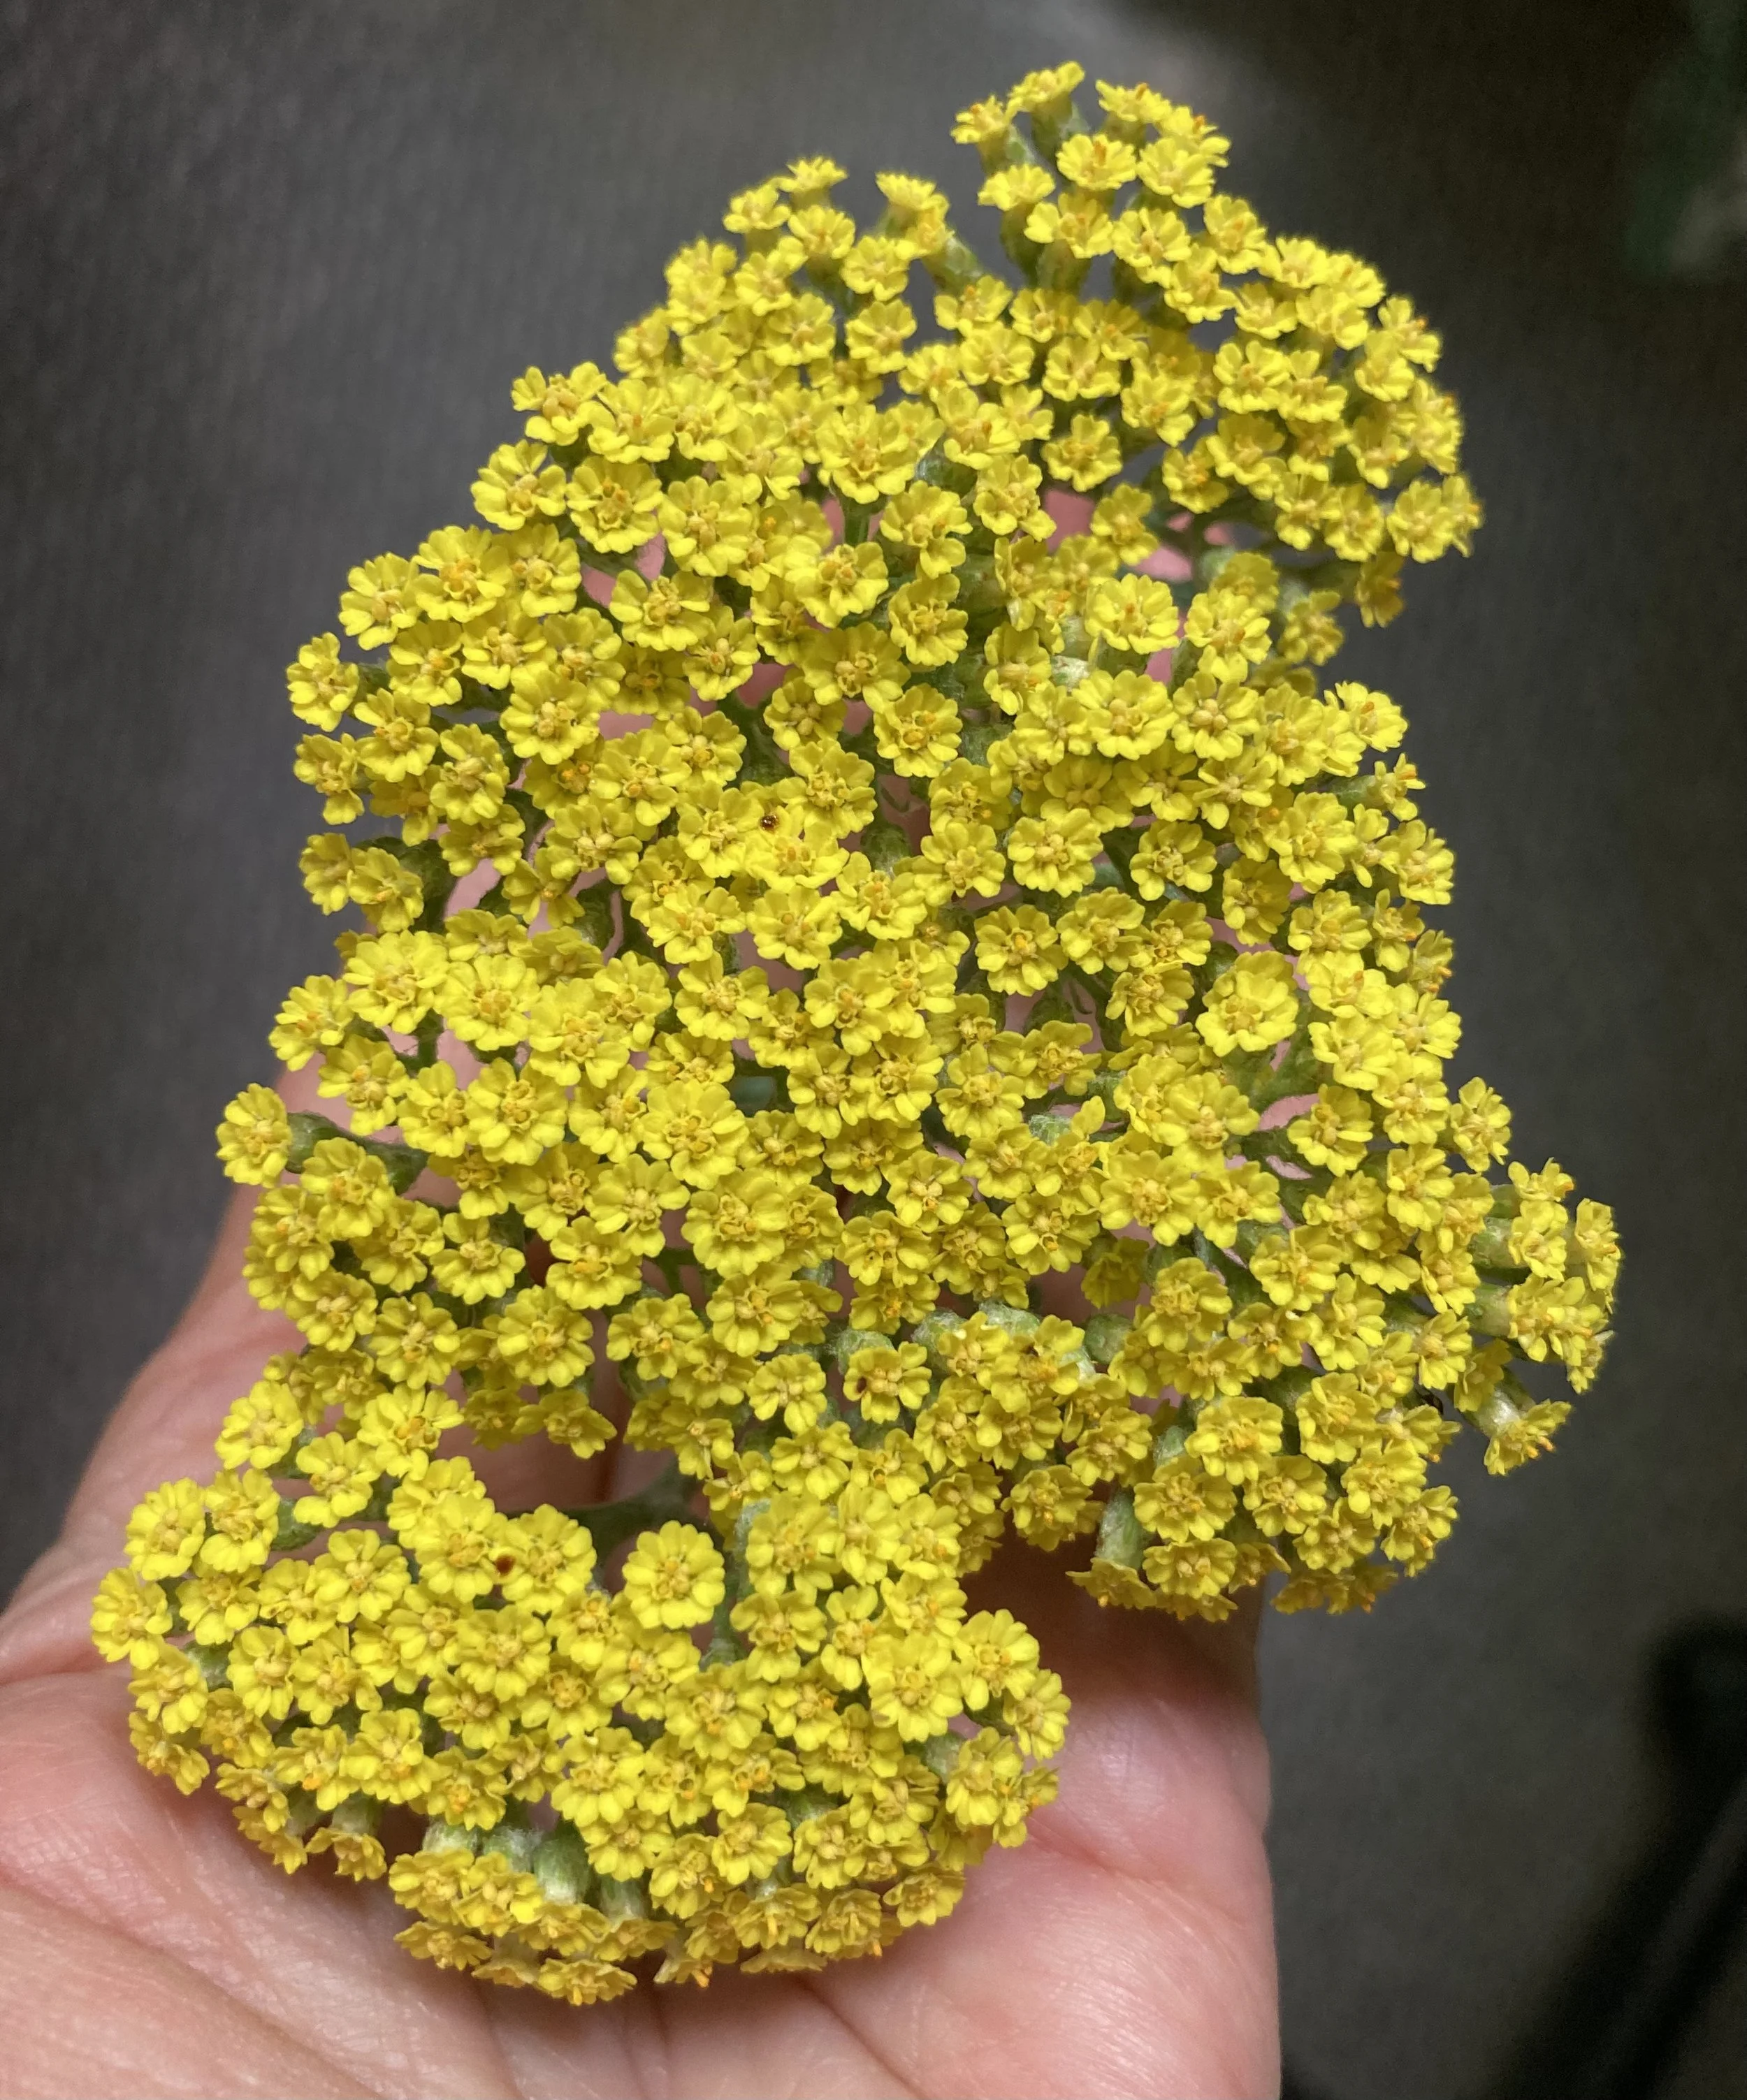
Yarrow, also known as achillea or sneezewort, is a perennial so it comes back every year on its own with no help from me. Love that! The bloom heads are made up of several clusters and each cluster contains dozens of small little flowers.
The yellow variety is a bit different than my other bed of yarrow. I’m not sure of the name, but I’ve seen it called Coronation Gold. I have a small patch of it in the perennial bed behind our barn, and it provides me with dozens of stems of beautiful bright yellow blooms. For me it blooms around the end of May, beginning of June. The yellow variety doesn’t reseed itself like my other yarrow, and it blooms about 2 weeks earlier. The yellow also dries fairly well and holds it’s color, when dried, better than my other yarrow.
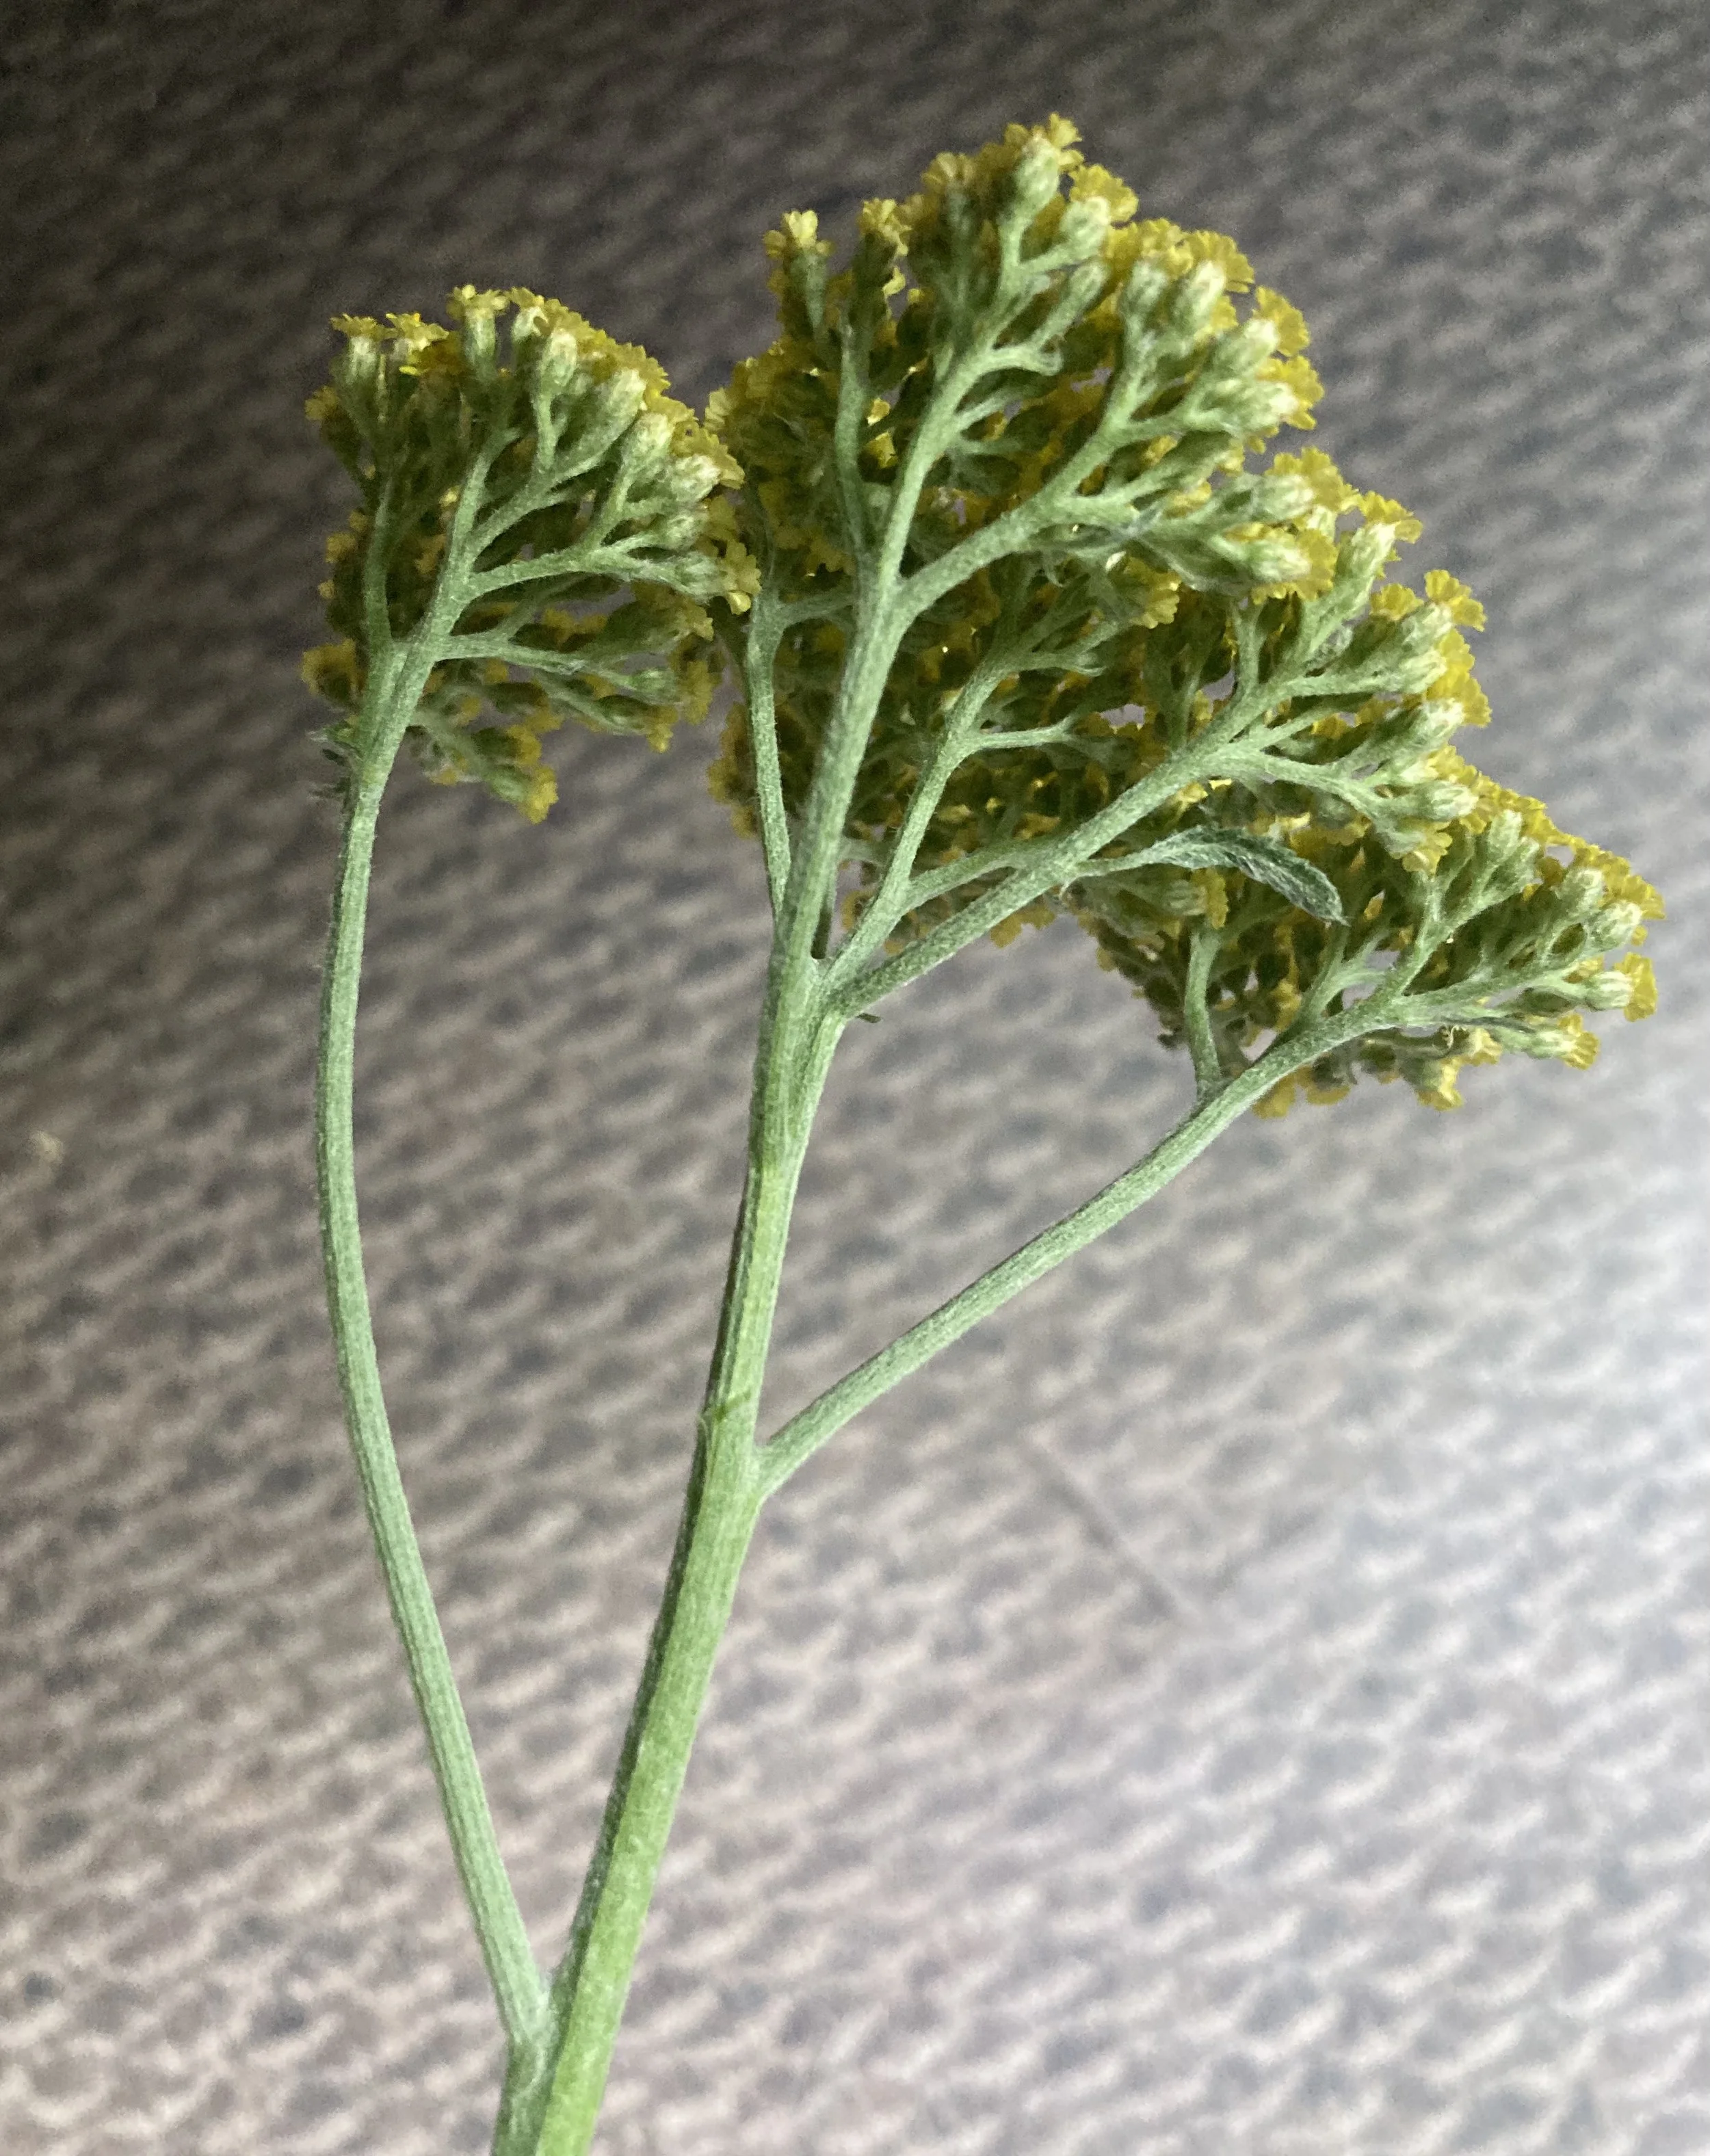
My other yarrow bed reseeds itself readily. I find it scattered all over my gardens and even up by our house. They say that once you have yarrow, you’ll always have yarrow, but it’s not on the invasive list. It also spreads by rhizomes, so a cut flower bed will fill-in quickly. If they get too crowded, the blooms will be smaller, so it’s best to divide them regularly. I’ve heard people say that after a few years, bright colored yarrow will eventually change to a lighter color, but I have not found that to be the case, at least not yet. I started my patch in 2022 and I still have a lot of the dark pink and red colors. Yarrow is a native to North America, and the bees and butterflies love it. When harvesting, wait for all the little florets to open. If you cut it too soon it will wilt.
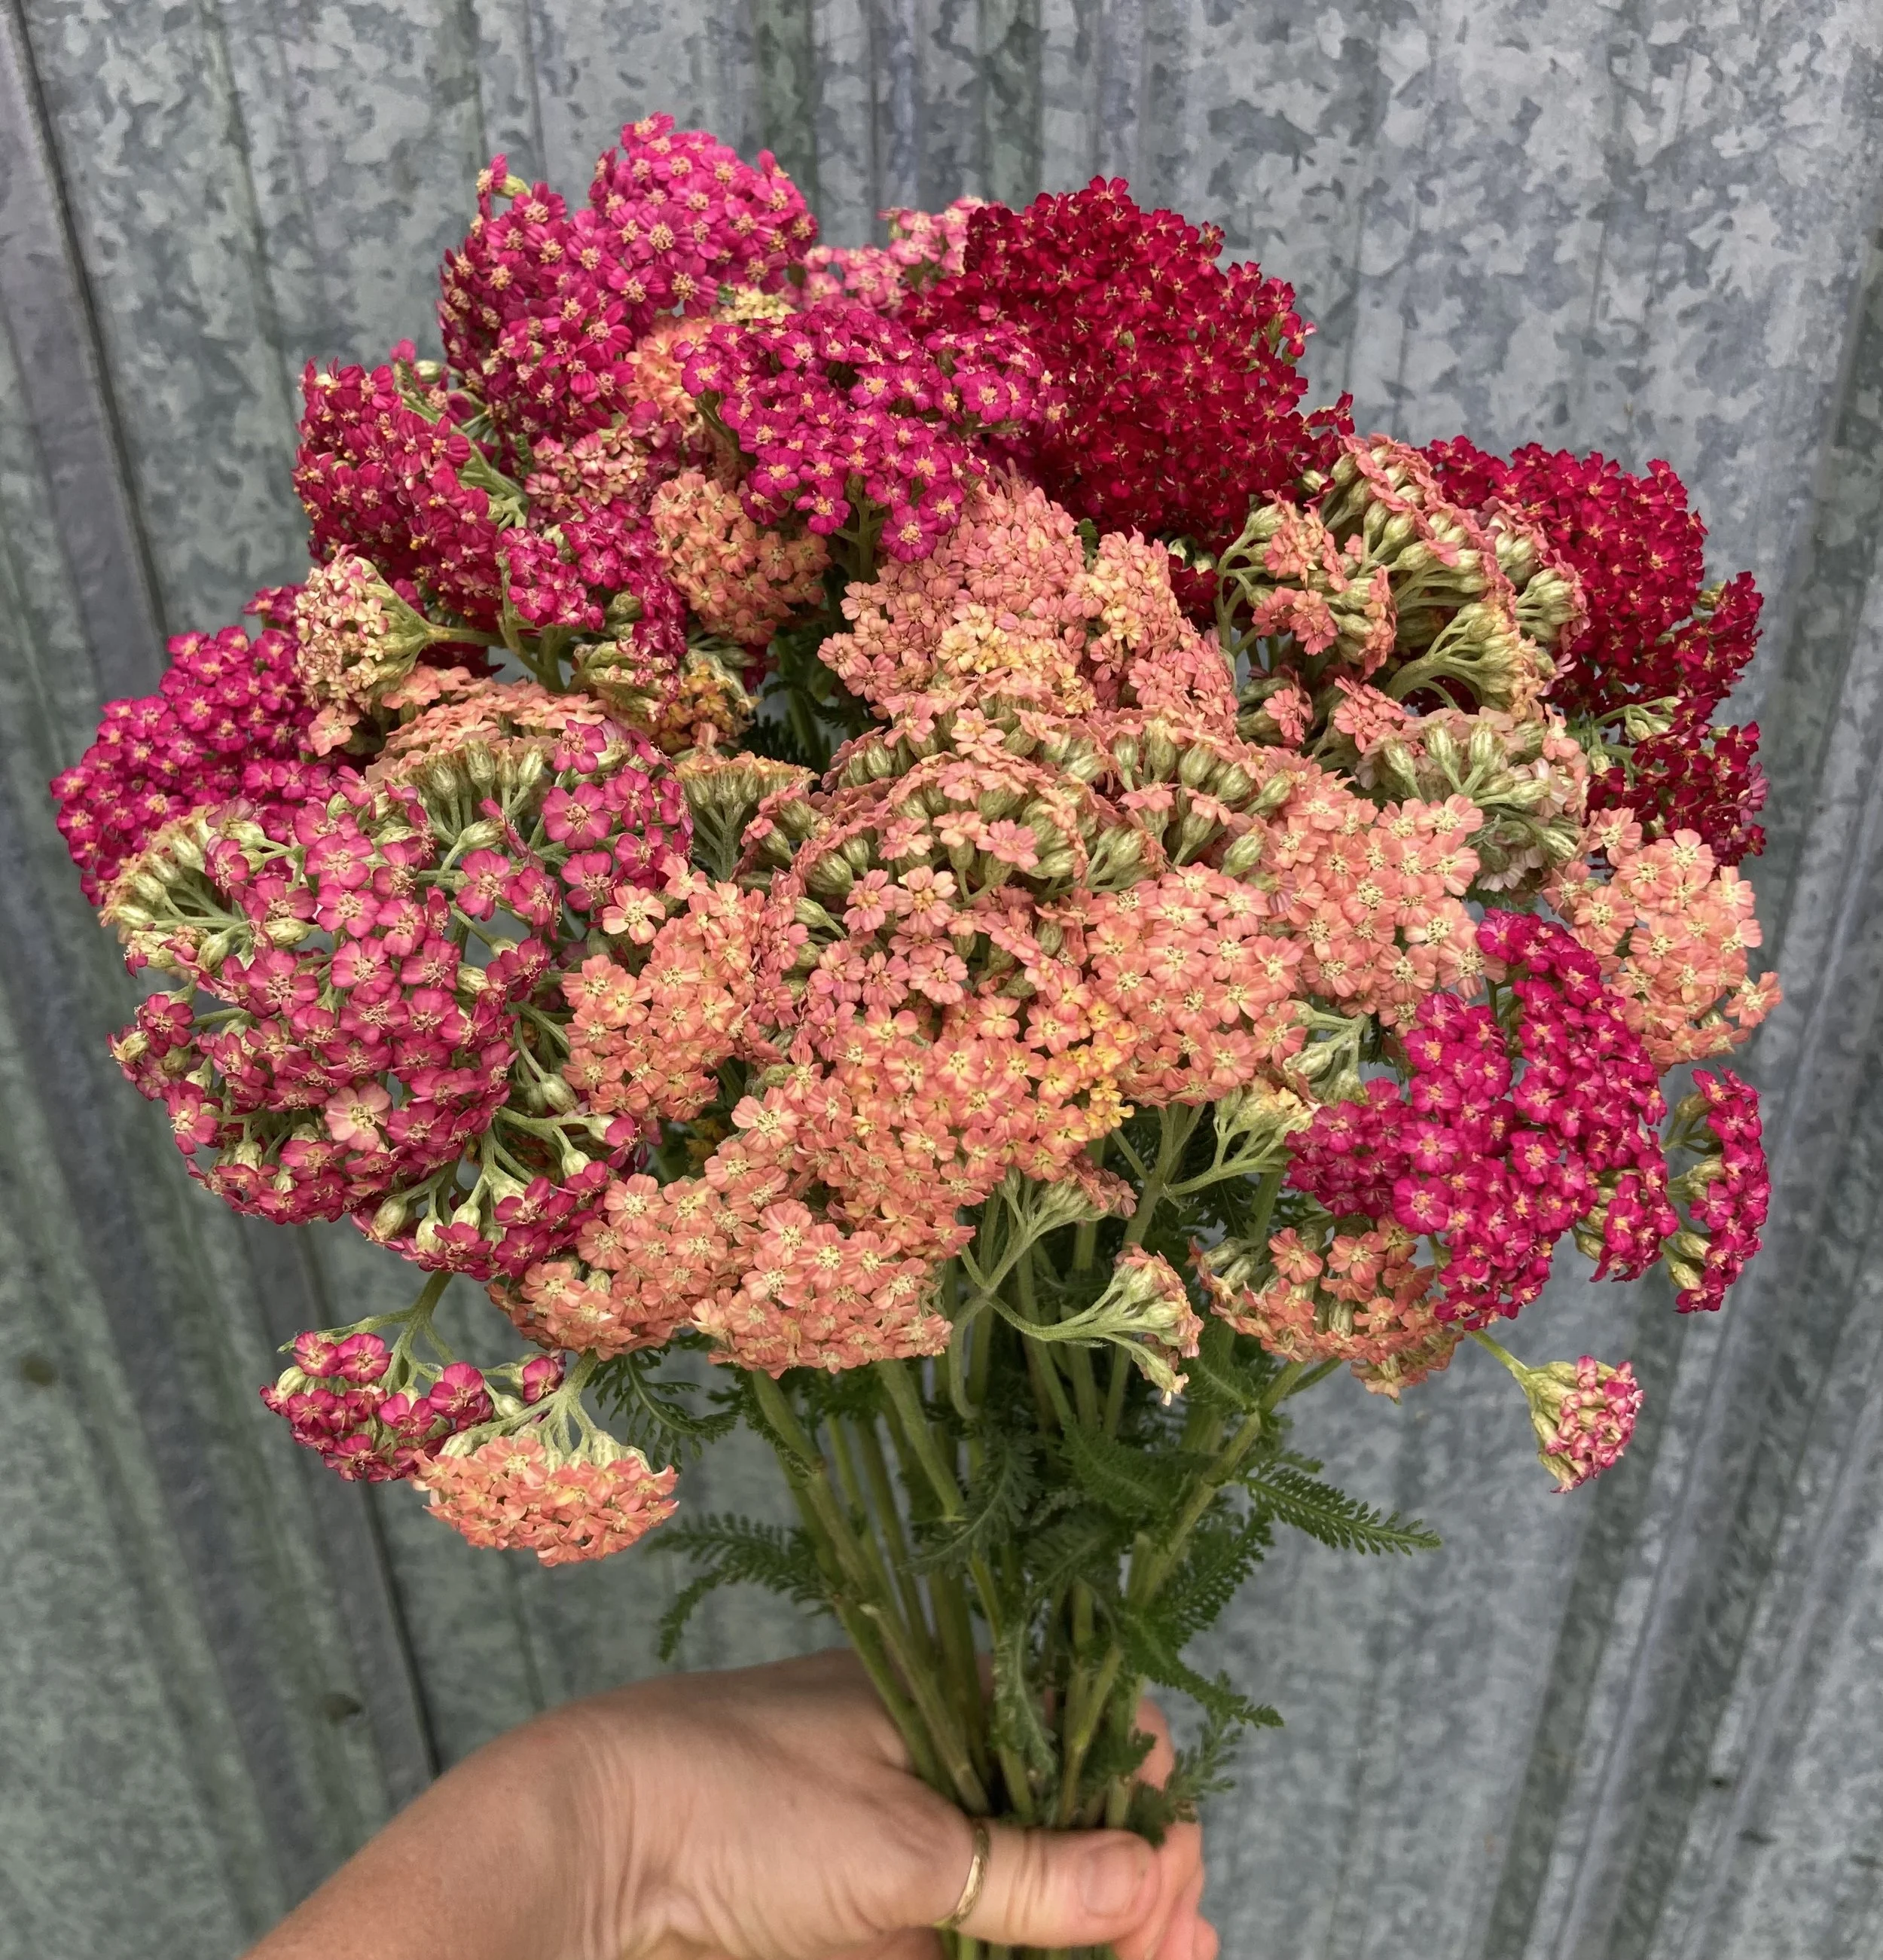
yarrow - red and apricot
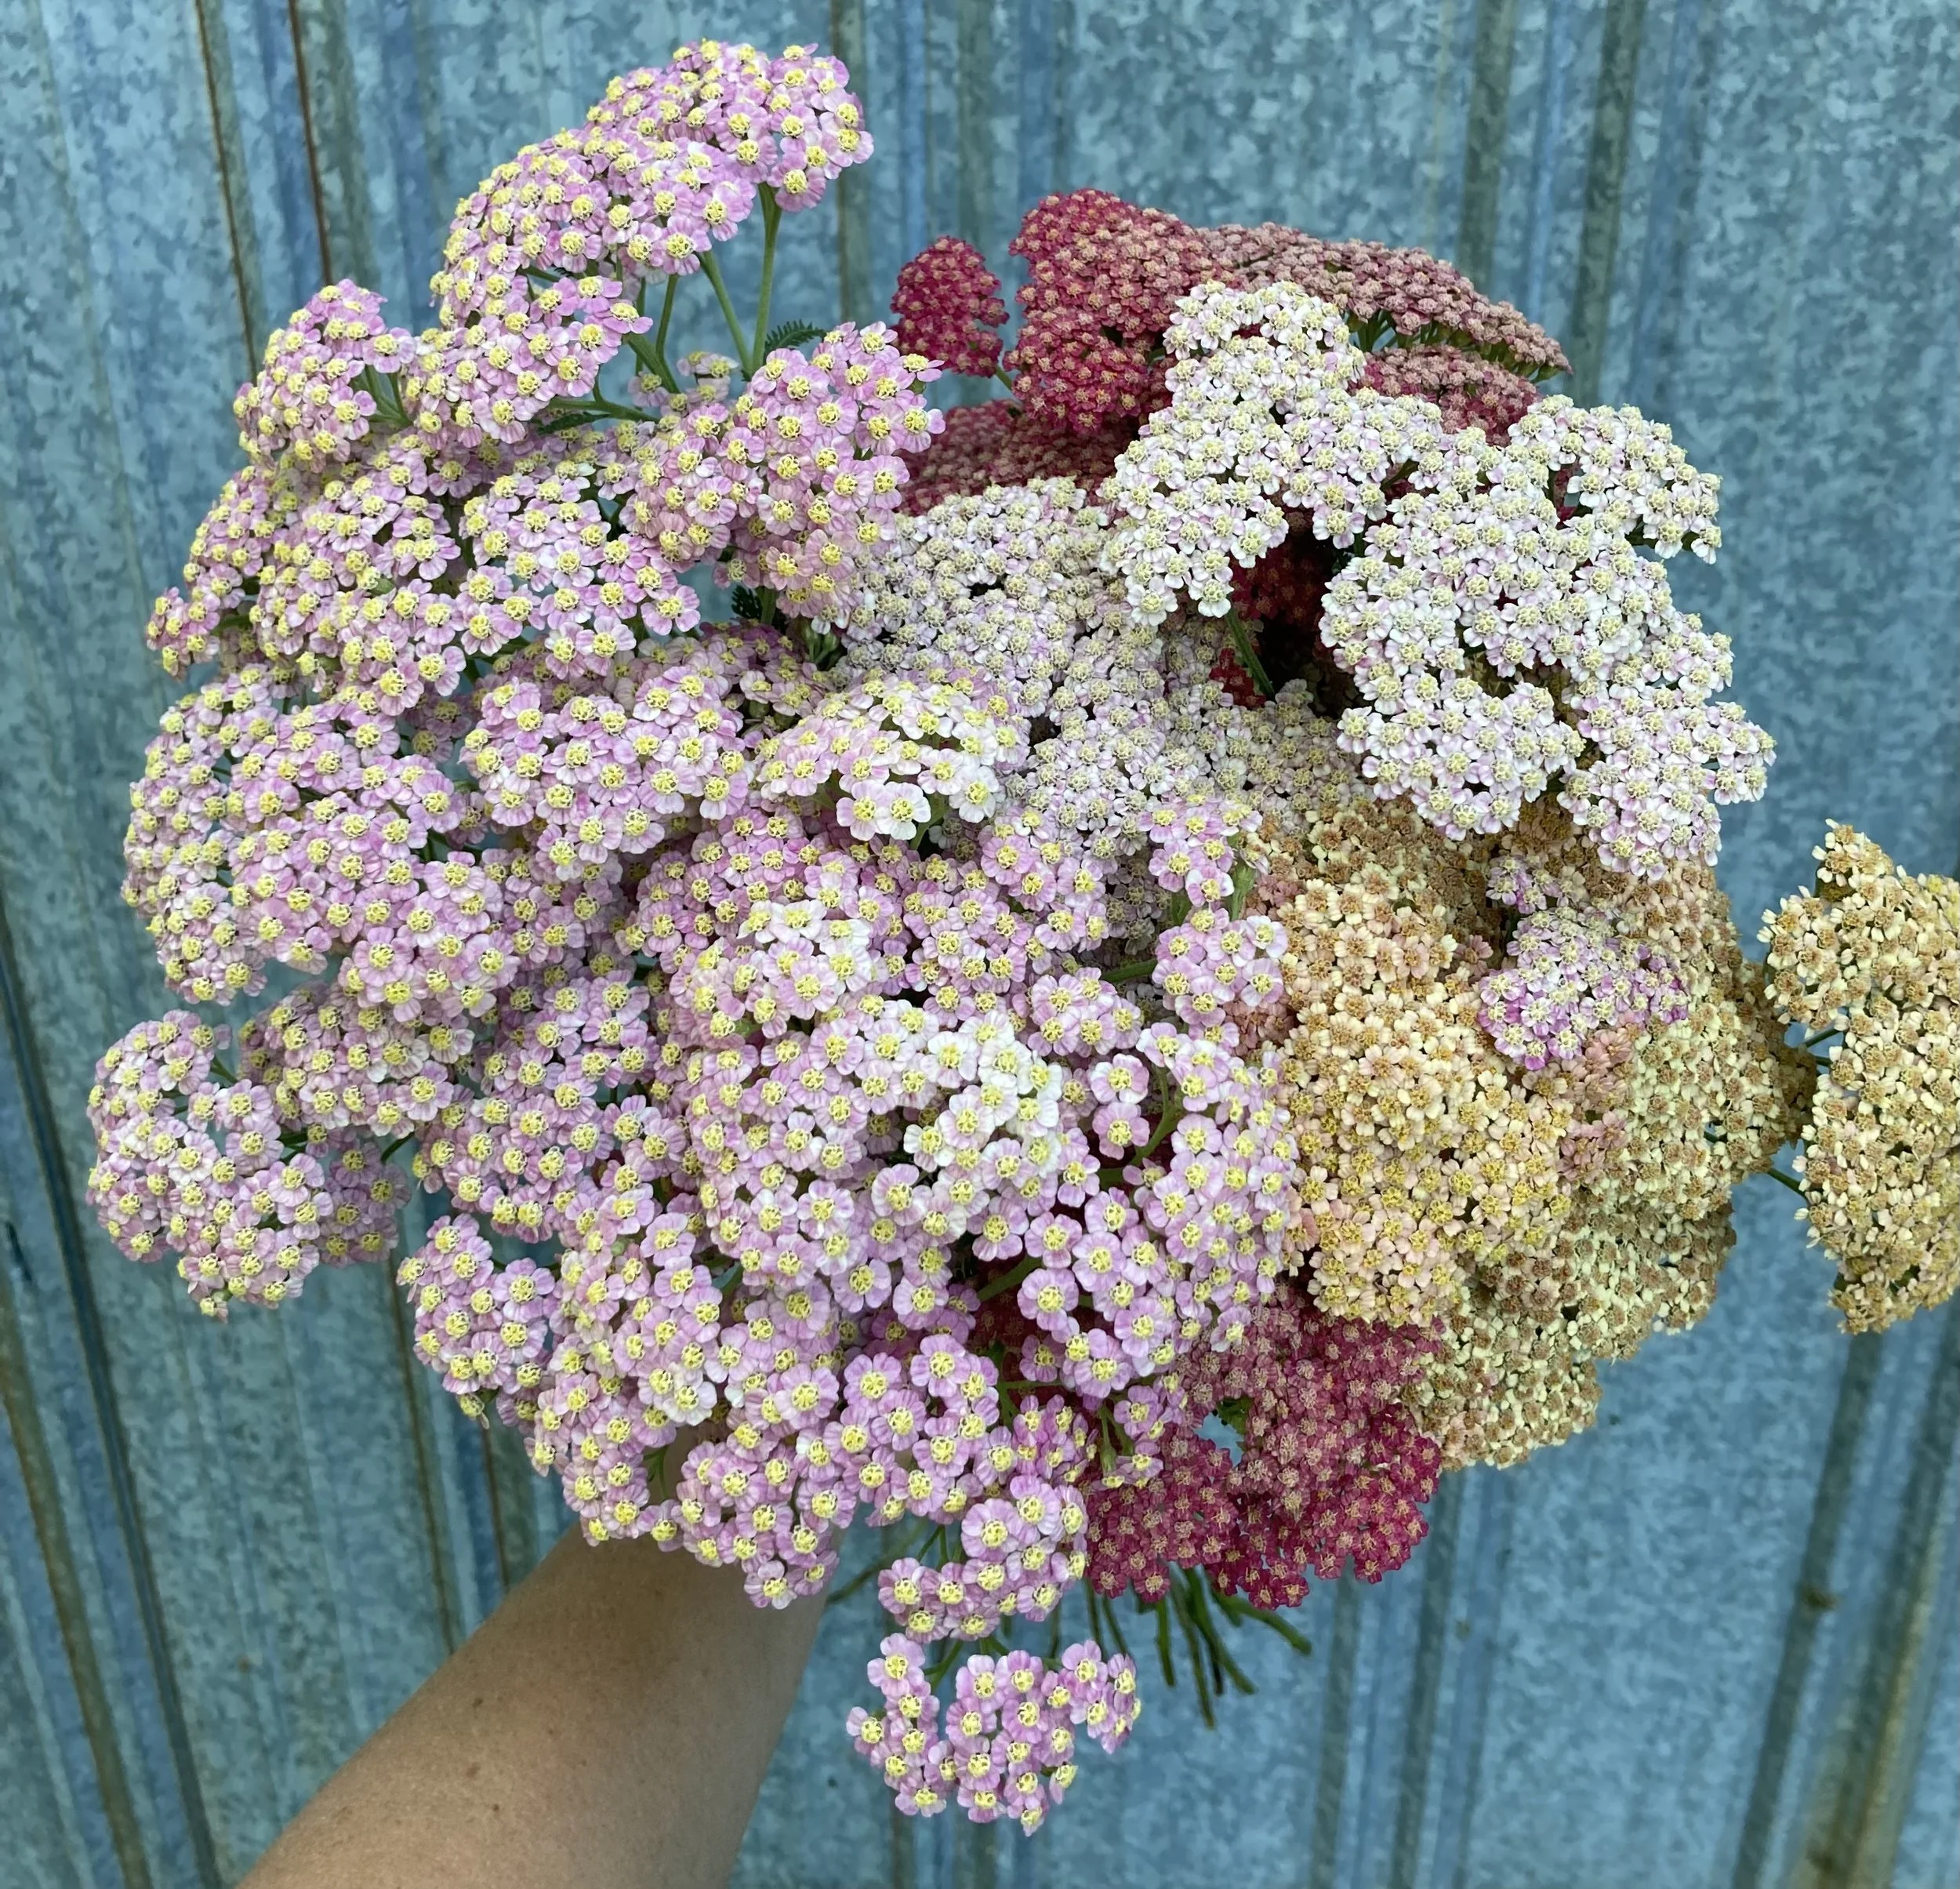
yarrow - light colors
Bachelor Buttons
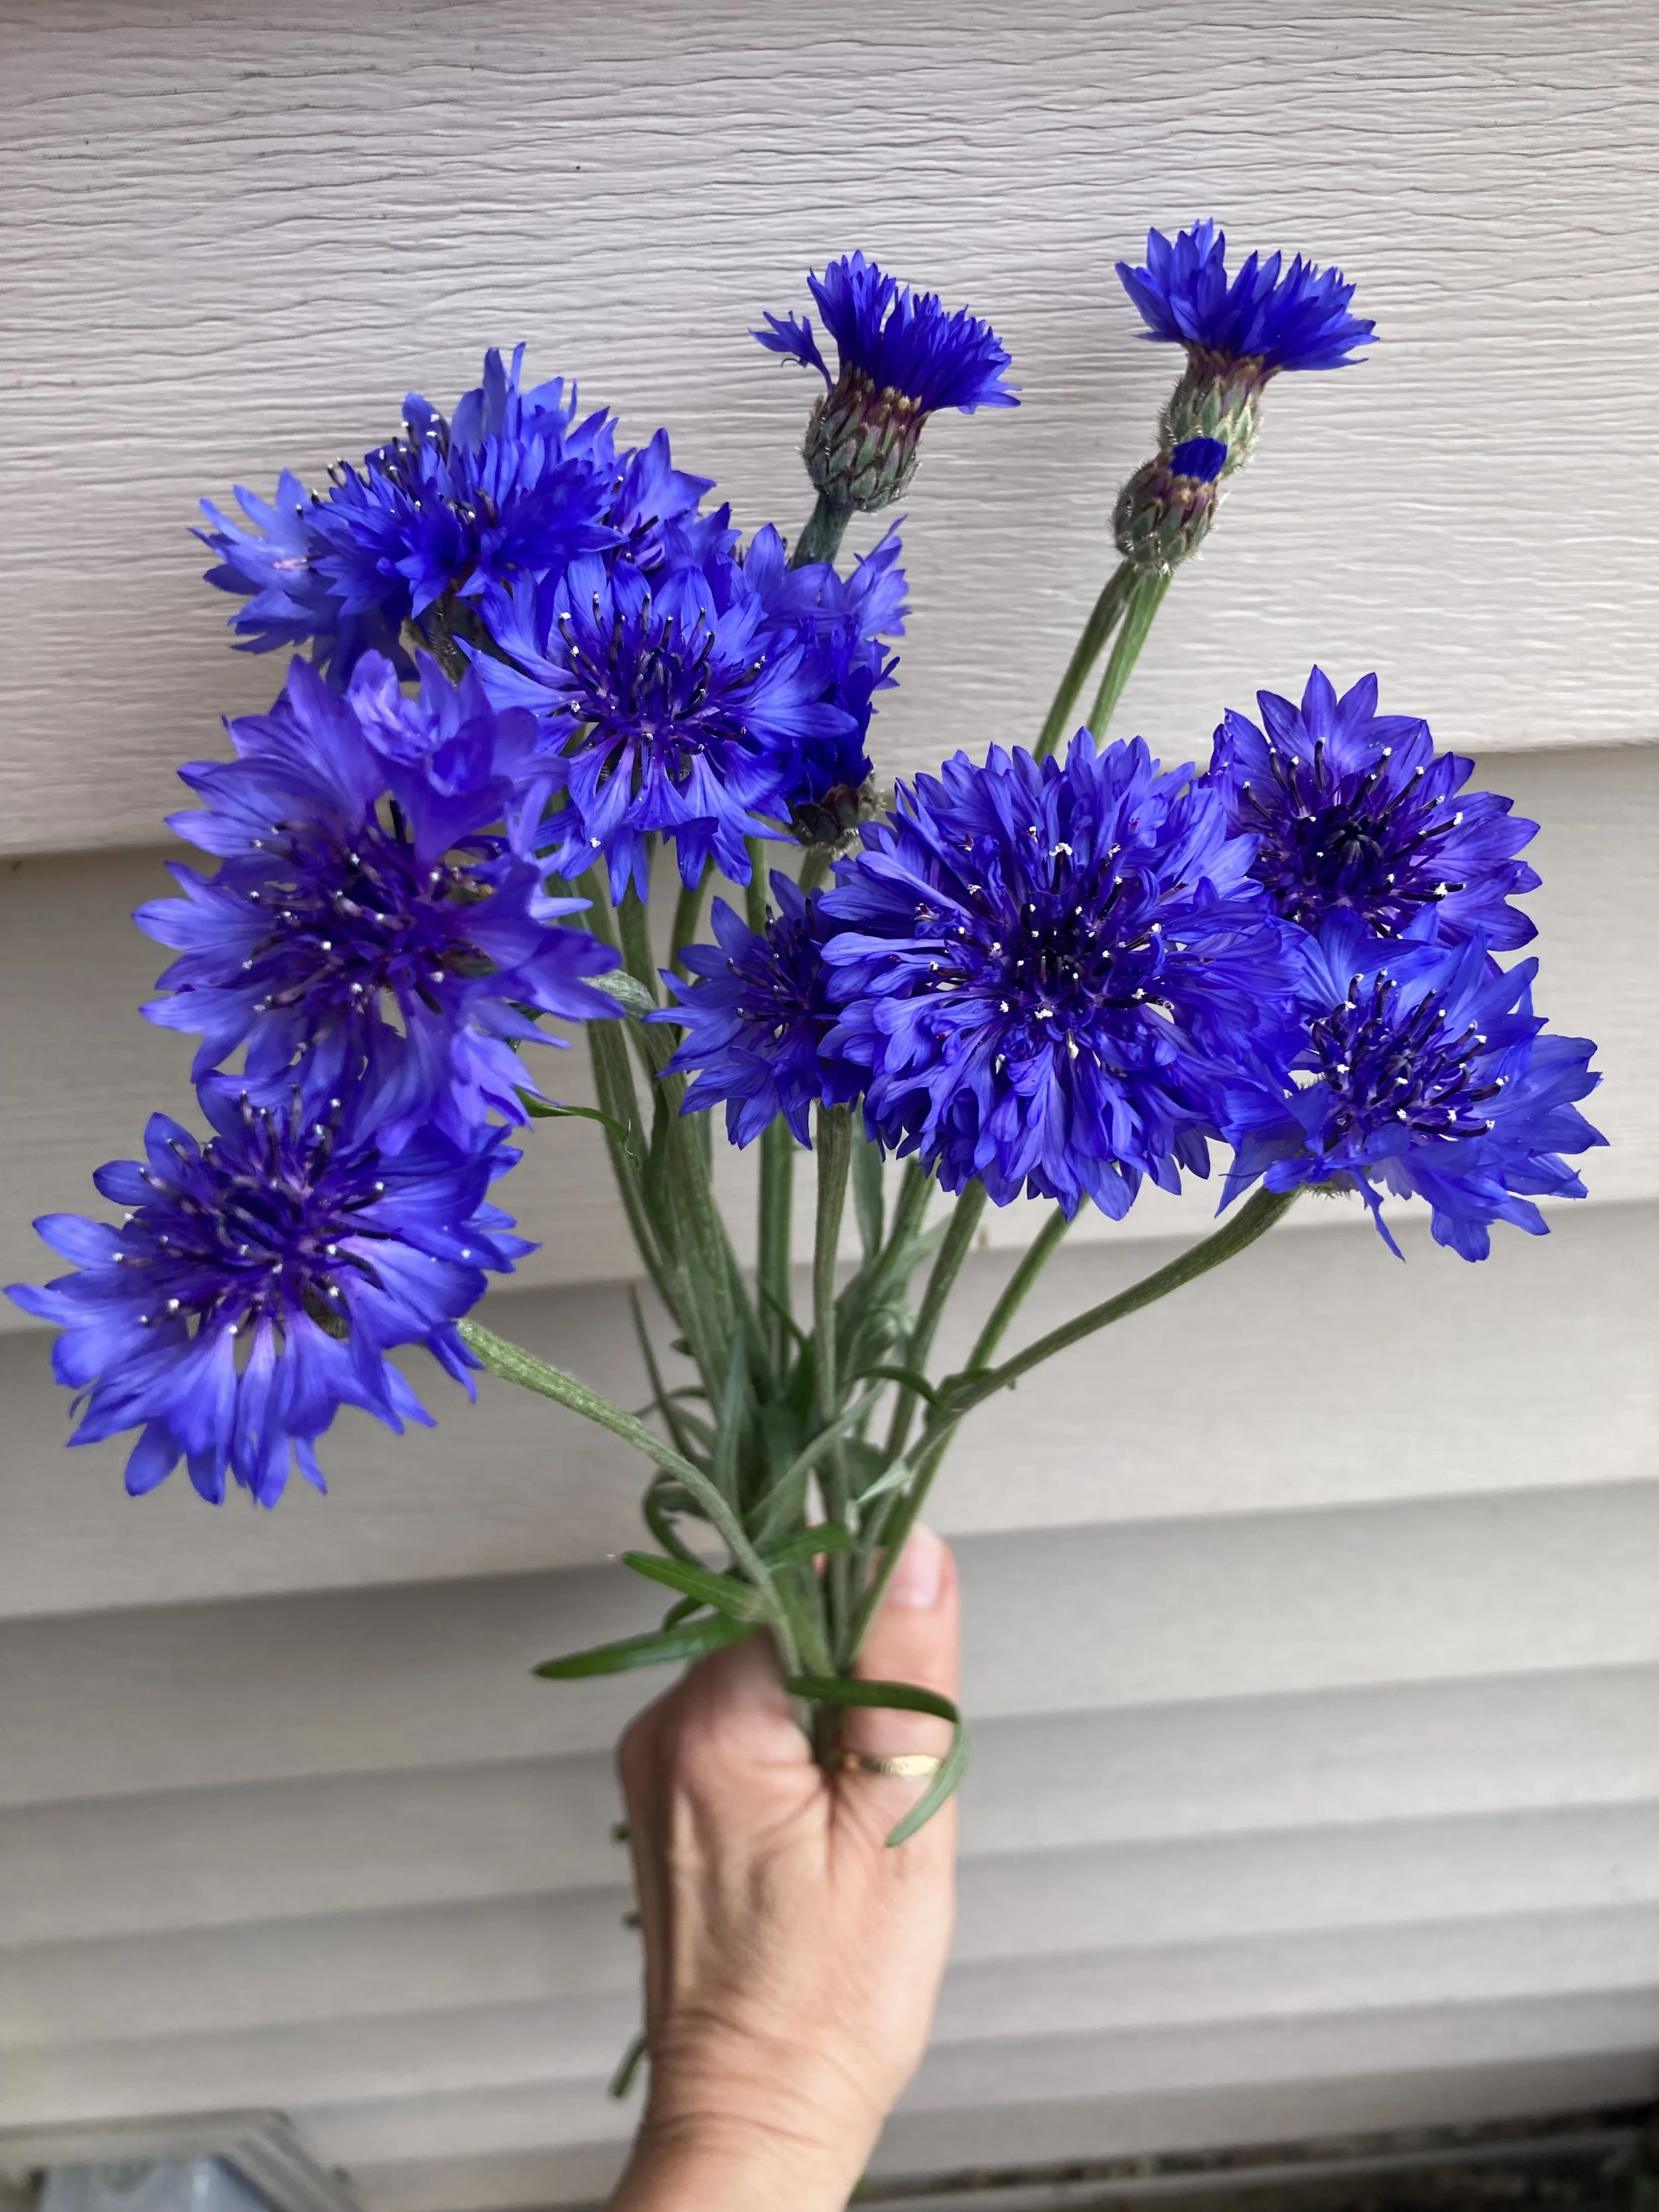
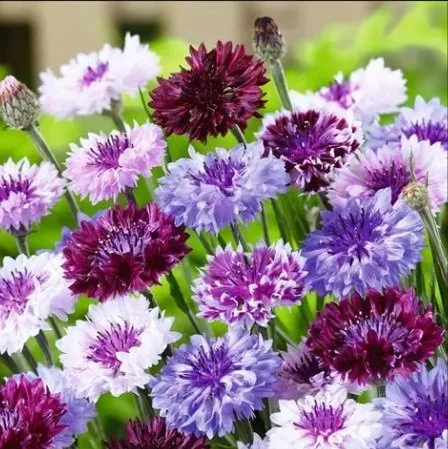
I absolutely love the deep blue color of bachelor buttons. The color blue is difficult to find in nature, most of the time it’s a shade of purple, but bachelor buttons have a true blue shade that I love to use in my bouquets. They do also come in other colors like light purple, pink and maroon, but blue is my favorite. I think the little pop of color adds a lot to a bouquet. Check out the picture of the yellow arrangement. That was one of the first arrangements I ever made back in 2022, the first year I opened the roadside stand. That bouquet would look very different without the pops of blue bachelor buttons.
Although they are not a perennial for me (the plants die back in the summer) they do reseed readily, and I find them all around my gardens, similar to my yarrow. Every spring I dig them up and plant them back into the bachelor button bed. For me, bachelor buttons grow into a tall skinny almost bush shape approximately 3’-4’ tall. There are many long slender stems on a plant, each with one bud on the end. The buds will bloom at different times, so in my experience, in order to get one bloom, you have to sacrifice several side shoots that aren’t ready yet so they’ll wilt when cut. Because of this, it makes them a little more time consuming to harvest and a lot of cut flower farmers don’t grow them. Also, they have relatively small blooms and a short vase life, usually only around 3-5 days. When harvesting, I cut them at ‘color crack’ stage which is when they are still in bud form but are just starting to crack open so you can see their color.
Even though some flower farmers won’t grow bachelor buttons, I will always grow them. I love the blue color AND it was my mother’s class flower. Crazy that she remembered what her class flower was, I don’t even know what mine was! She was an amazing person. My mom was born in 1923 and graduated in the Class of 1941. We lost mom in March 2025, she was almost 102. She volunteered at Sonnenberg Gardens until she was 98, down on her hands and knees weeding and helping to water. She was incredible! In honor of mom, I will always grow bachelor buttons.


Orlaya
Orlaya is an airy white flower that blooms in spring. It is a cool flower meaning it can withstand some cold temperatures. I plant it in the fall and it overwinters and blooms around the end of May or beginning of June. You can also plant it in early spring, but it won’t bloom until July. It also reseeds if you leave a couple of seed heads.
Orlaya grows to about 3’ tall. The blooms consist of many smaller flowers that make up one bloom head, and there are several bloom heads per stem. This one is tricky to harvest. You almost have to wait for the first bloom to go to seed before the others will be ready. You can see this in the picture below called ‘wilty orlaya’. The first bloom has gone to seed, you can see it just above my hand. I also included a closeup picture of the seed pod. You can also see all the side shoots that are wilting because they aren’t ready to harvest. The side shoots will all be removed with just 2 or 3 blooms remaining. You’ll want to harvest orlaya first thing in the morning and put it right into a bucket of water. It also benefits from a hydrating solution which helps it to drink-up the water. I use a product called Quick Dip. You dip the freshly cut stems into the solution for just a few seconds, then into water. Like most other flowers, you should let orlaya sit and hydrate for several hours or even overnight before working with it.
I think the seed pods are pretty cool looking and I sometimes include them in bouquets. Once at this stage, they last for several months.
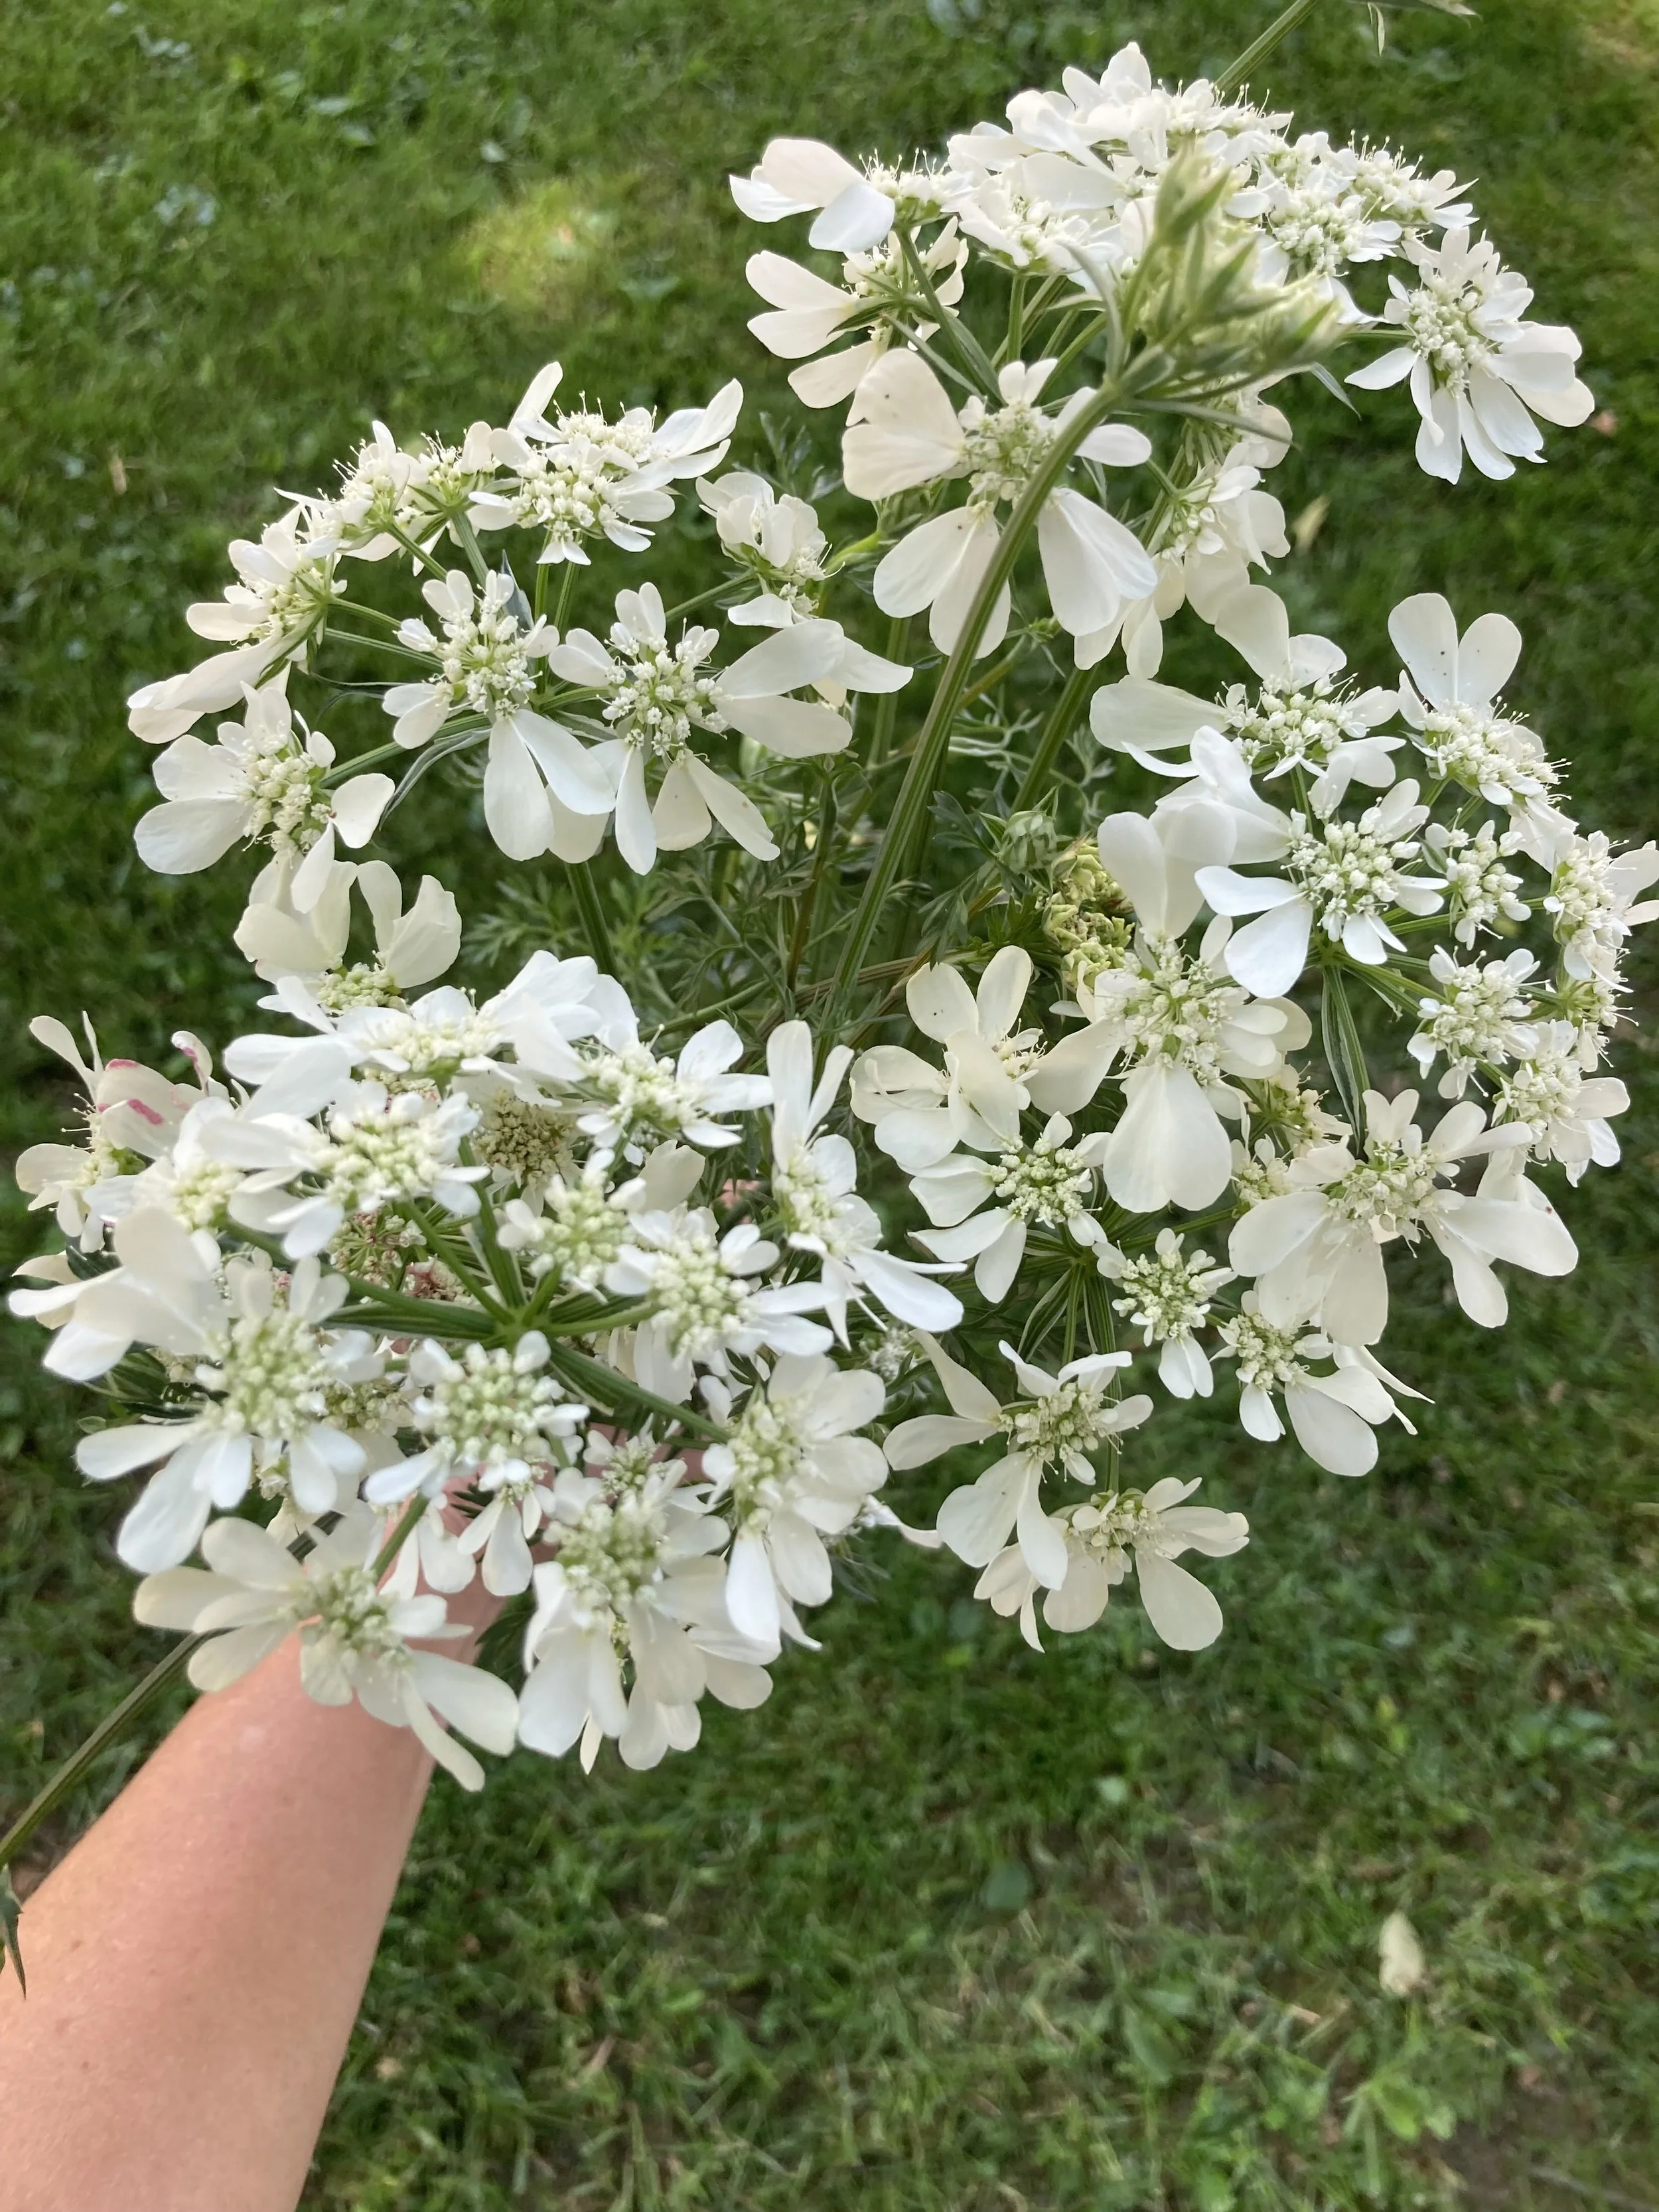
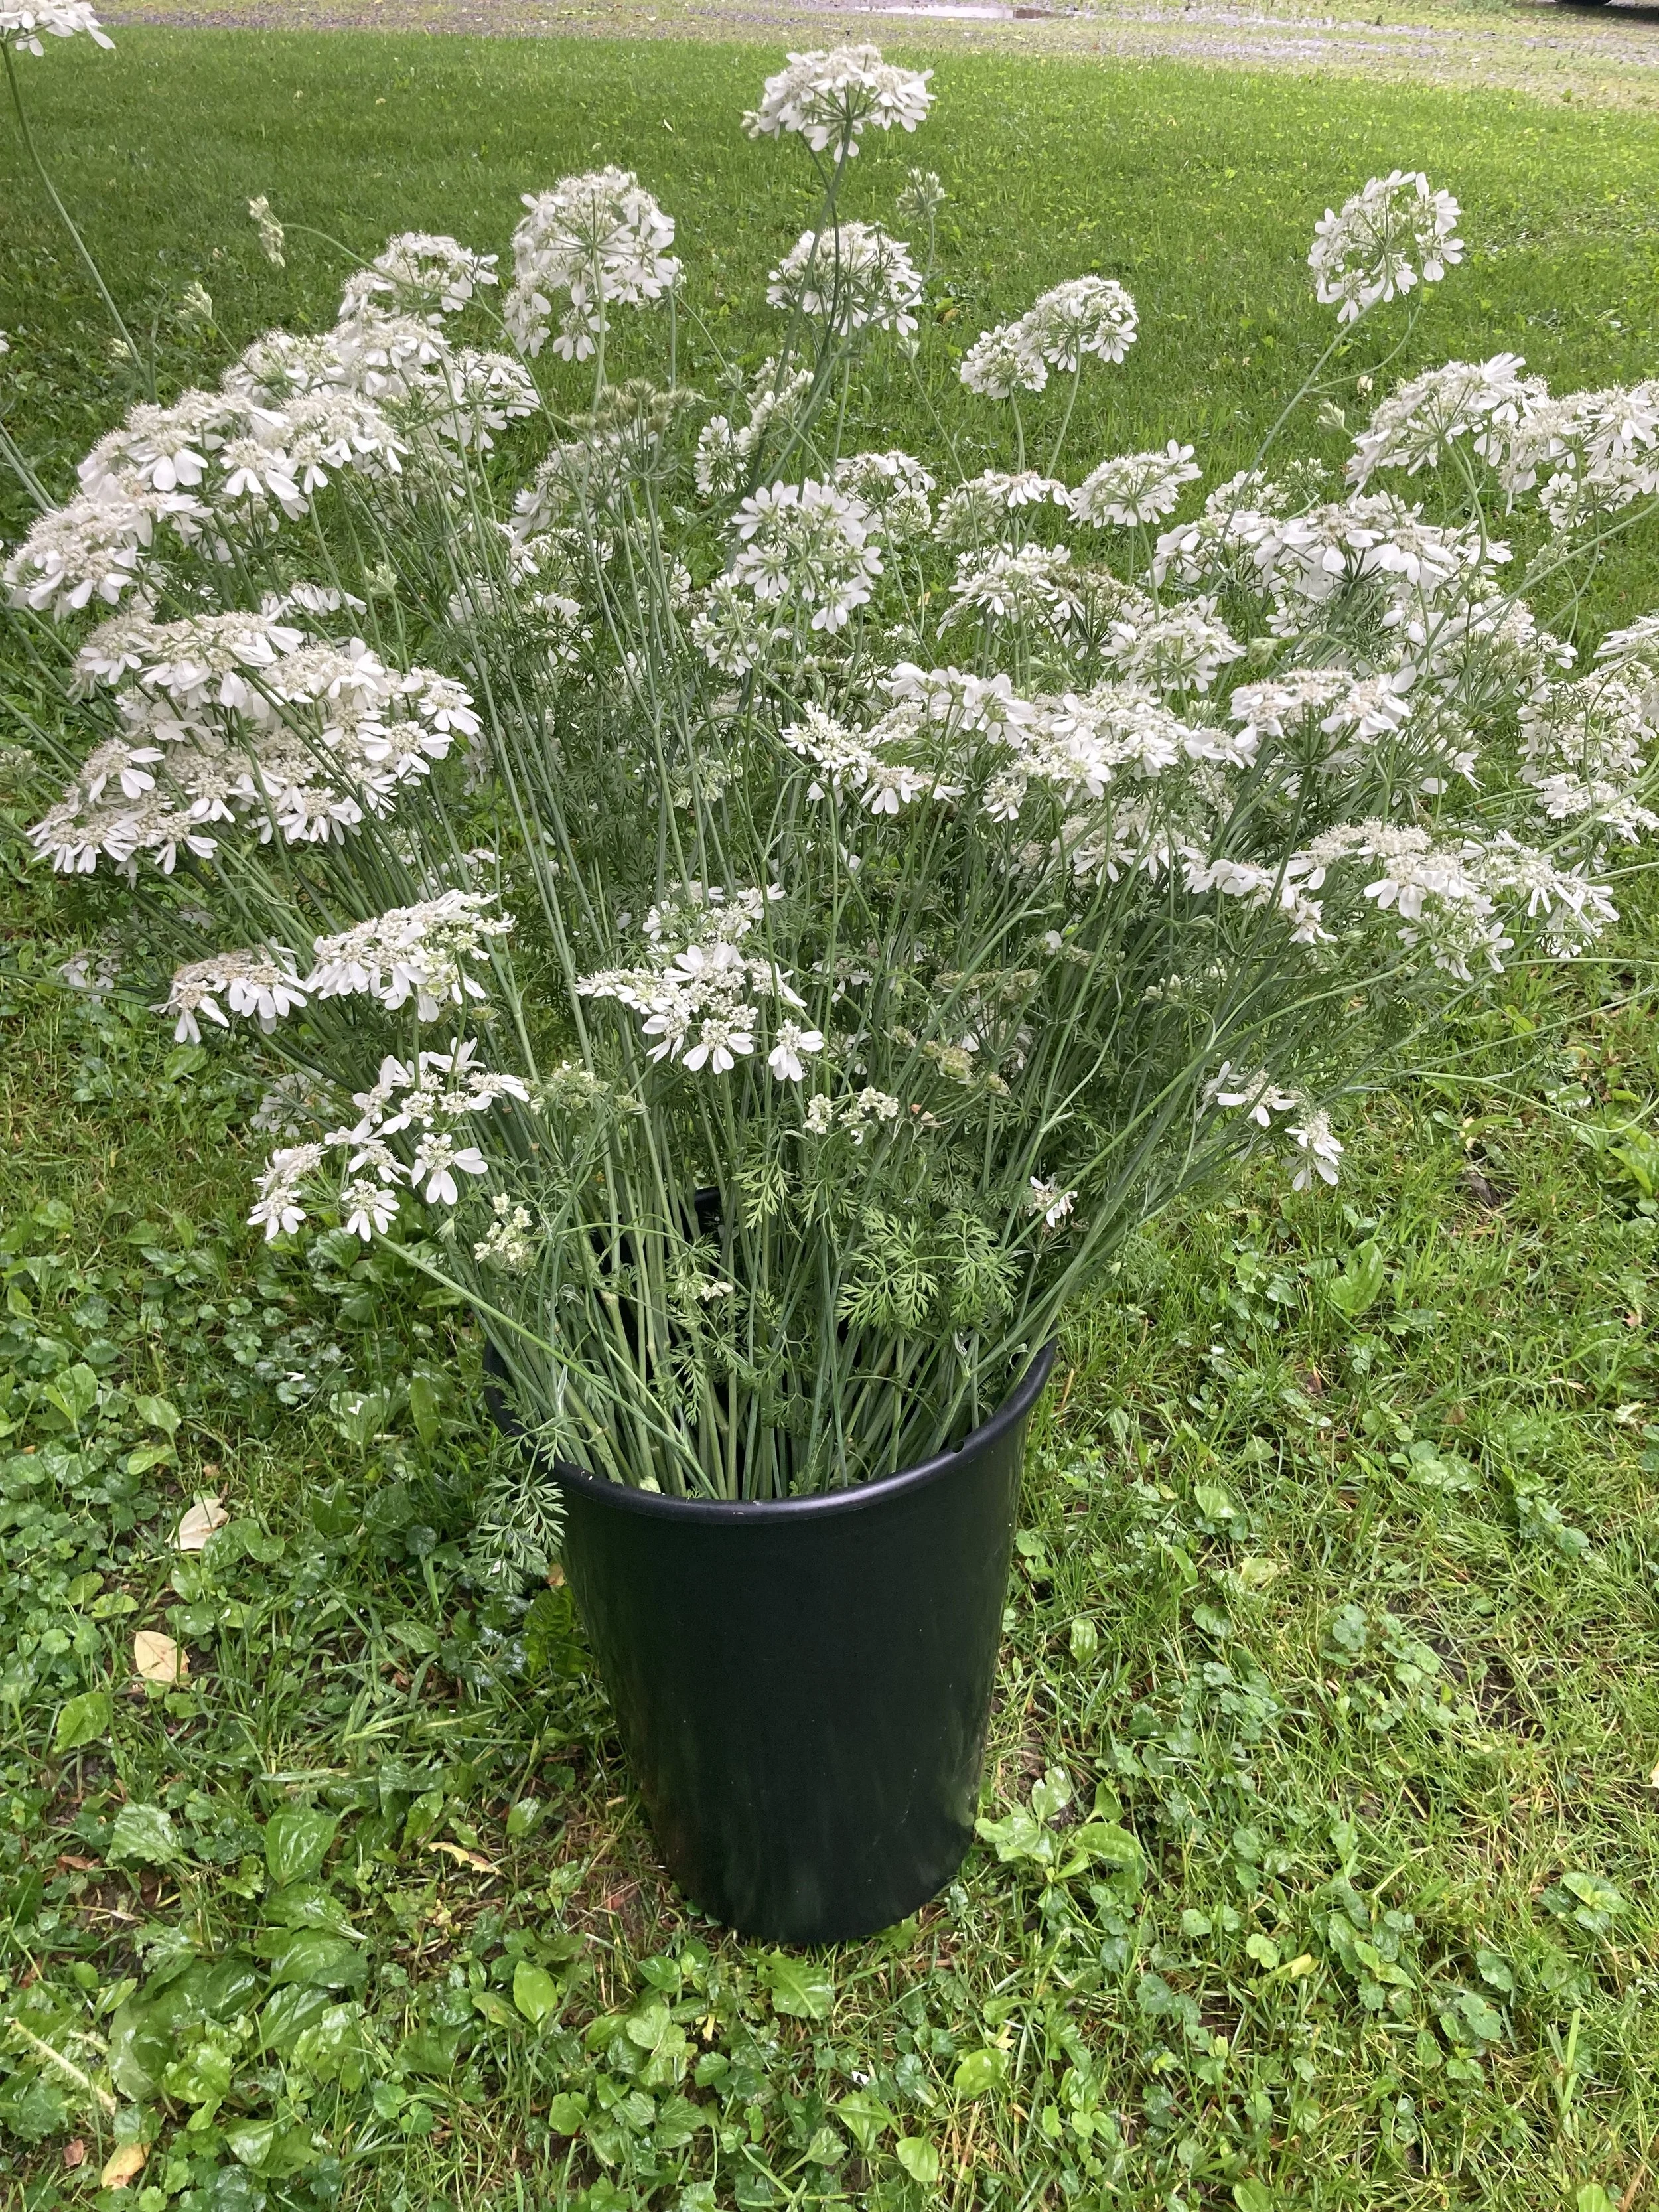
bucket of orlaya
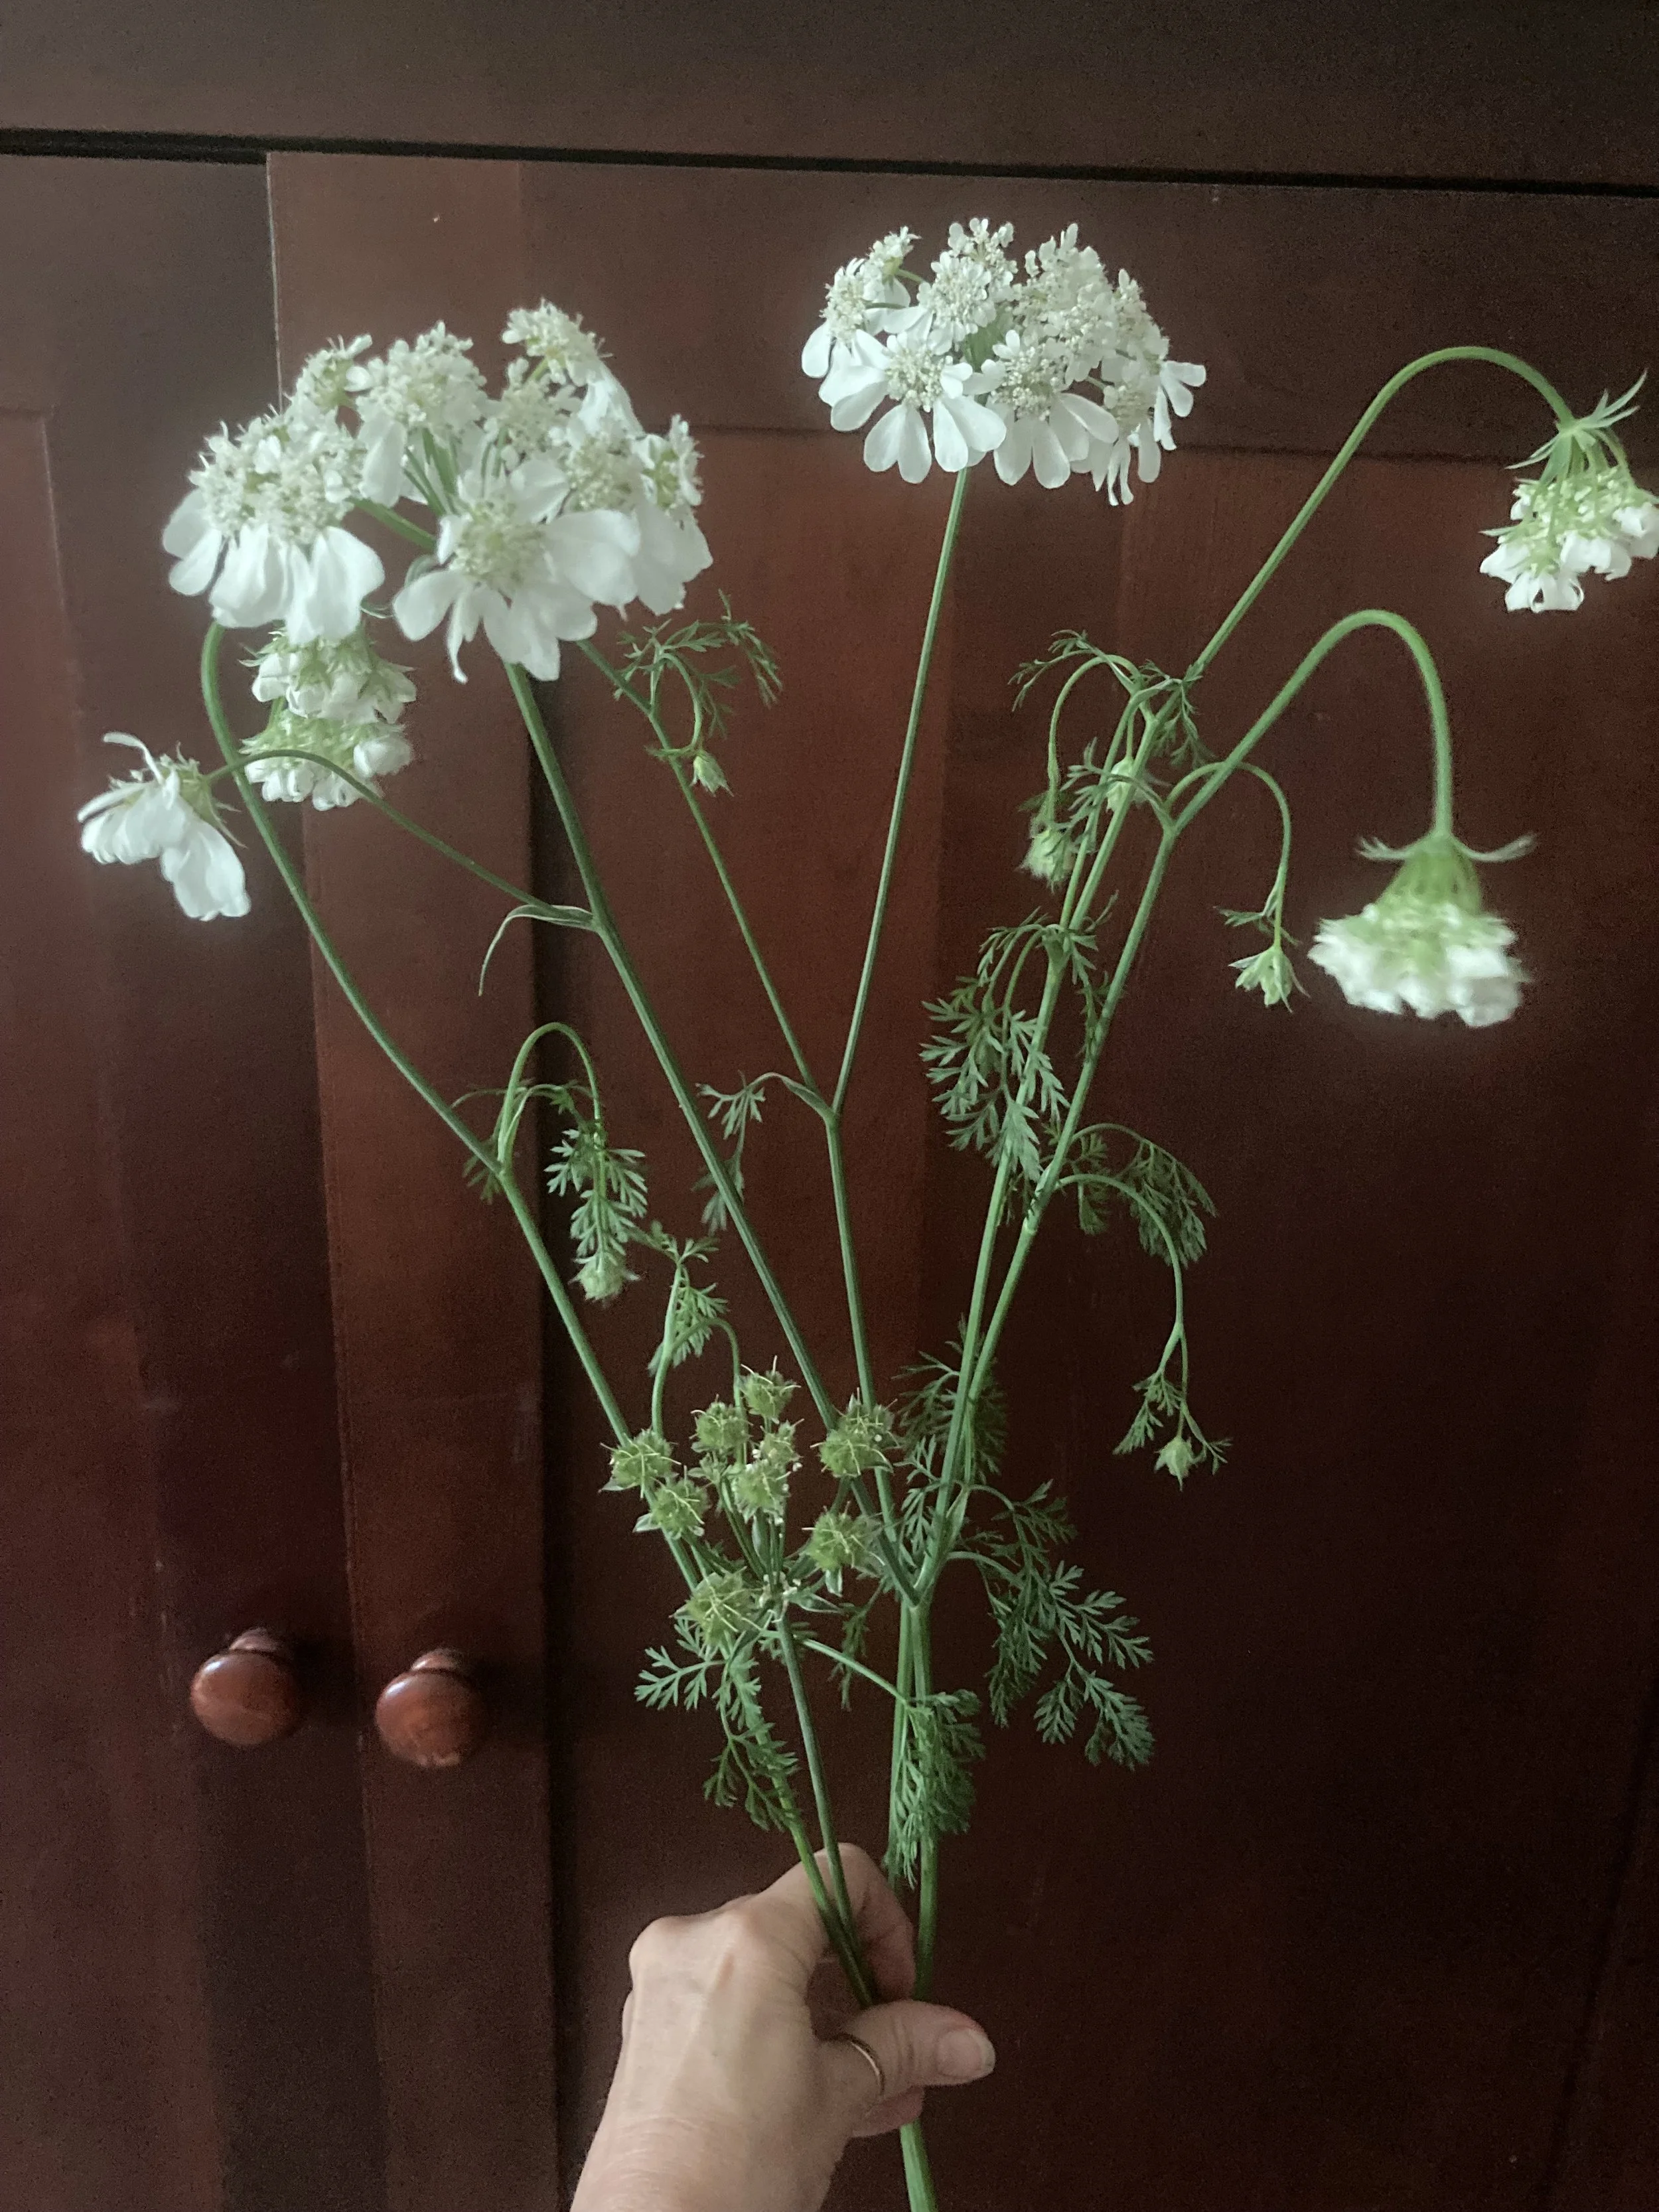
wilty orlaya - see the seed pod just above my hand?
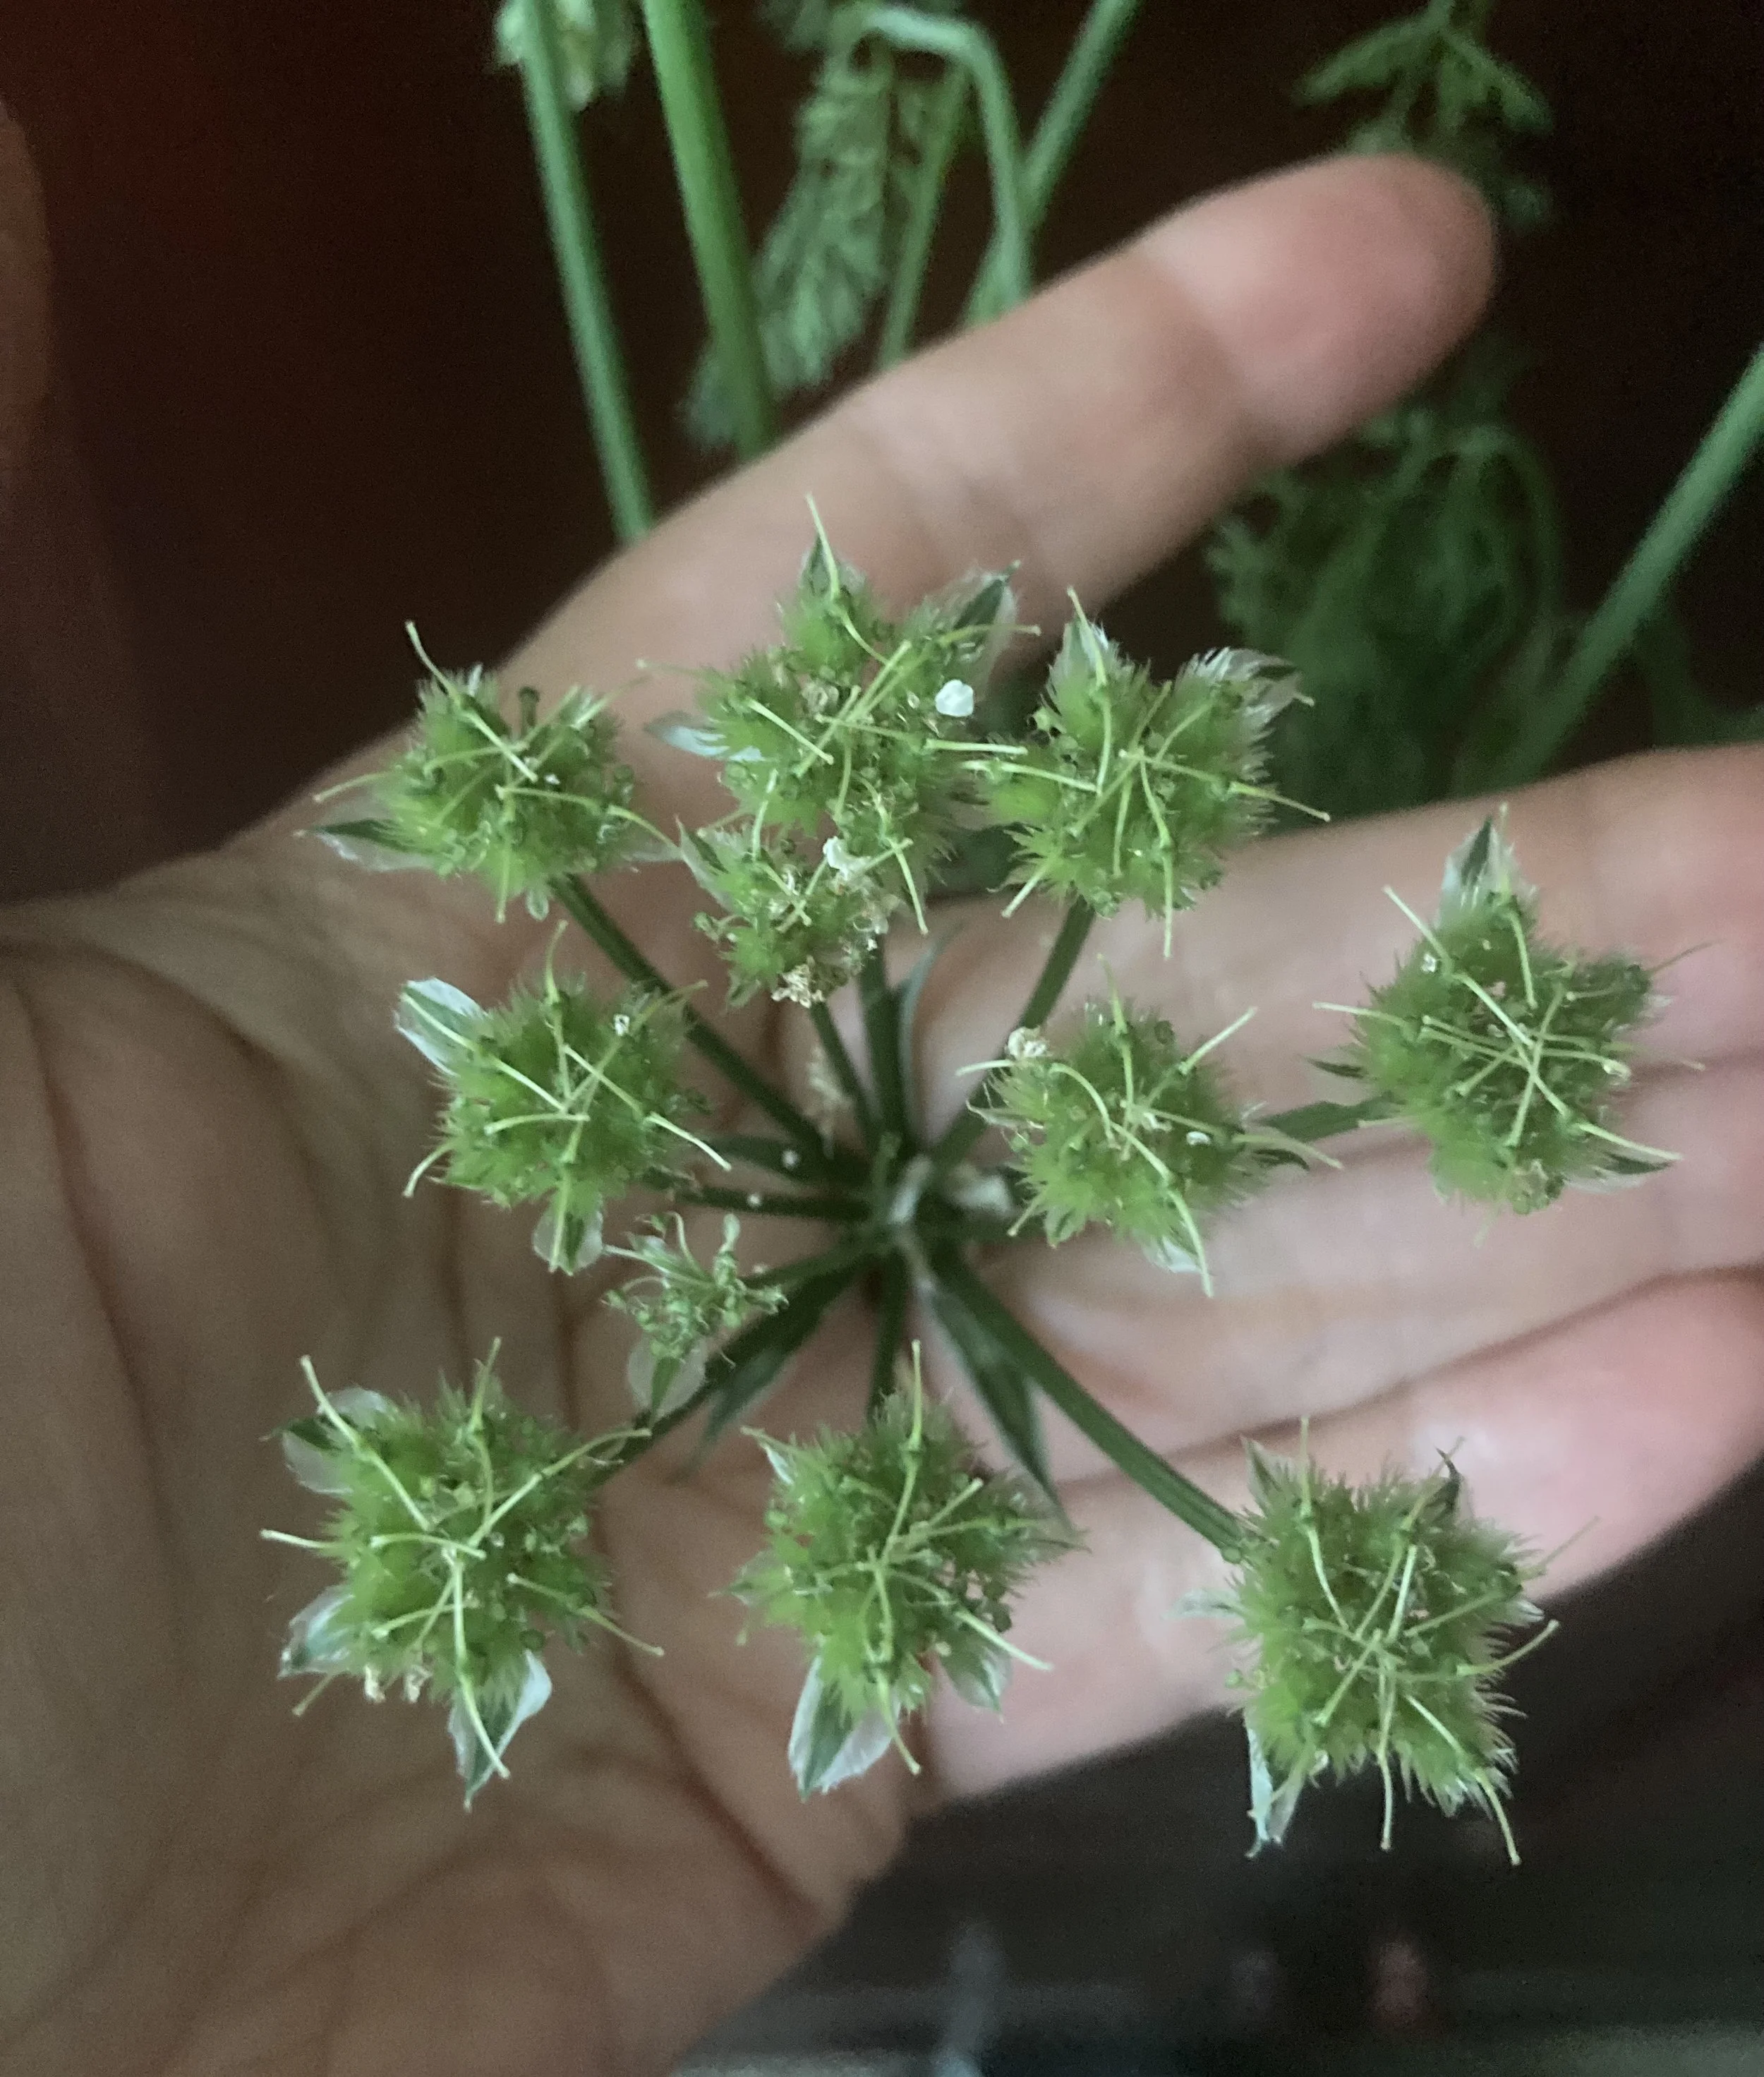
orlaya seed pod
Ranunculus
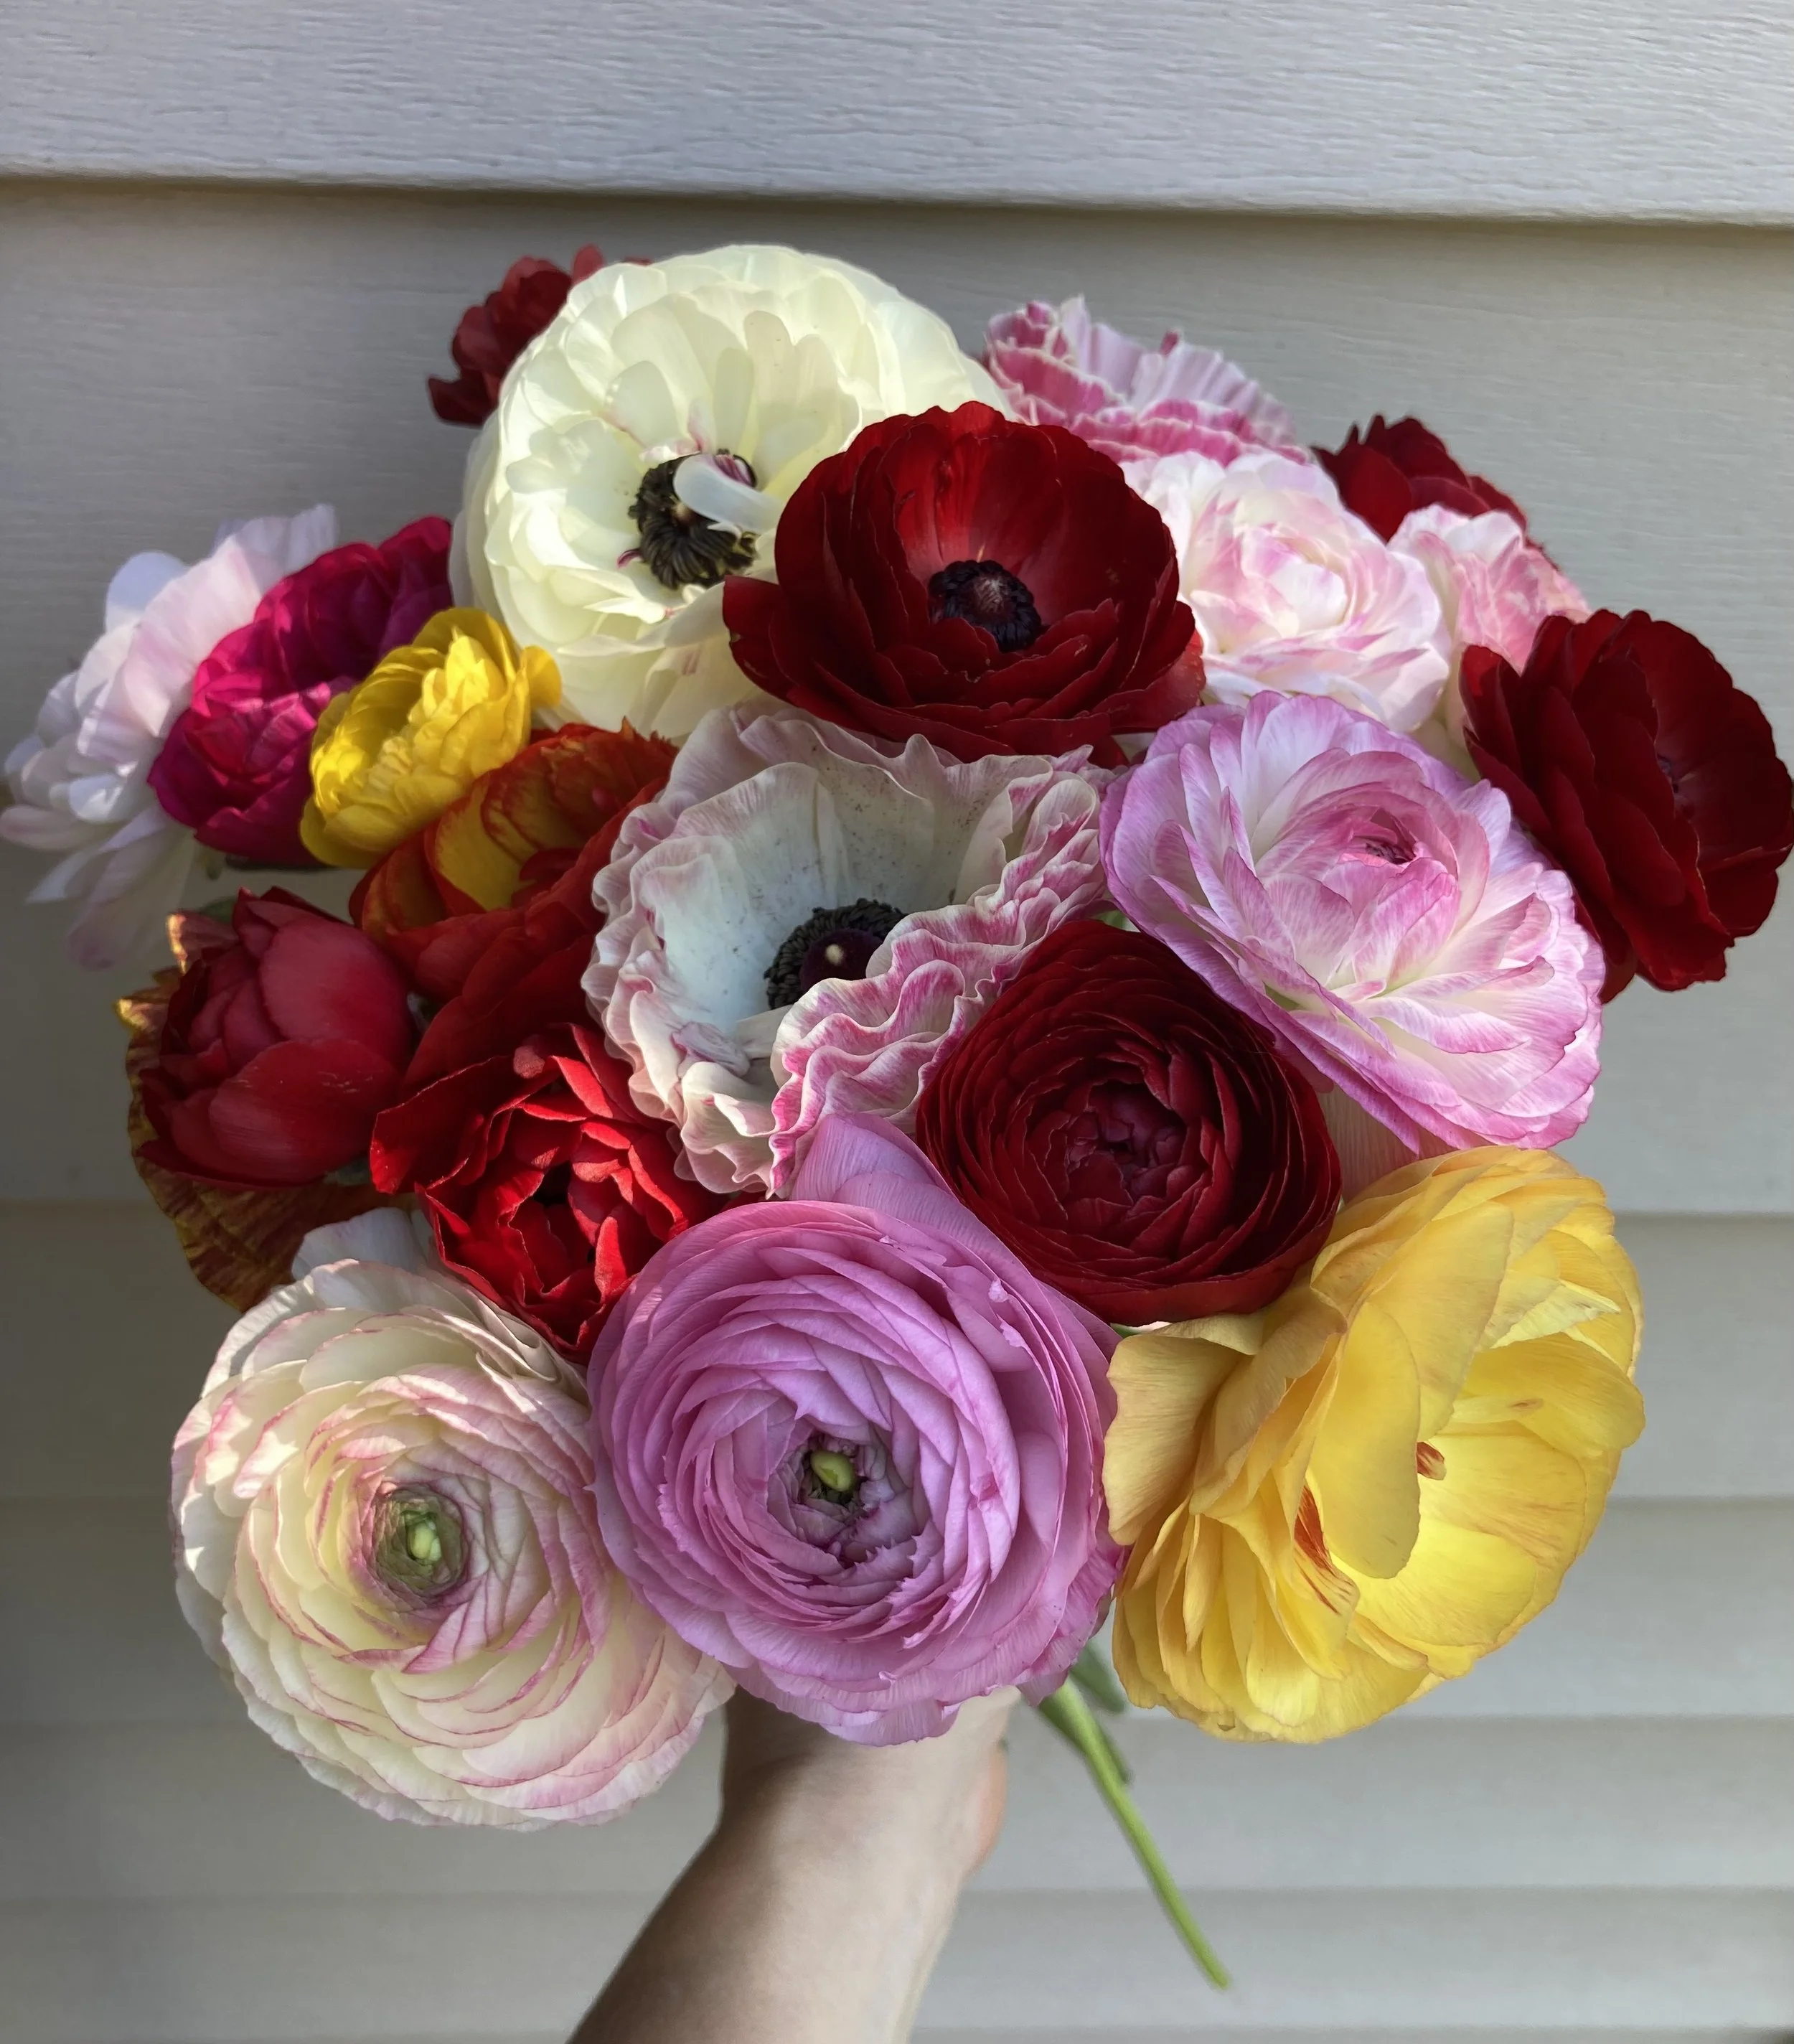
I love ranunculus blooms. Although the buds are very small and almost get lost in a bouquet, you will definitely notice them once they open. The blooms are absolutely gorgeous. They almost look fake with all those soft, ruffly flower petals. People always ask me what they are.
Unfortunately, ranunculus is usually a challenge for me to grow. They will shut down and stop blooming once the temps reach the upper 70 to low 80s (degrees Farenheit). If your plants aren’t blooming by the time we reach those temps, you’re out of luck, which is usually the case for me. To get the most out of them, you really need a way to control their environment such as with a greenhouse, or better yet, a heated greenhouse. Some flower farmers in this area have ranunculus blooms for Mother’s day. Mine usually don’t bloom until the beginning of June.
They are a cool flower so I plant them out early when there’s still a chance of light frost. I plant mine after the ground has thawed and the soil is workable, usually in March or April,. They grow from dried up, funny looking little roots called corms. I soak the corms in water for about 2 hours then lay them in a bottom tray with slightly moistened potting soil. I place them close to each other and cover them with more moist potting soil (but not too moist or they will rot). Then I put them in a cool dark place for 10 days. I know that sounds weird, but that’s what they like. I use a closet with no windows that is completely dark and the temperature stays between 50-60 degrees Fahrenheit. After 10 days you will see some green growth. At this stage, I take them out of the closet, give them a little water and put them out on the covered porch for about a week to harden off. While they can handle some cold temperatures, you don’t want them to completely freeze because it could damage the leaves and the roots. If it gets below 28 degrees, you should cover them with frost cloth.
Usually for me, by the time they’re starting to bud-up and bloom, we get warm temps and the plants shut down and stop producing. Some of the pictures below are from 2023. I got them in the ground really late on April 22nd. It got warm early that year, so I only got a few blooms from that healthy beautiful ranunculus bed pictured below. The picture of the bed with all the blooms is from 2024. This year (2026) I planted them out much earlier on March 10th. Because we had such a cool spring this year, I got a pretty decent harvest. Unfortunately, we also got a lot of rain. I had 2 beds of ranunculus and one of them got completely saturated and most of the corms rotted.
To harvest ranunculus, you want to catch them at the ‘color crack’ stage. That is when they are still in bud form, but they’re just starting to crack open so you can see what color they are. When you harvest them at this stage, you can store them in a cooler or refrigerator for a week or two, and when you take them out to use them, they’ll still have a vase life of 7-10 days or more. After the bed has been harvested, I let the foliage die back a little, but usually not too long because I’ll want to reuse that bed for another crop, usually zinnias or snapdragons.
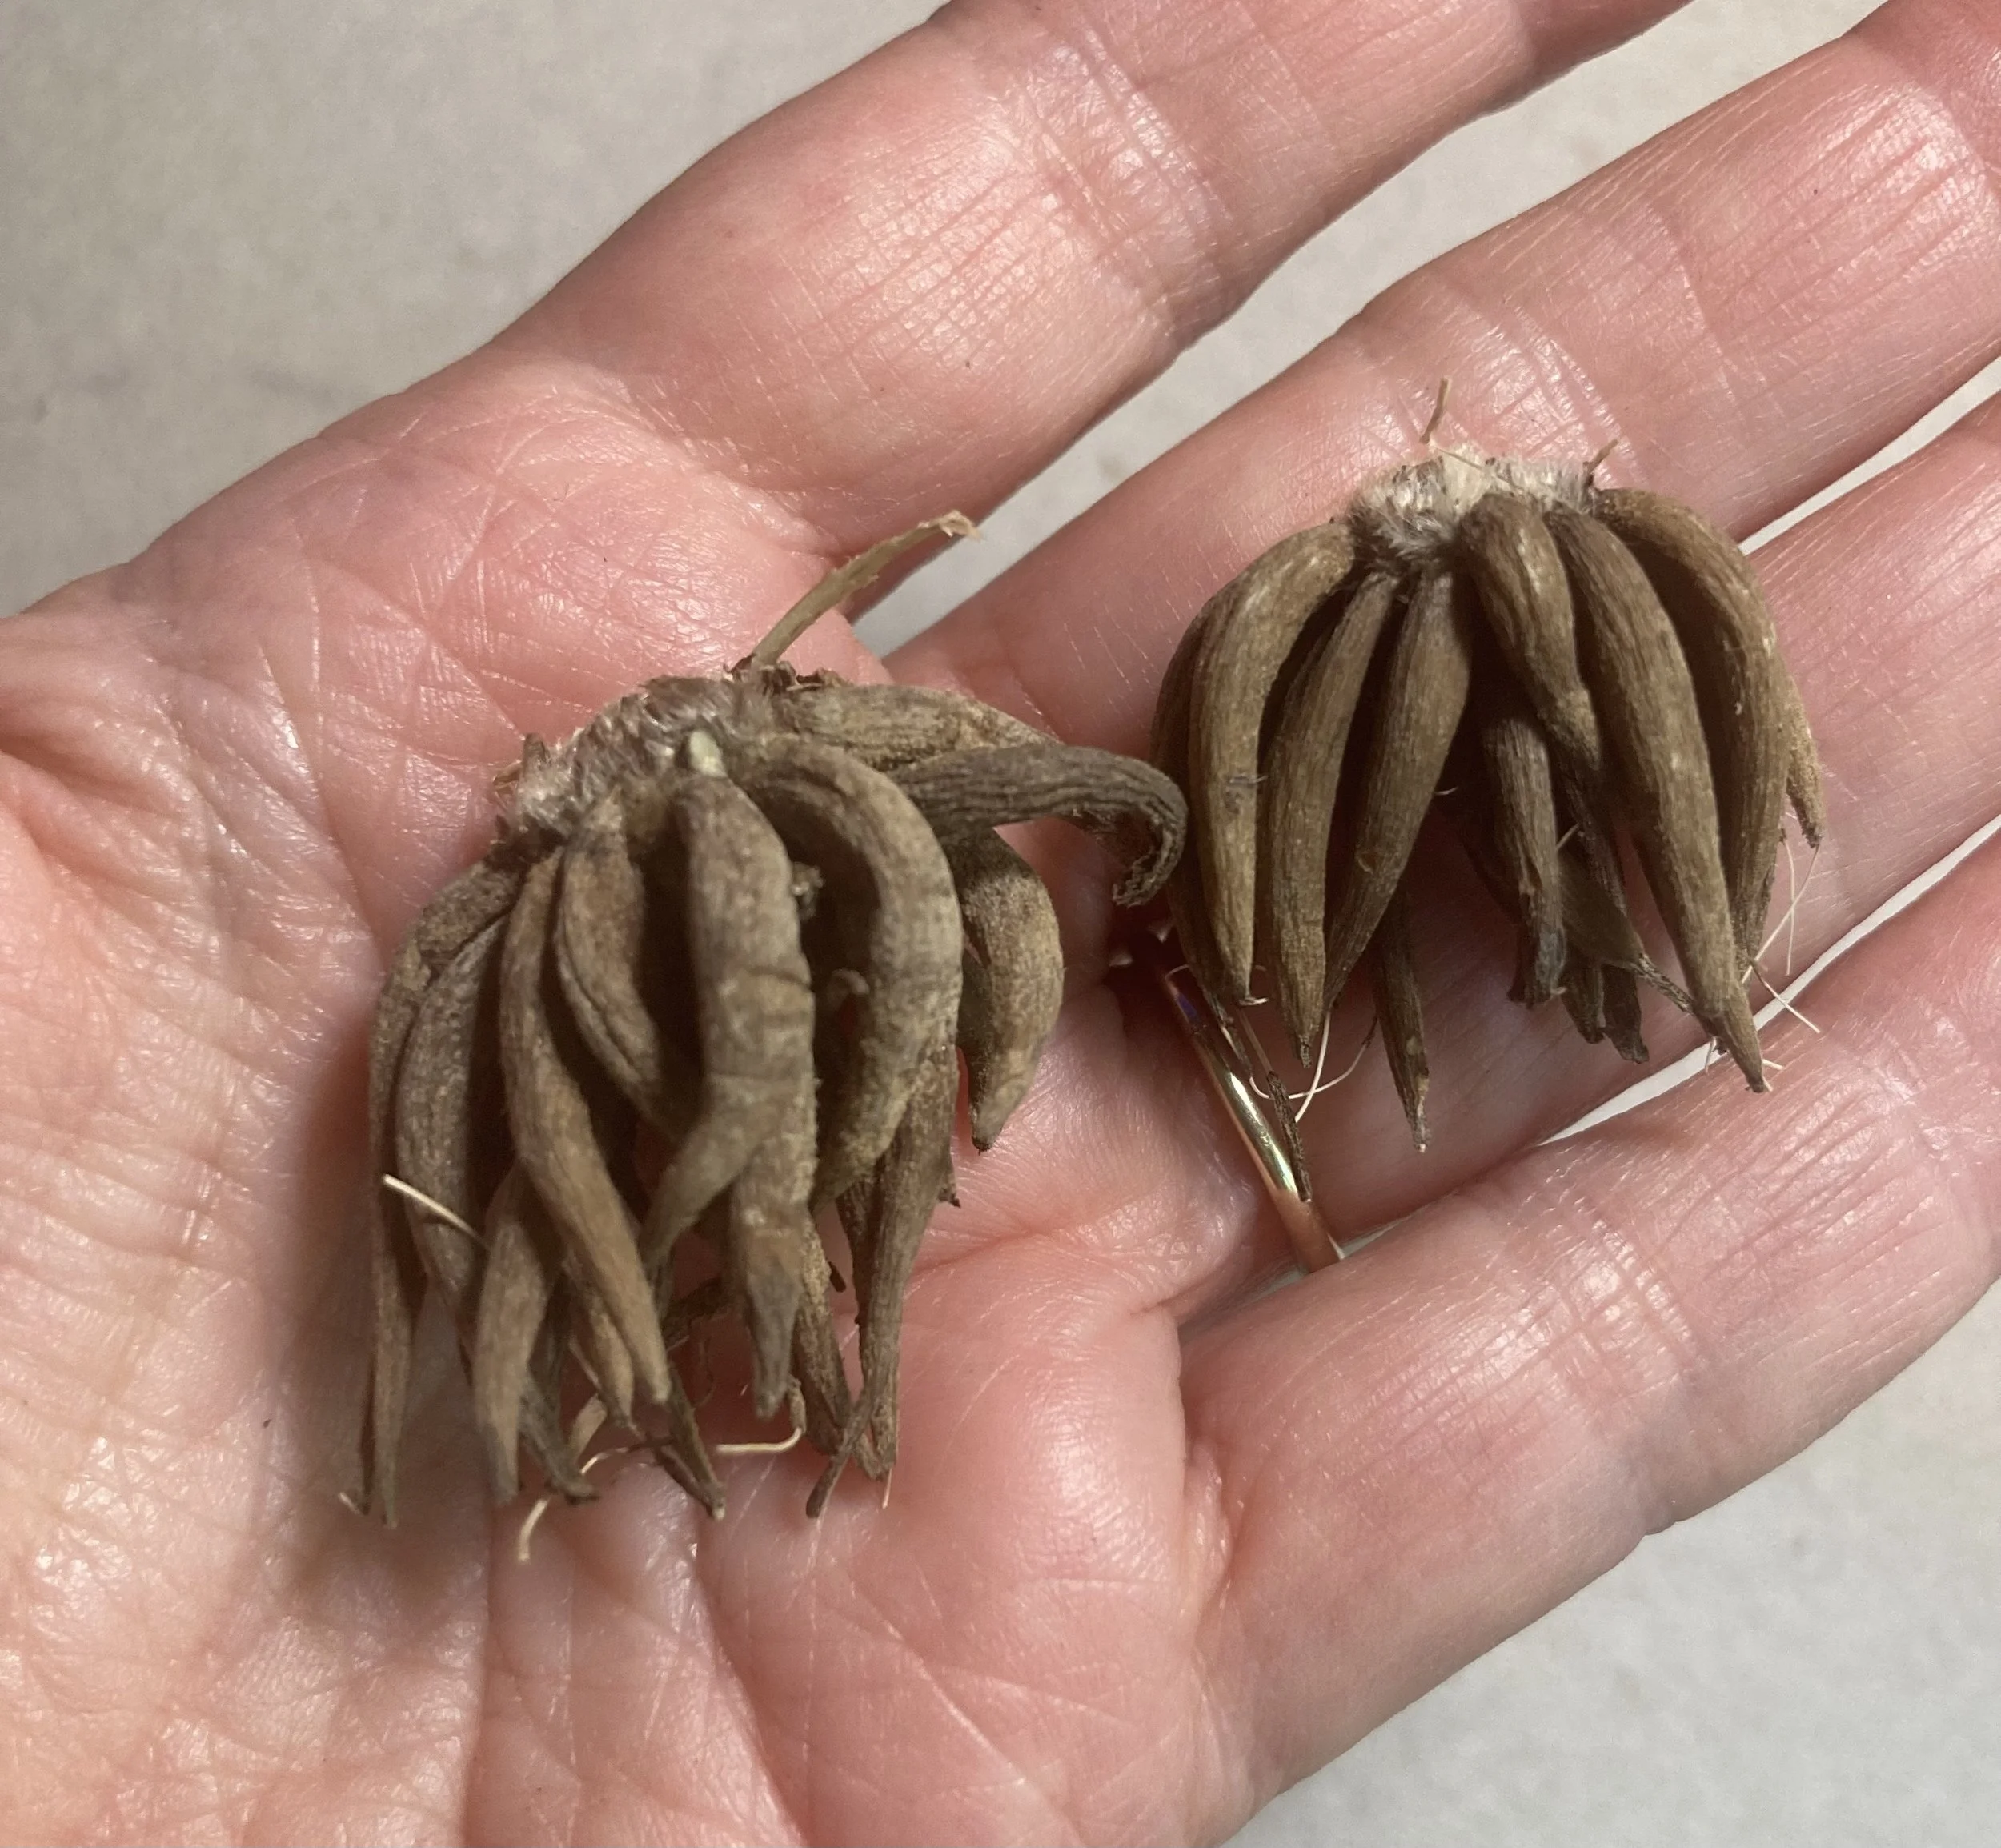
ranunculus corms

ranunculus corms lined up close together before being covered with soil
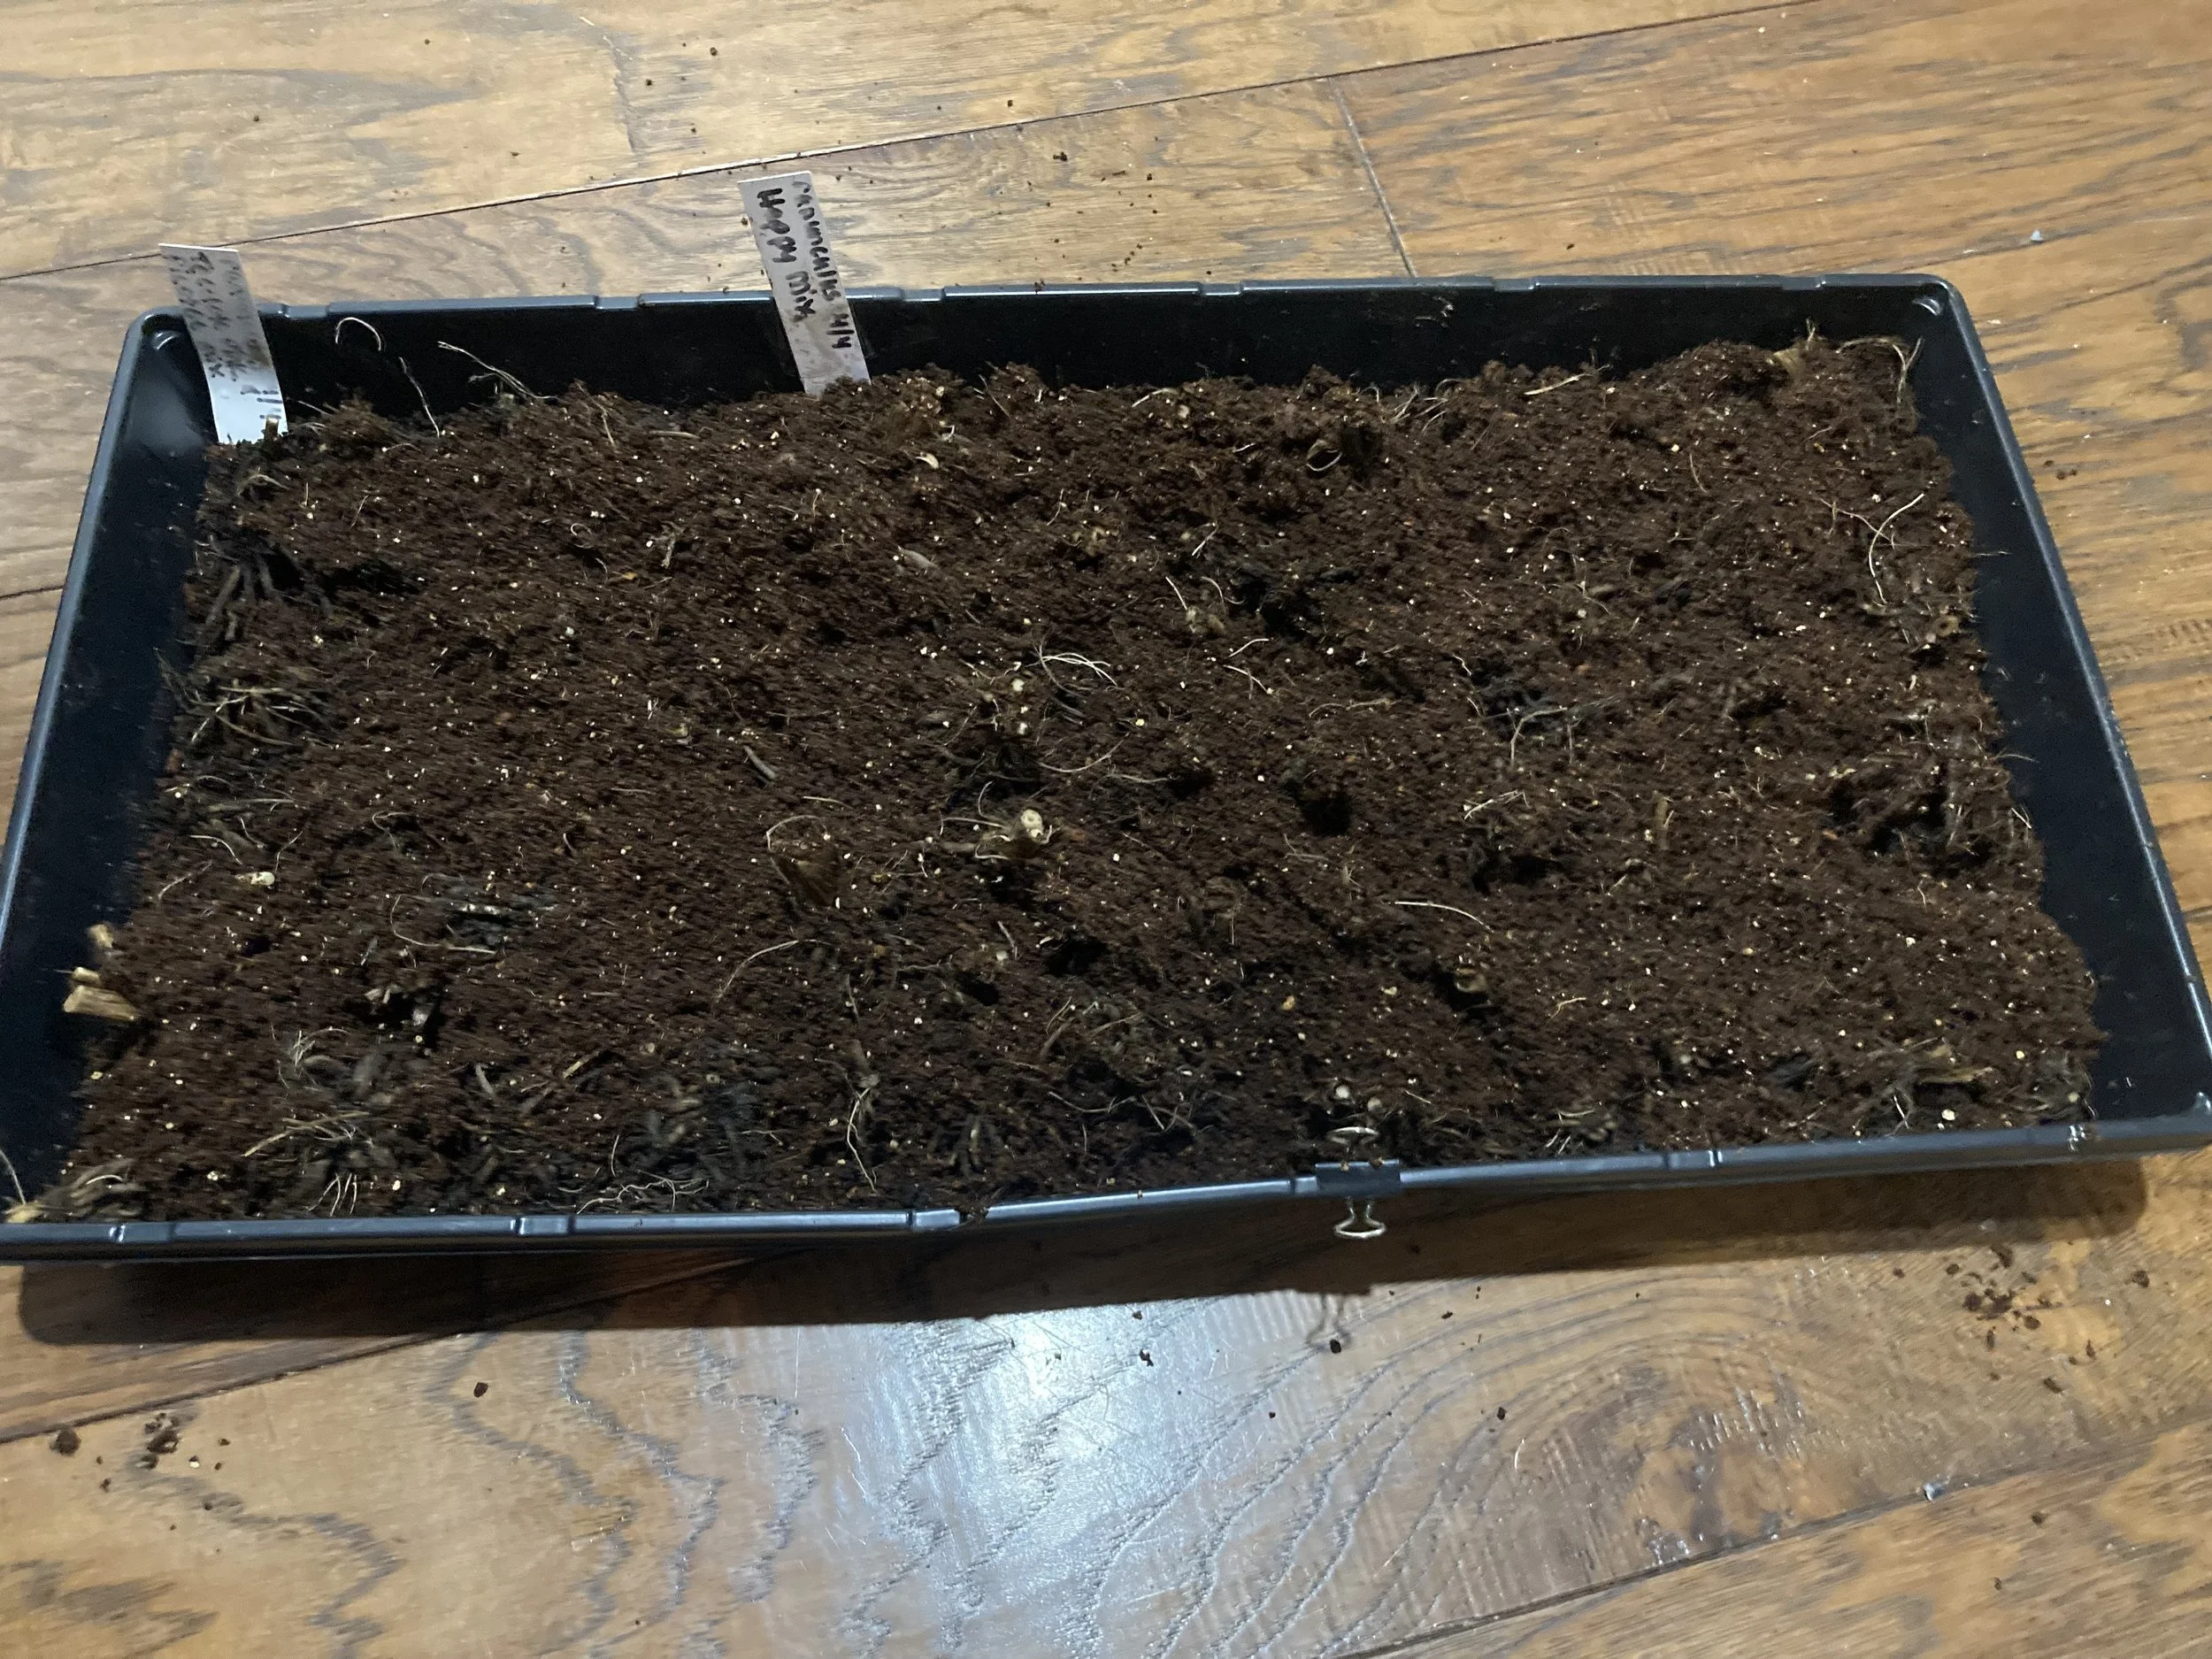
a tray of ranunculus ready to go into cold dark storage for 10 days

2 ranunculus trays on planting day April 22, 2023
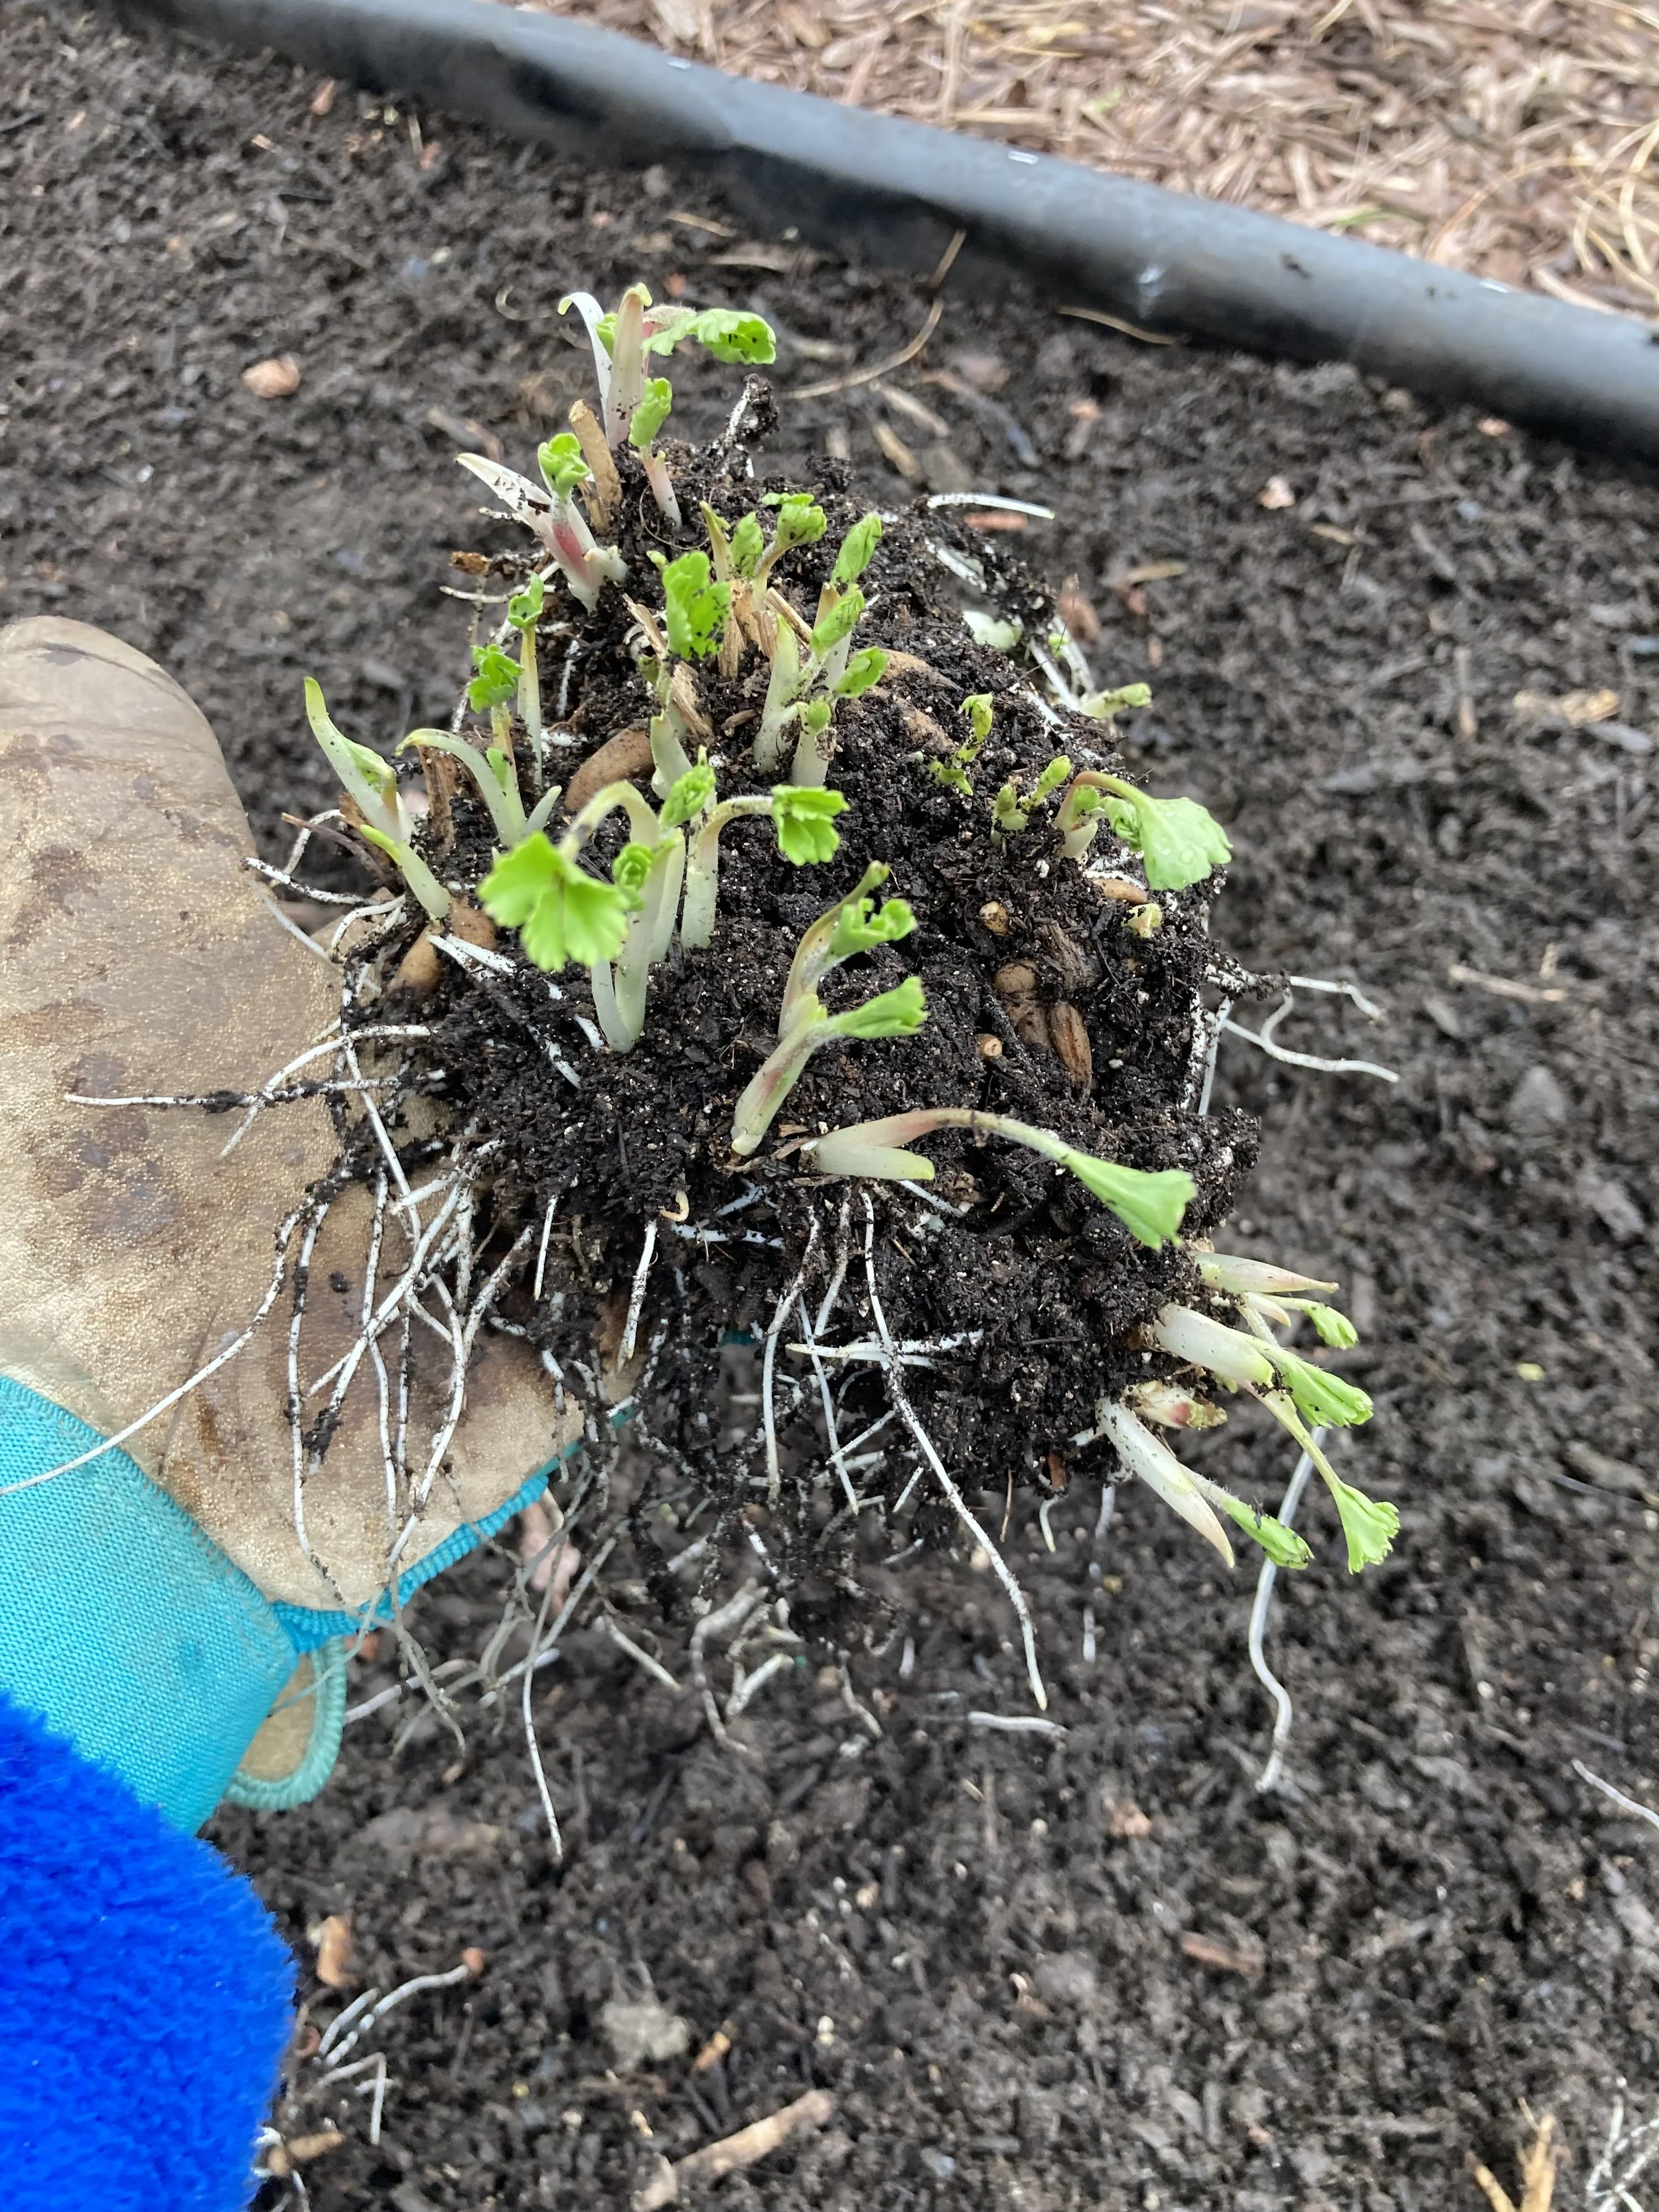
several ranunculus corms in my hand, I pull these apart and plant each corm individually

ranunculus May 12, 2023

ranunculus May 21, 2023 - I hardly got any blooms out of this bed because it got too warm and the plants shut down and quit blooming
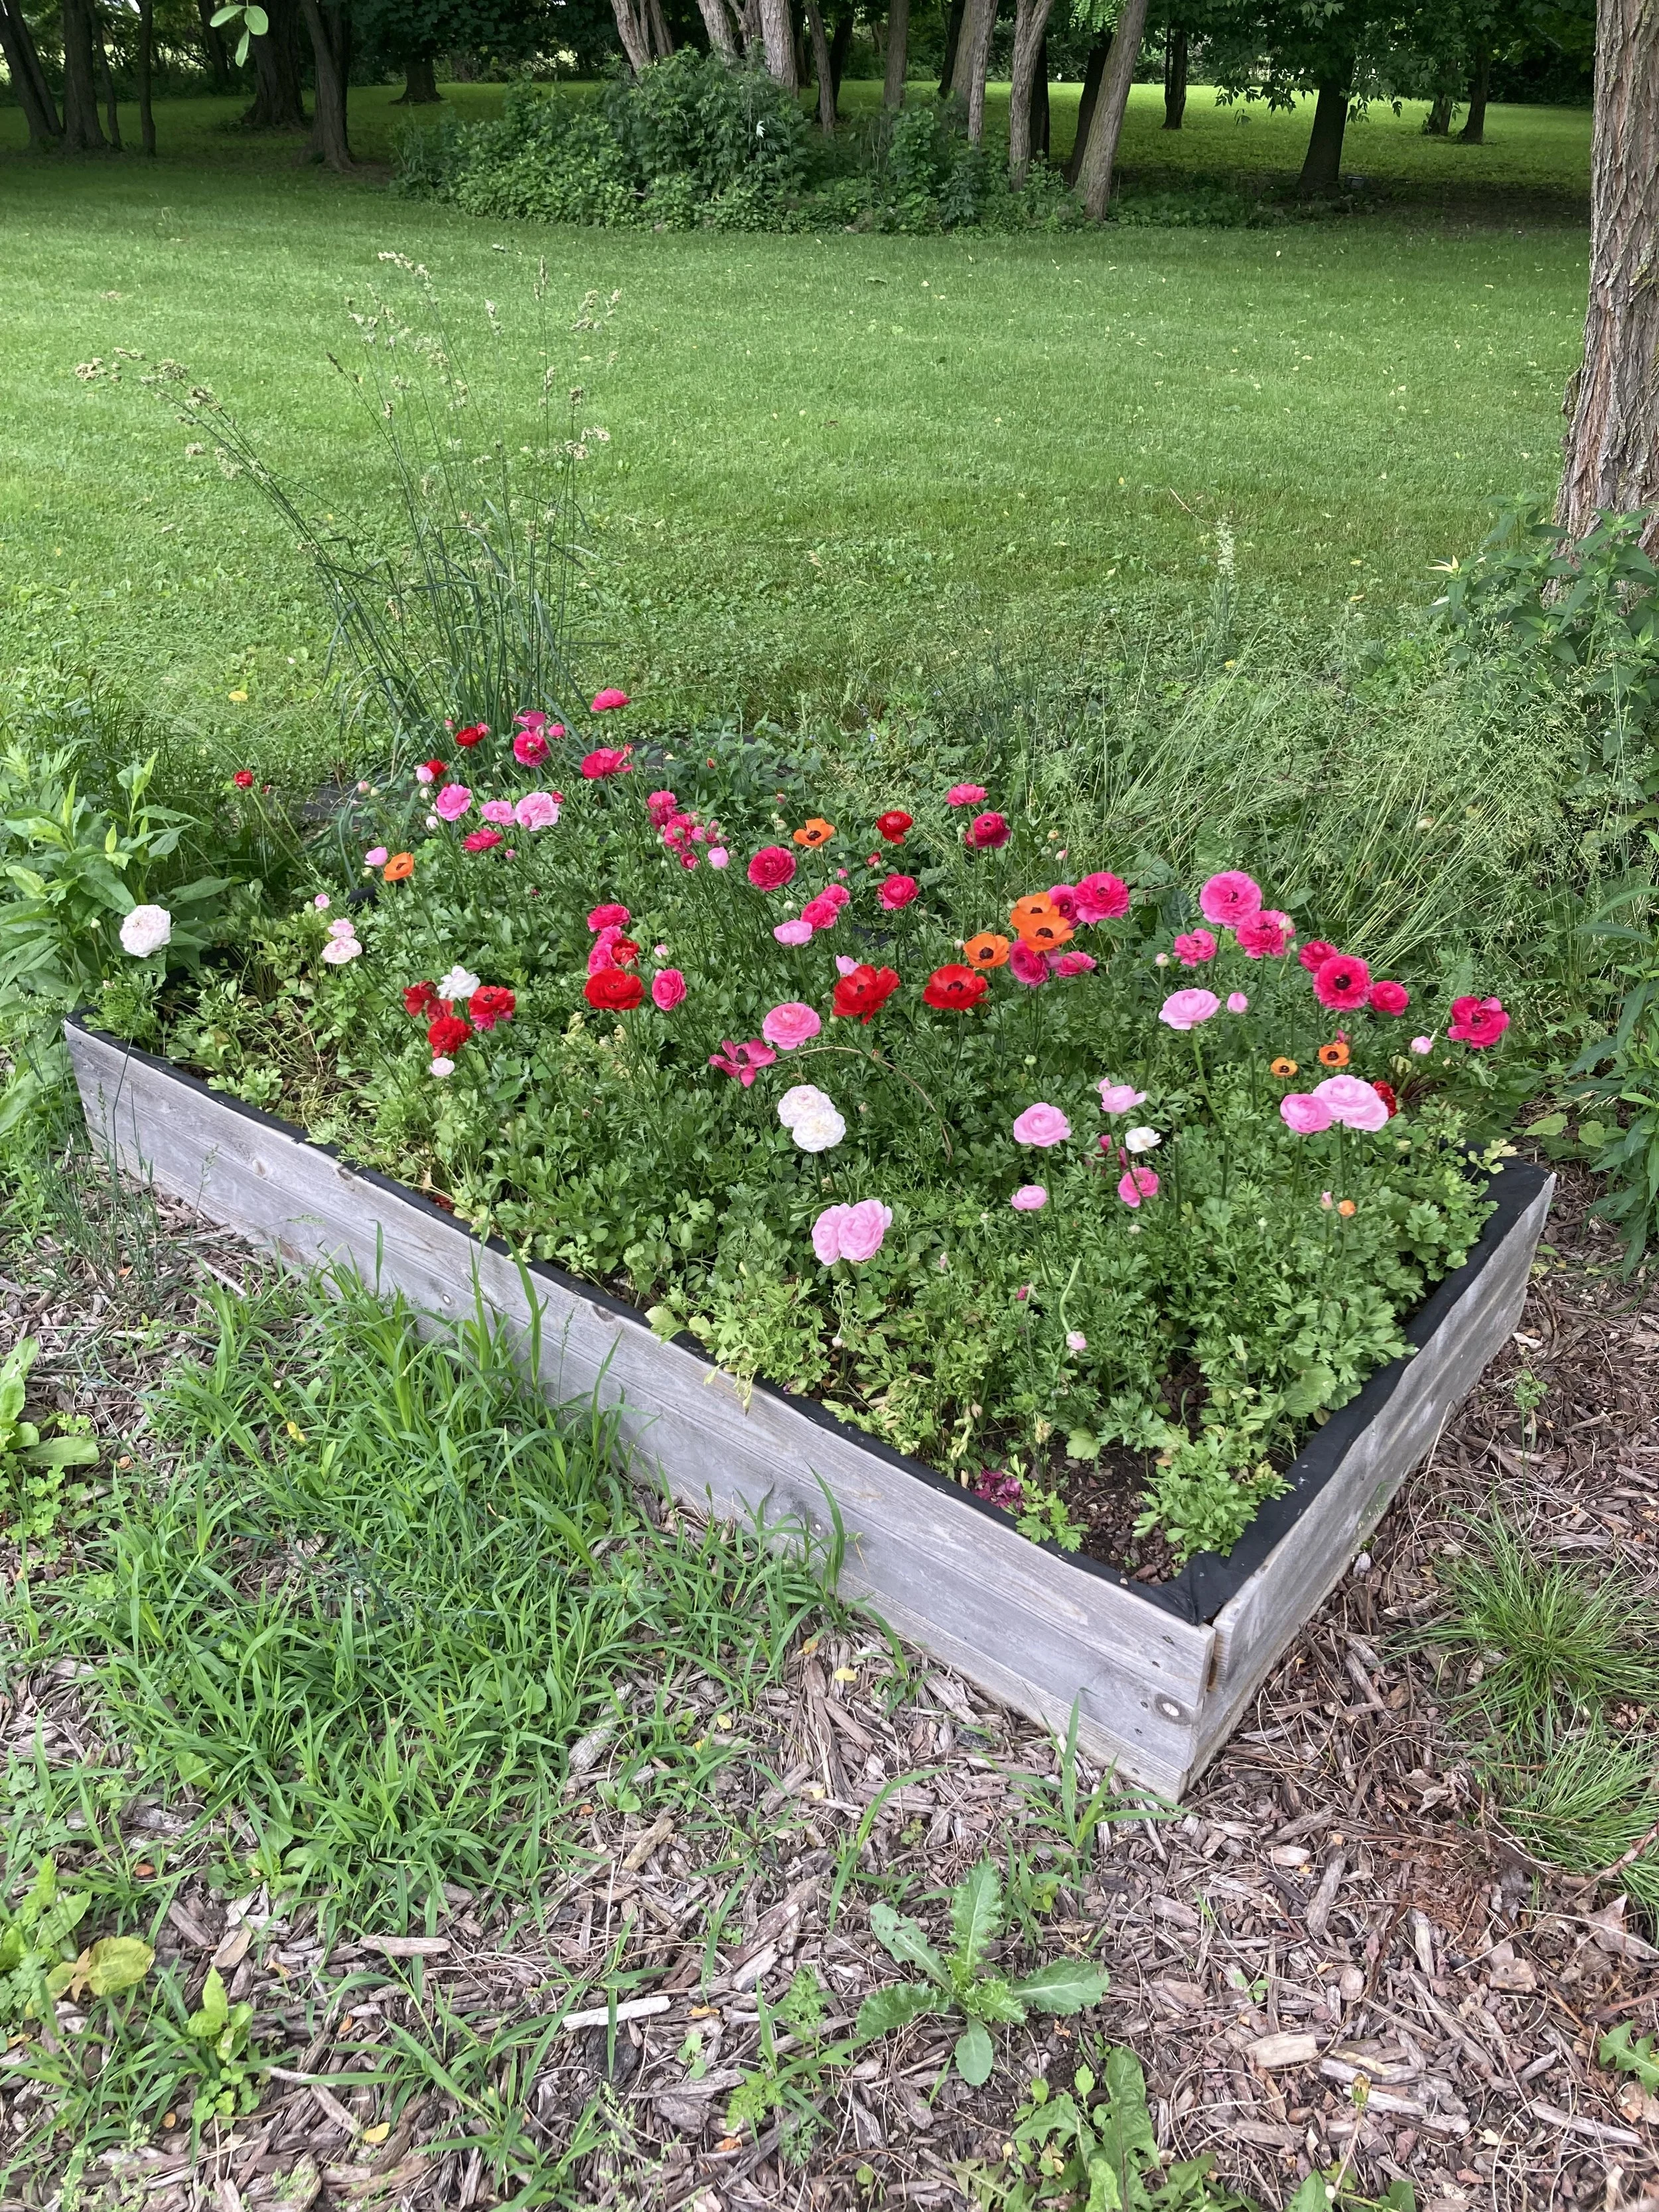
ranunculus in bloom, this is from 2024
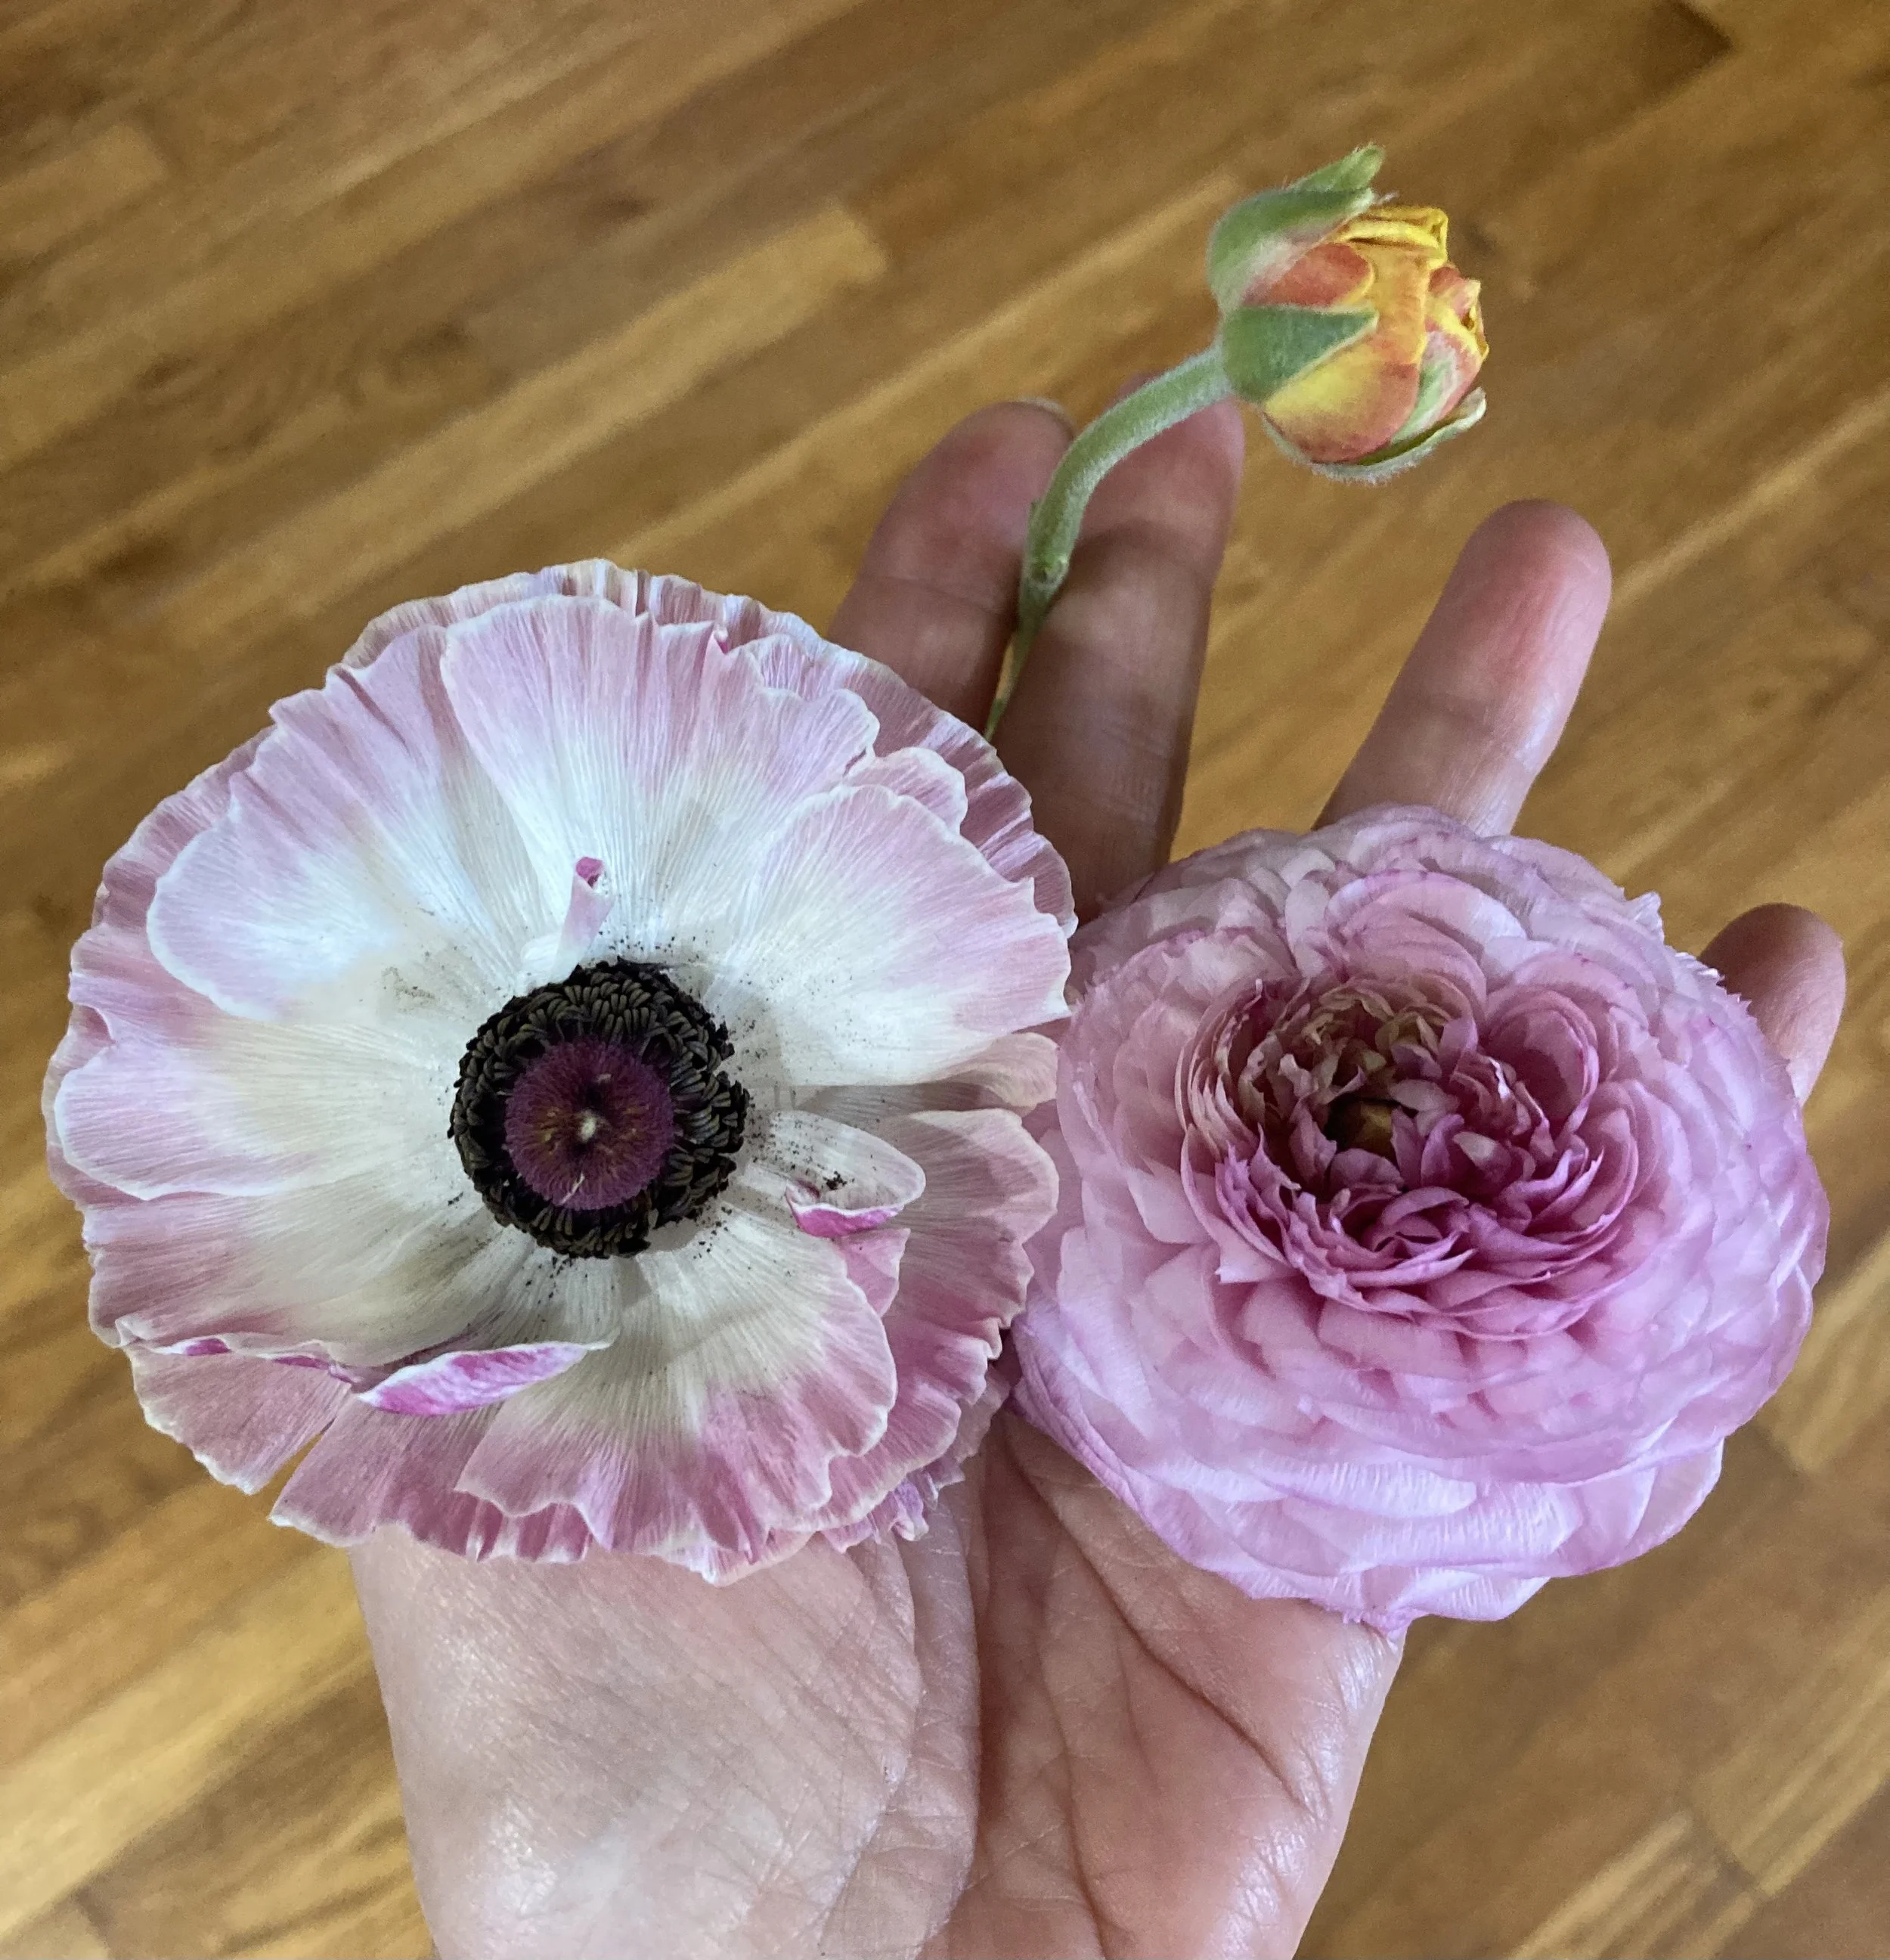
ranunculus - 2 different bloom types plus one in bud stage
Canterbury bells
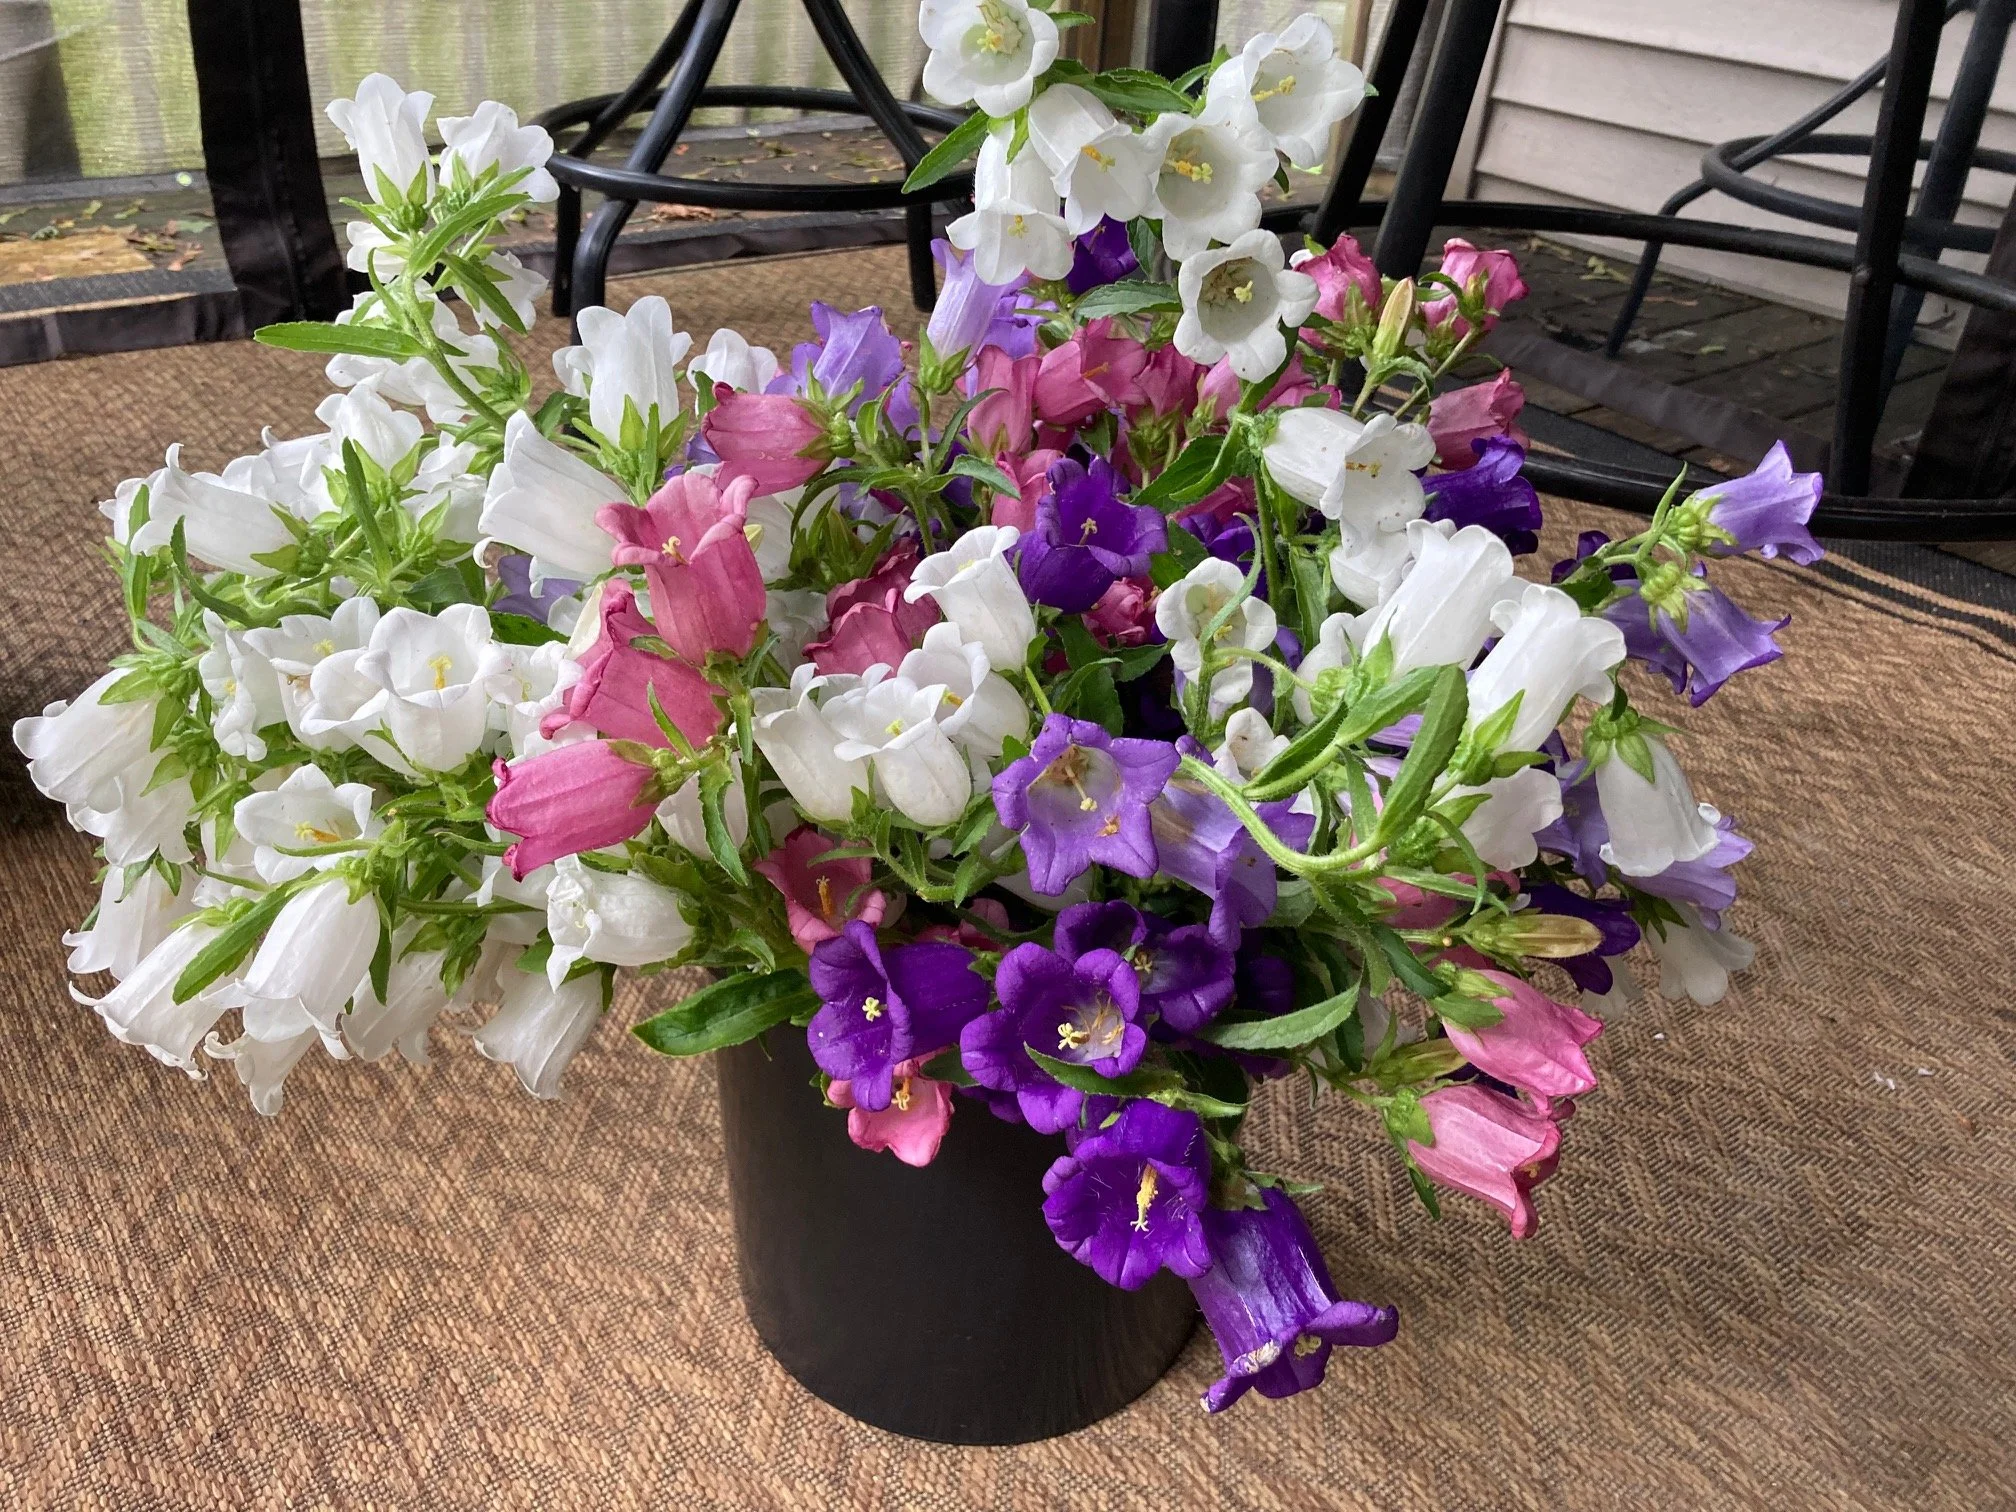
Canterbury bells (or Campanula) were one of my Mom’s favorite flowers. We first saw them in my cousin Sandy’s garden and we both fell in love with them. I knew I had to add them to my lineup. The huge bells are incredible, over 3 inches long, they’re like lily-of-the-valley on steroids. They’re available in 4 different colors - dark purple (which is my favorite), lavender, rose and white. I didn’t get many of the rose shade this year. We had a streak of 90 degree days right after they bloomed and they all got scorched in the sun and were unusable. The cups face upwards and have a great vase life. There are several bells on each stem, and the stems can grow to be over 2 feet long. They are a “cool flower” which means you can plant in the garden BEFORE our last frost and they can withstand the cold temperatures and even a light frost or snow. They used to be considered a biannual because you can plant them in the fall, they’ll survive the winter, and come up in the spring. New varieties can be planted indoors in late winter/early spring and bloom the same year.


Canterbury bells seeds - these are pelletized which means they have a coating on them that makes the tiny seeds easier to work with

Feb 12 - started seeds indoors

March 22 - Canterbury bells seedlings - the white on the tray is diatomaceous earth, the yellow are sticky traps, both to help prevent fungus gnats

March 30 - hardening off Canterbury bell seedlings

April 15 - planted 3 beds (approx 3'x6' each) of Canterbury bells - I put the larger seedlings on the north side of the bed, smaller on the south side

May 10 - Canterbury bells

May 25 - Canterbury bells

June 1 - Canterbury bells

June 11 - Canterbury bells with lots of buds

huge stem of white Canterbury bells

long stem of dark purple Canterbury bells
large 3" cups of lavender Canterbury bells

bucket of bells

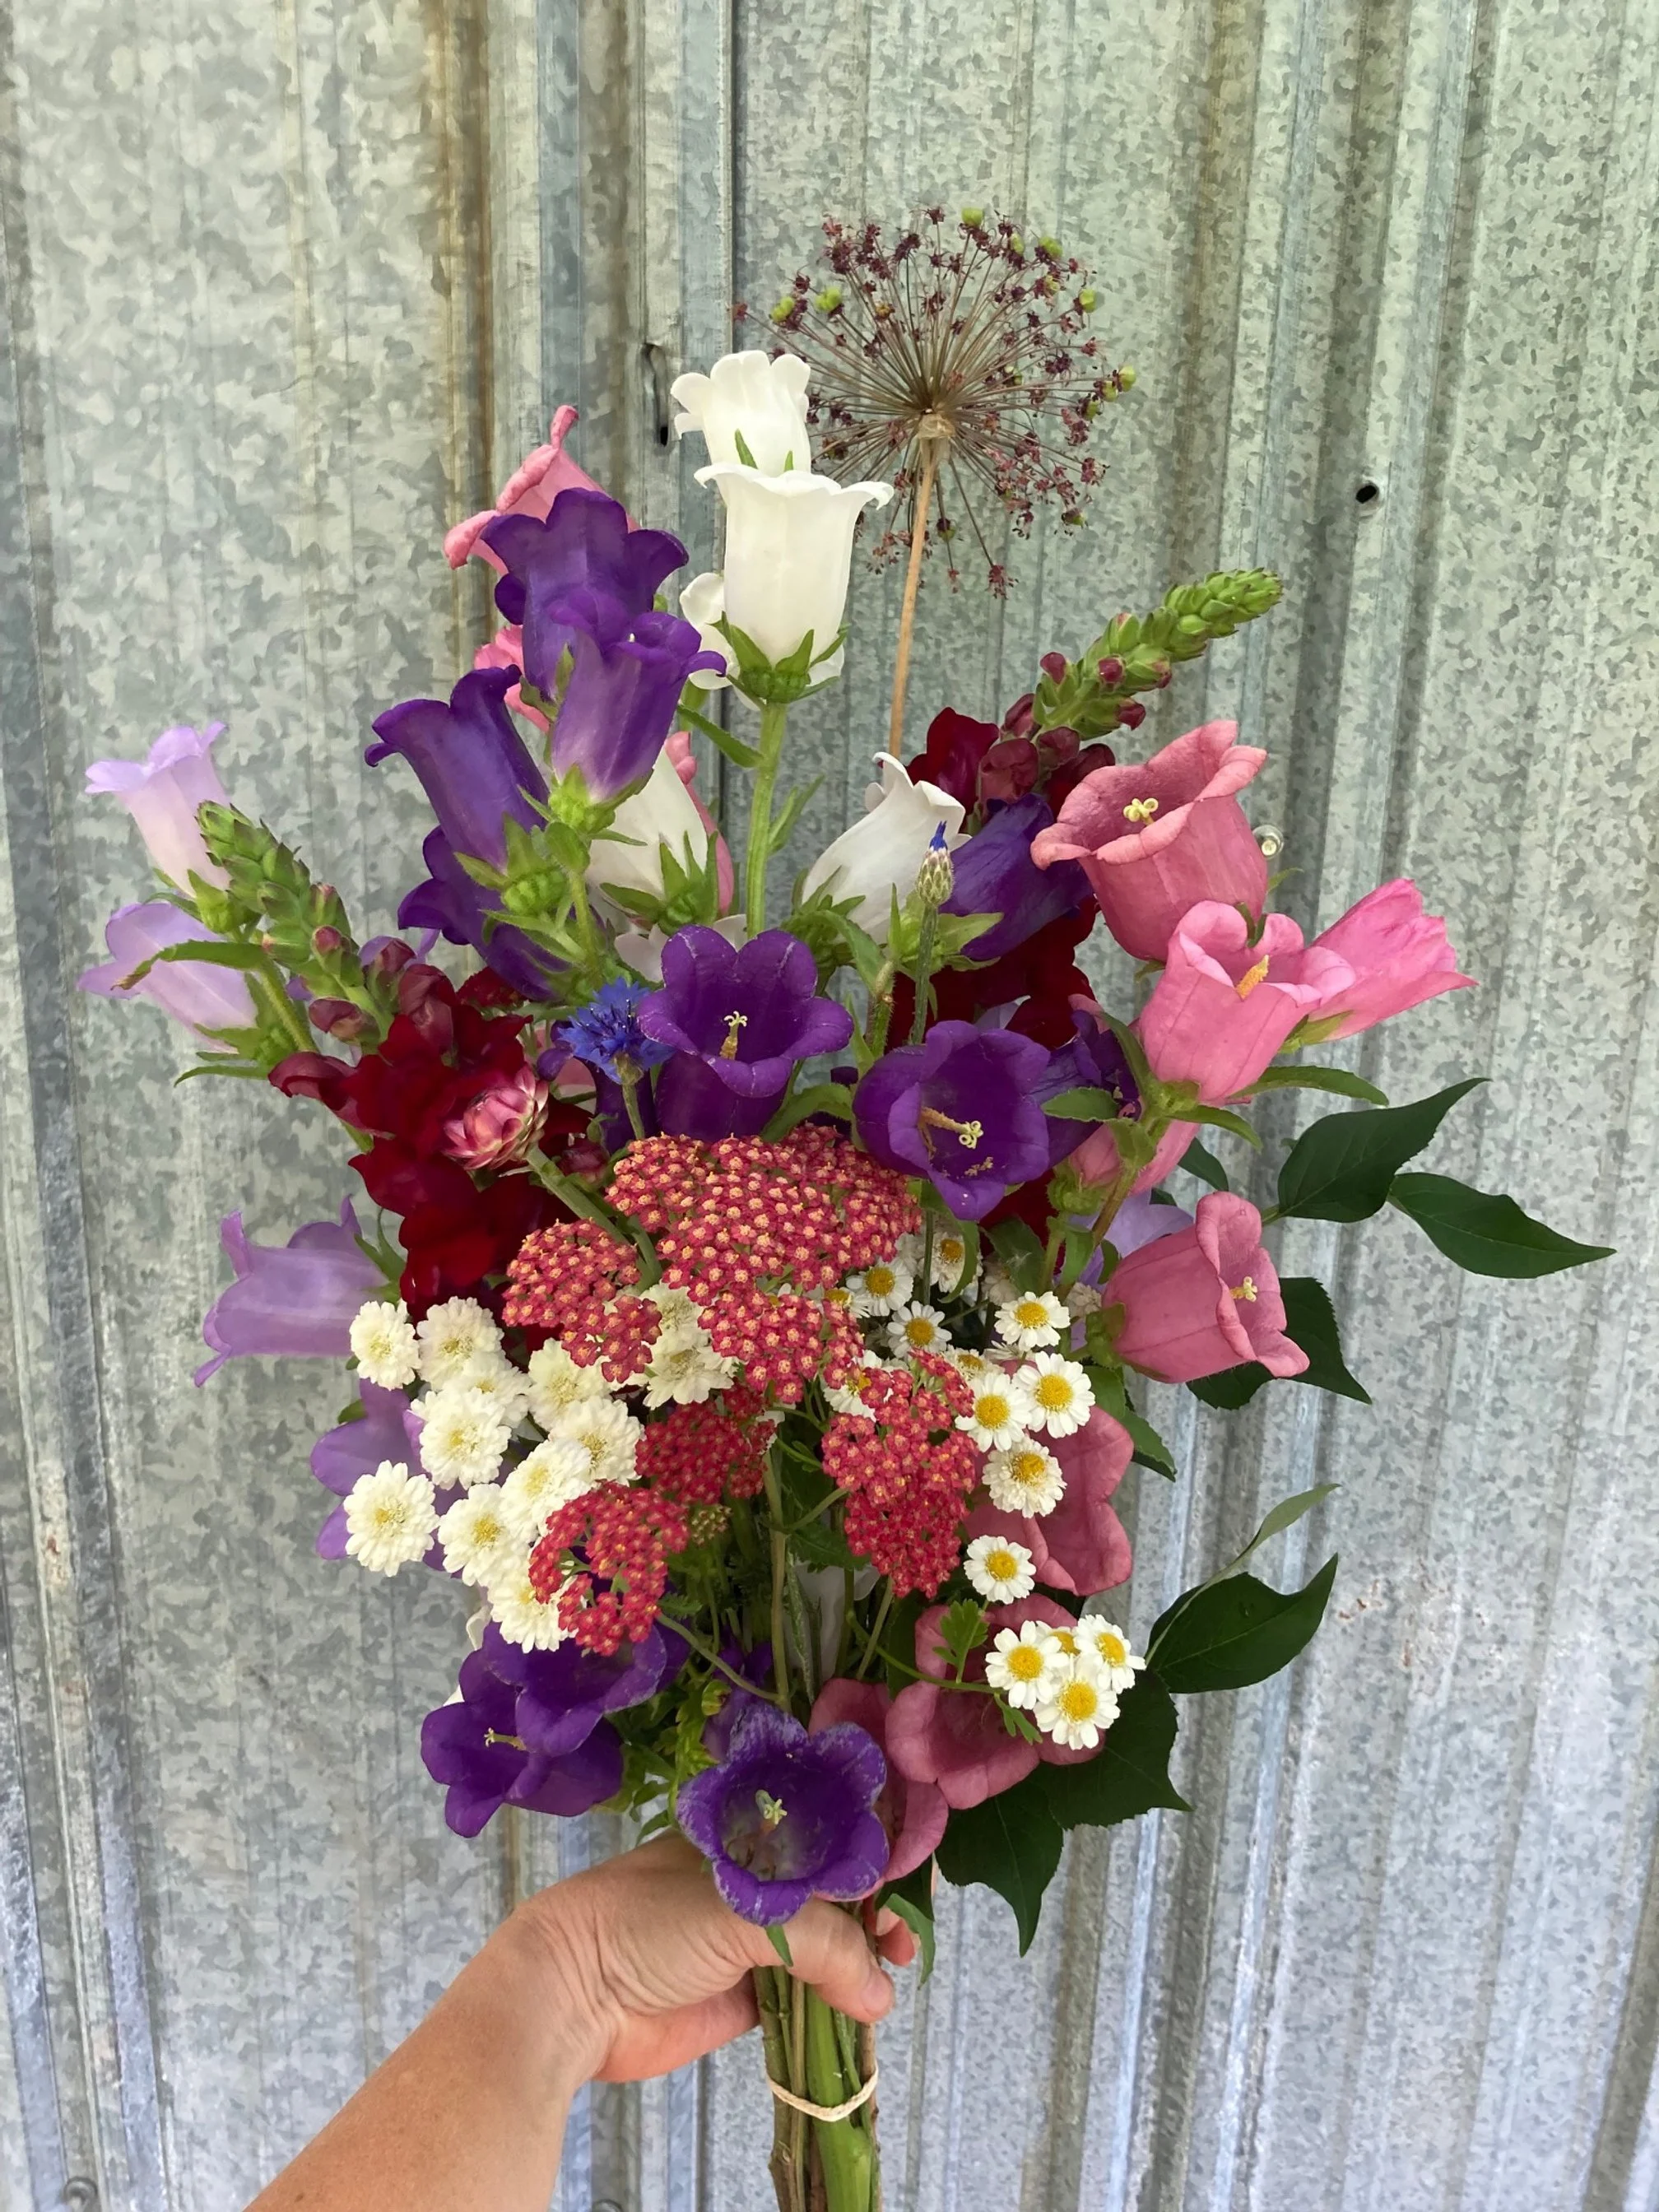
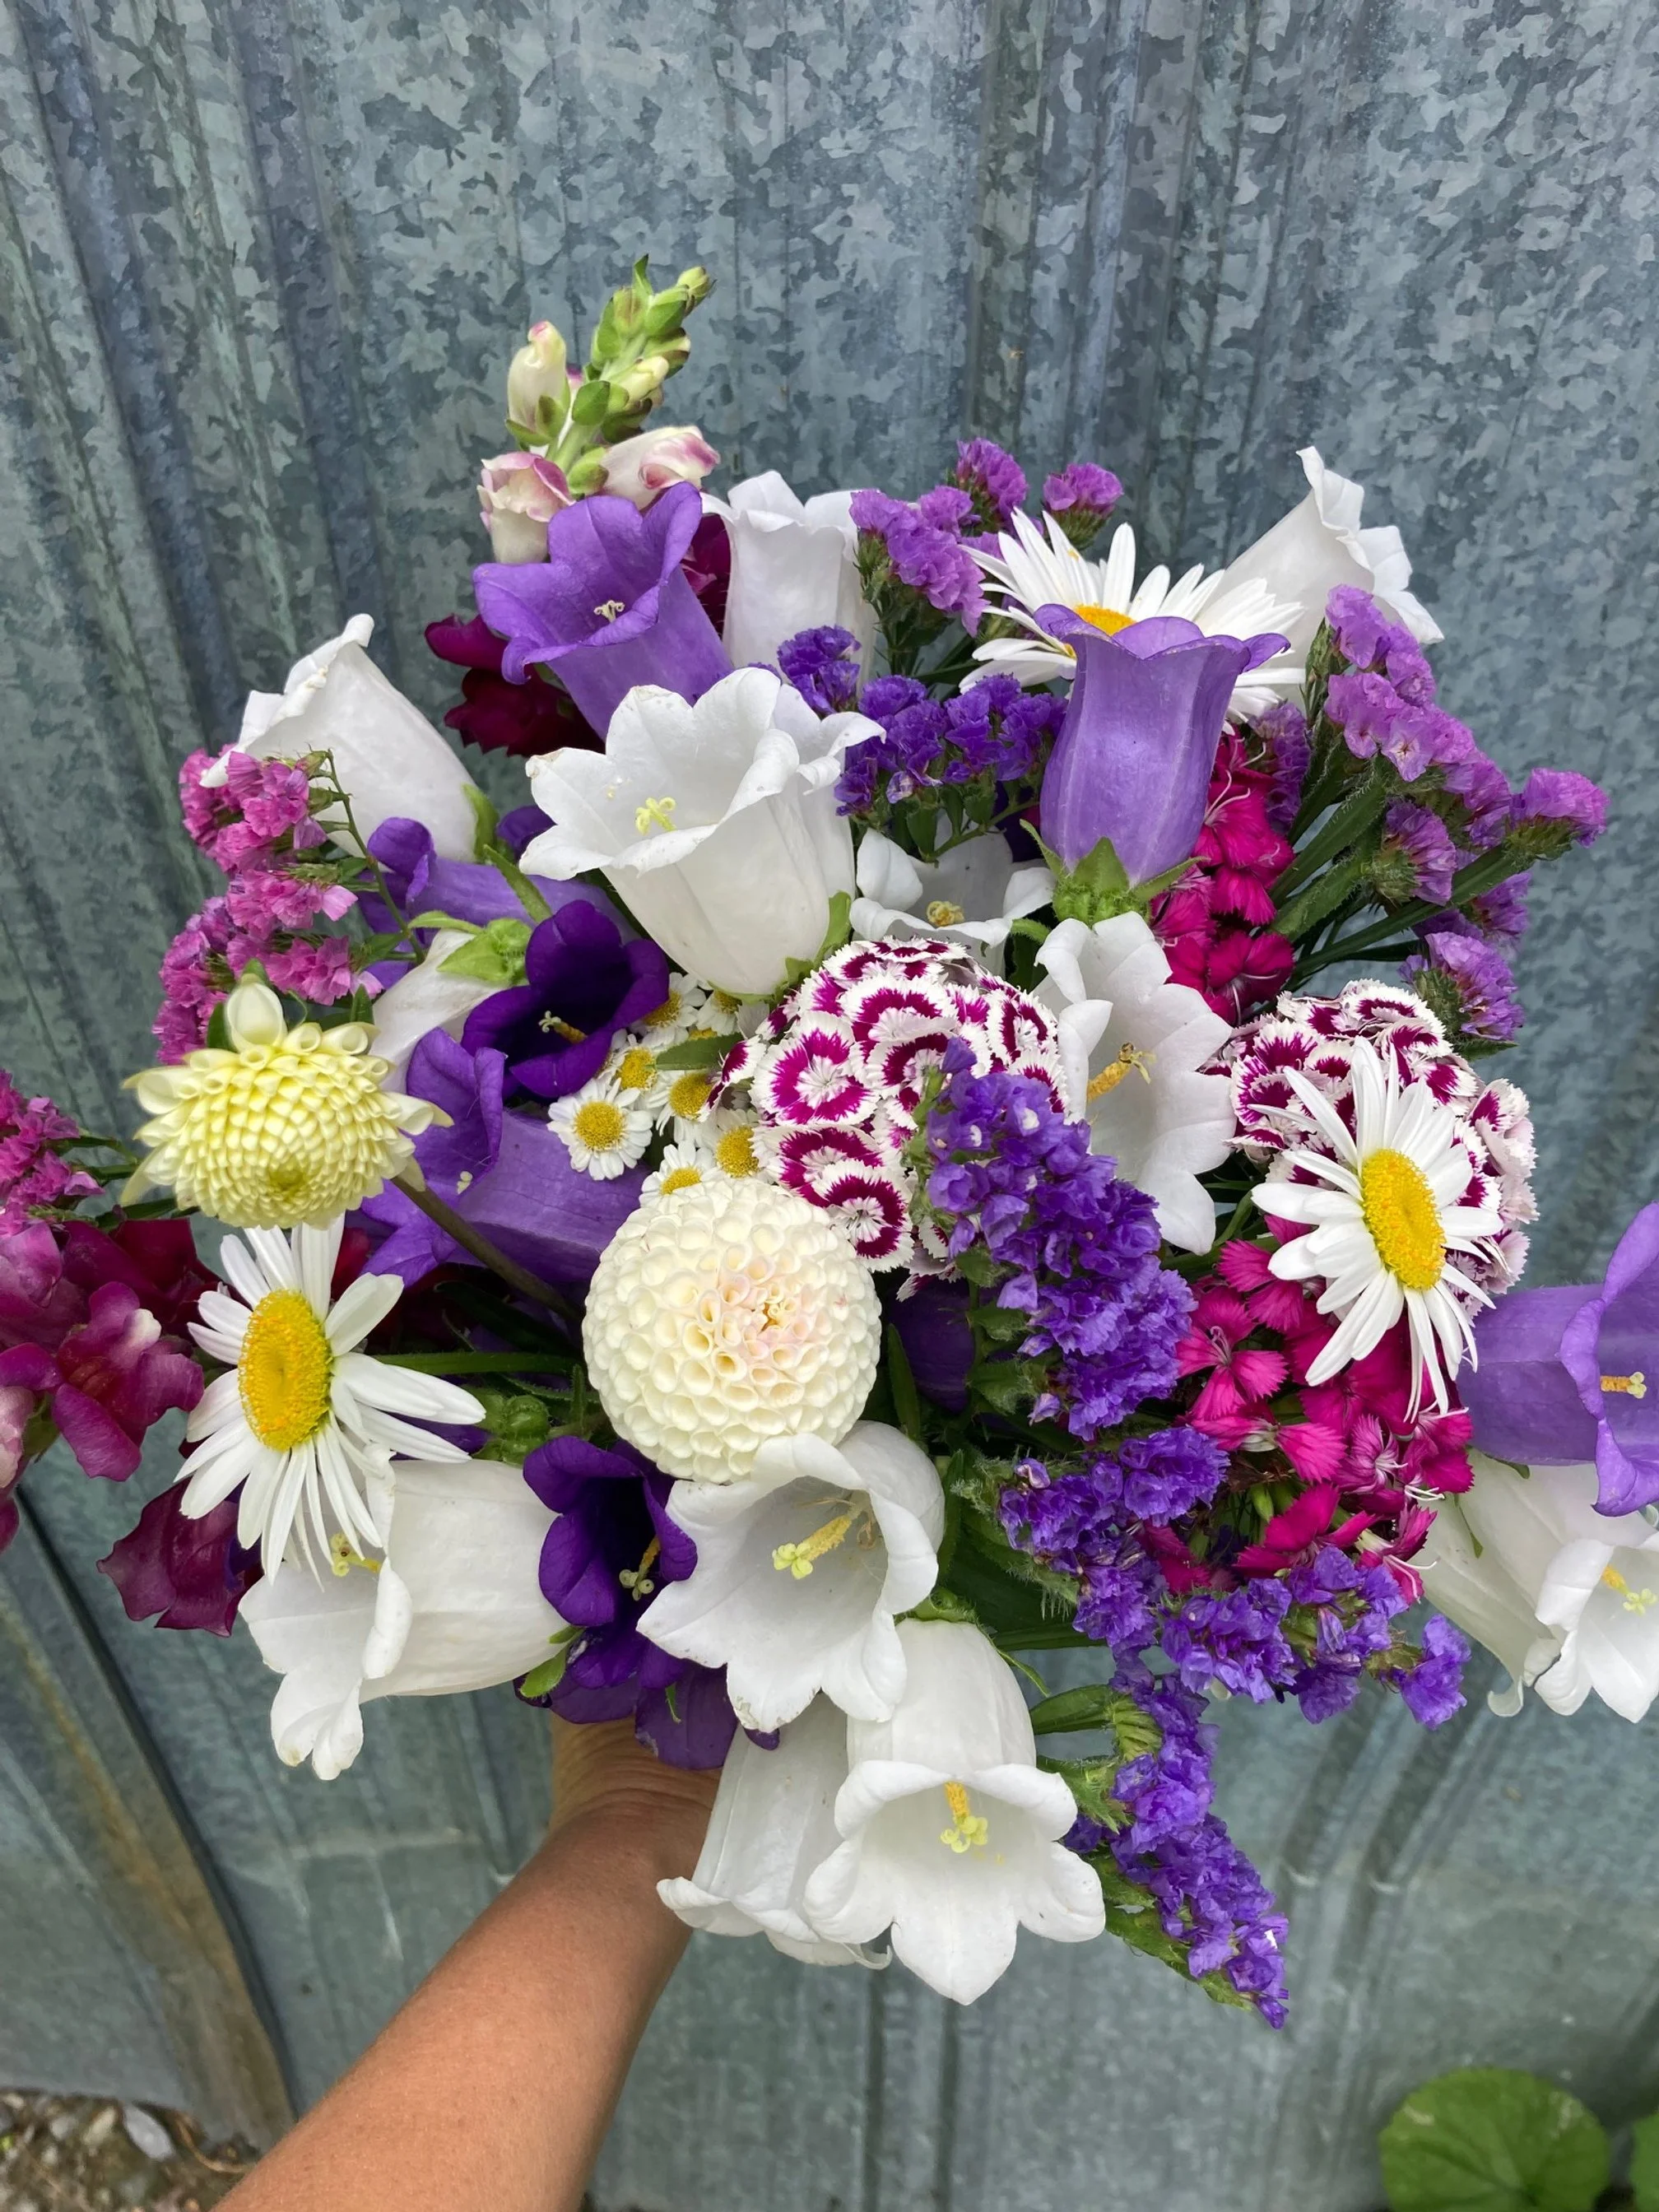
bouquet with Canterbury bells, peonies, feverfew and foliage

red, white and blue bouquet
red, white and blue bouquet
Snapdragons
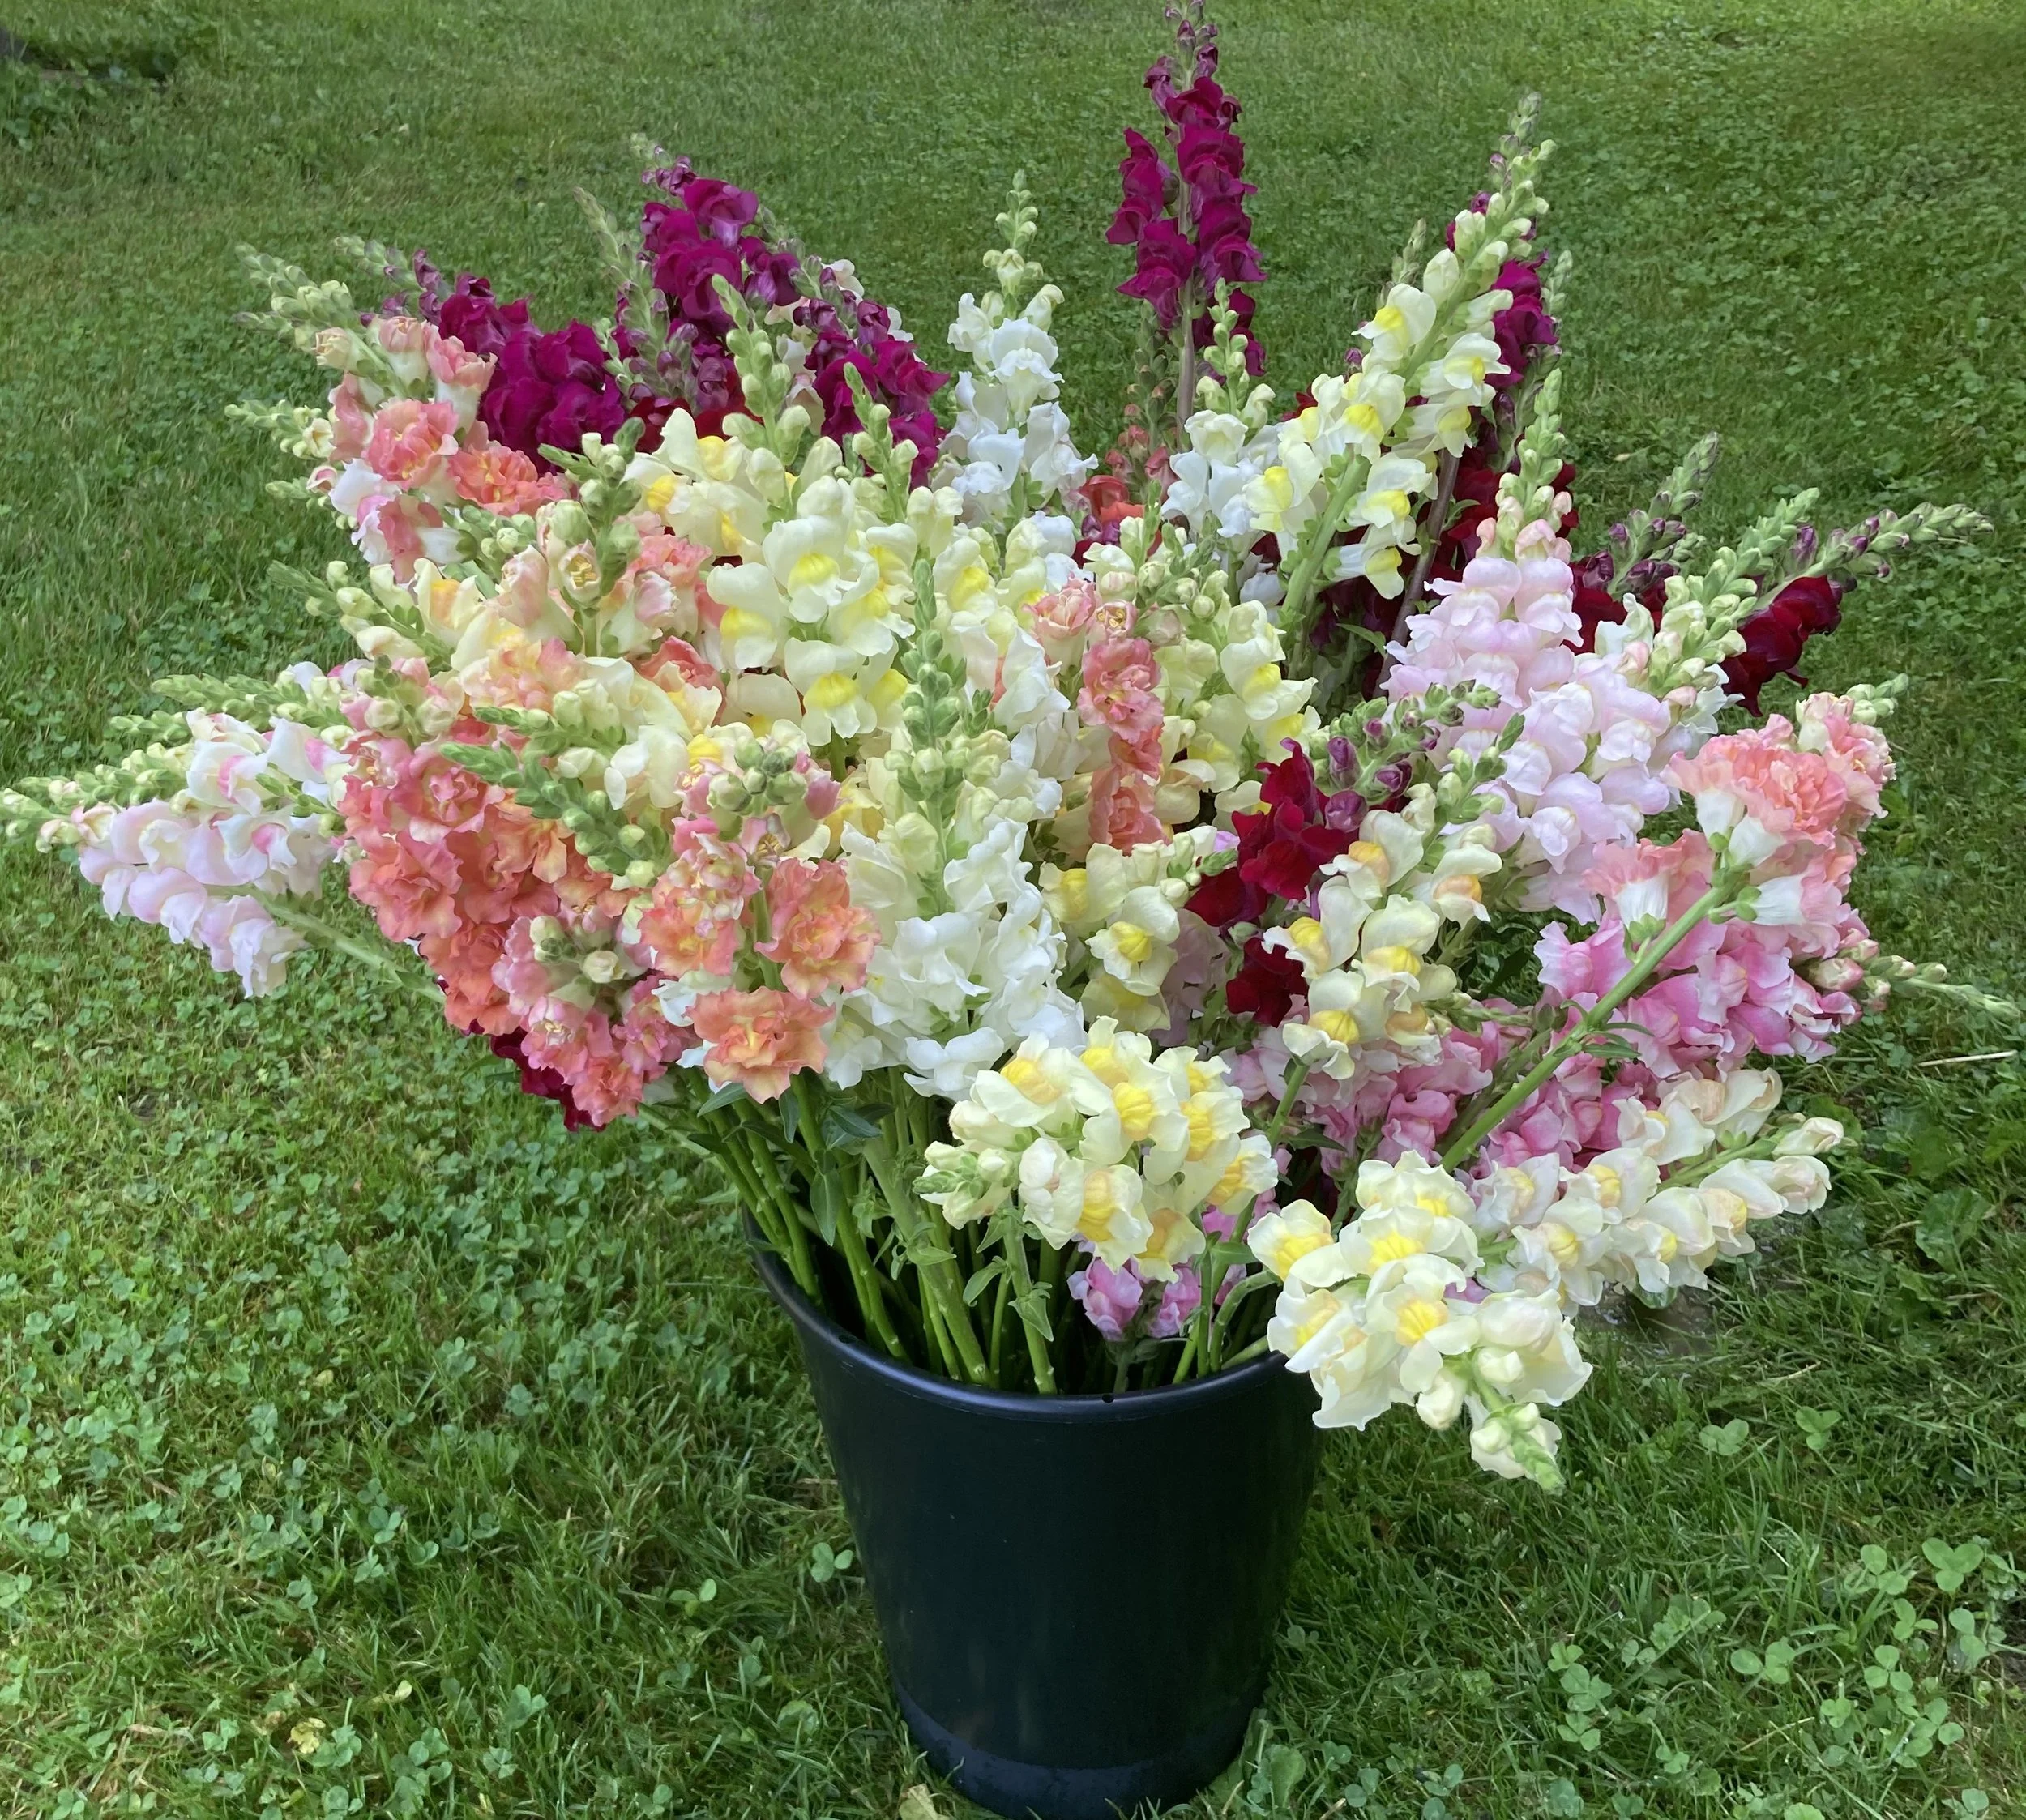
Snapdragons are one of my favorite spring spike elements in my bouquets. They come in a wide array of colors and have a wonderful sweet smell that’s subtle, not overwhelming. A lot of flower farmers grow stock as their spring spike element which is similar to snapdragon in many ways. The biggest difference is that stock only shoots up one stem with one bloom then it’s done. Snapdragons, if you pinch them when they’re young, they will send up multiple stems meaning more blooms. They will also rebloom. I usually get a big flush of blooms in the spring and fall with consistent but less blooms throughout the summer months. They are a cool flower so they prefer to start growing in cool weather meaning I always plant my baby seedlings out before our last frost date in the spring, usually sometime in April. I start the seeds in February and get blooms usually the middle to end of June. I don’t have a hoop house yet, so they are not protected or covered in any way.
Snapdragon seeds are tiny, they look like dust in your hand. Some seeds come pelleted with a coating on them that makes them much easier to work with. I start them in a 20 channel tray. I number each of the rows then keep track of what I planted in row 1, what I planted in row 2, etc. Once they germinate I transplant them into a 72 cell tray where they will stay and grow for 4-6 weeks. I then harden them off and eventually transplant outside.
I grow mostly the Potomac series in many different colors. I also grow one called Madame Butterfly Bronze with White which has a beautiful double almost frilly bloom. In the past I’ve also grown the Costa series which is supposed to bloom a little earlier than the Potomac, but I didn’t see much difference so I stopped growing that one. I usually get my seeds from Johnny’s Selected Seeds. They cost $5.60 for 50 seeds in 2025.
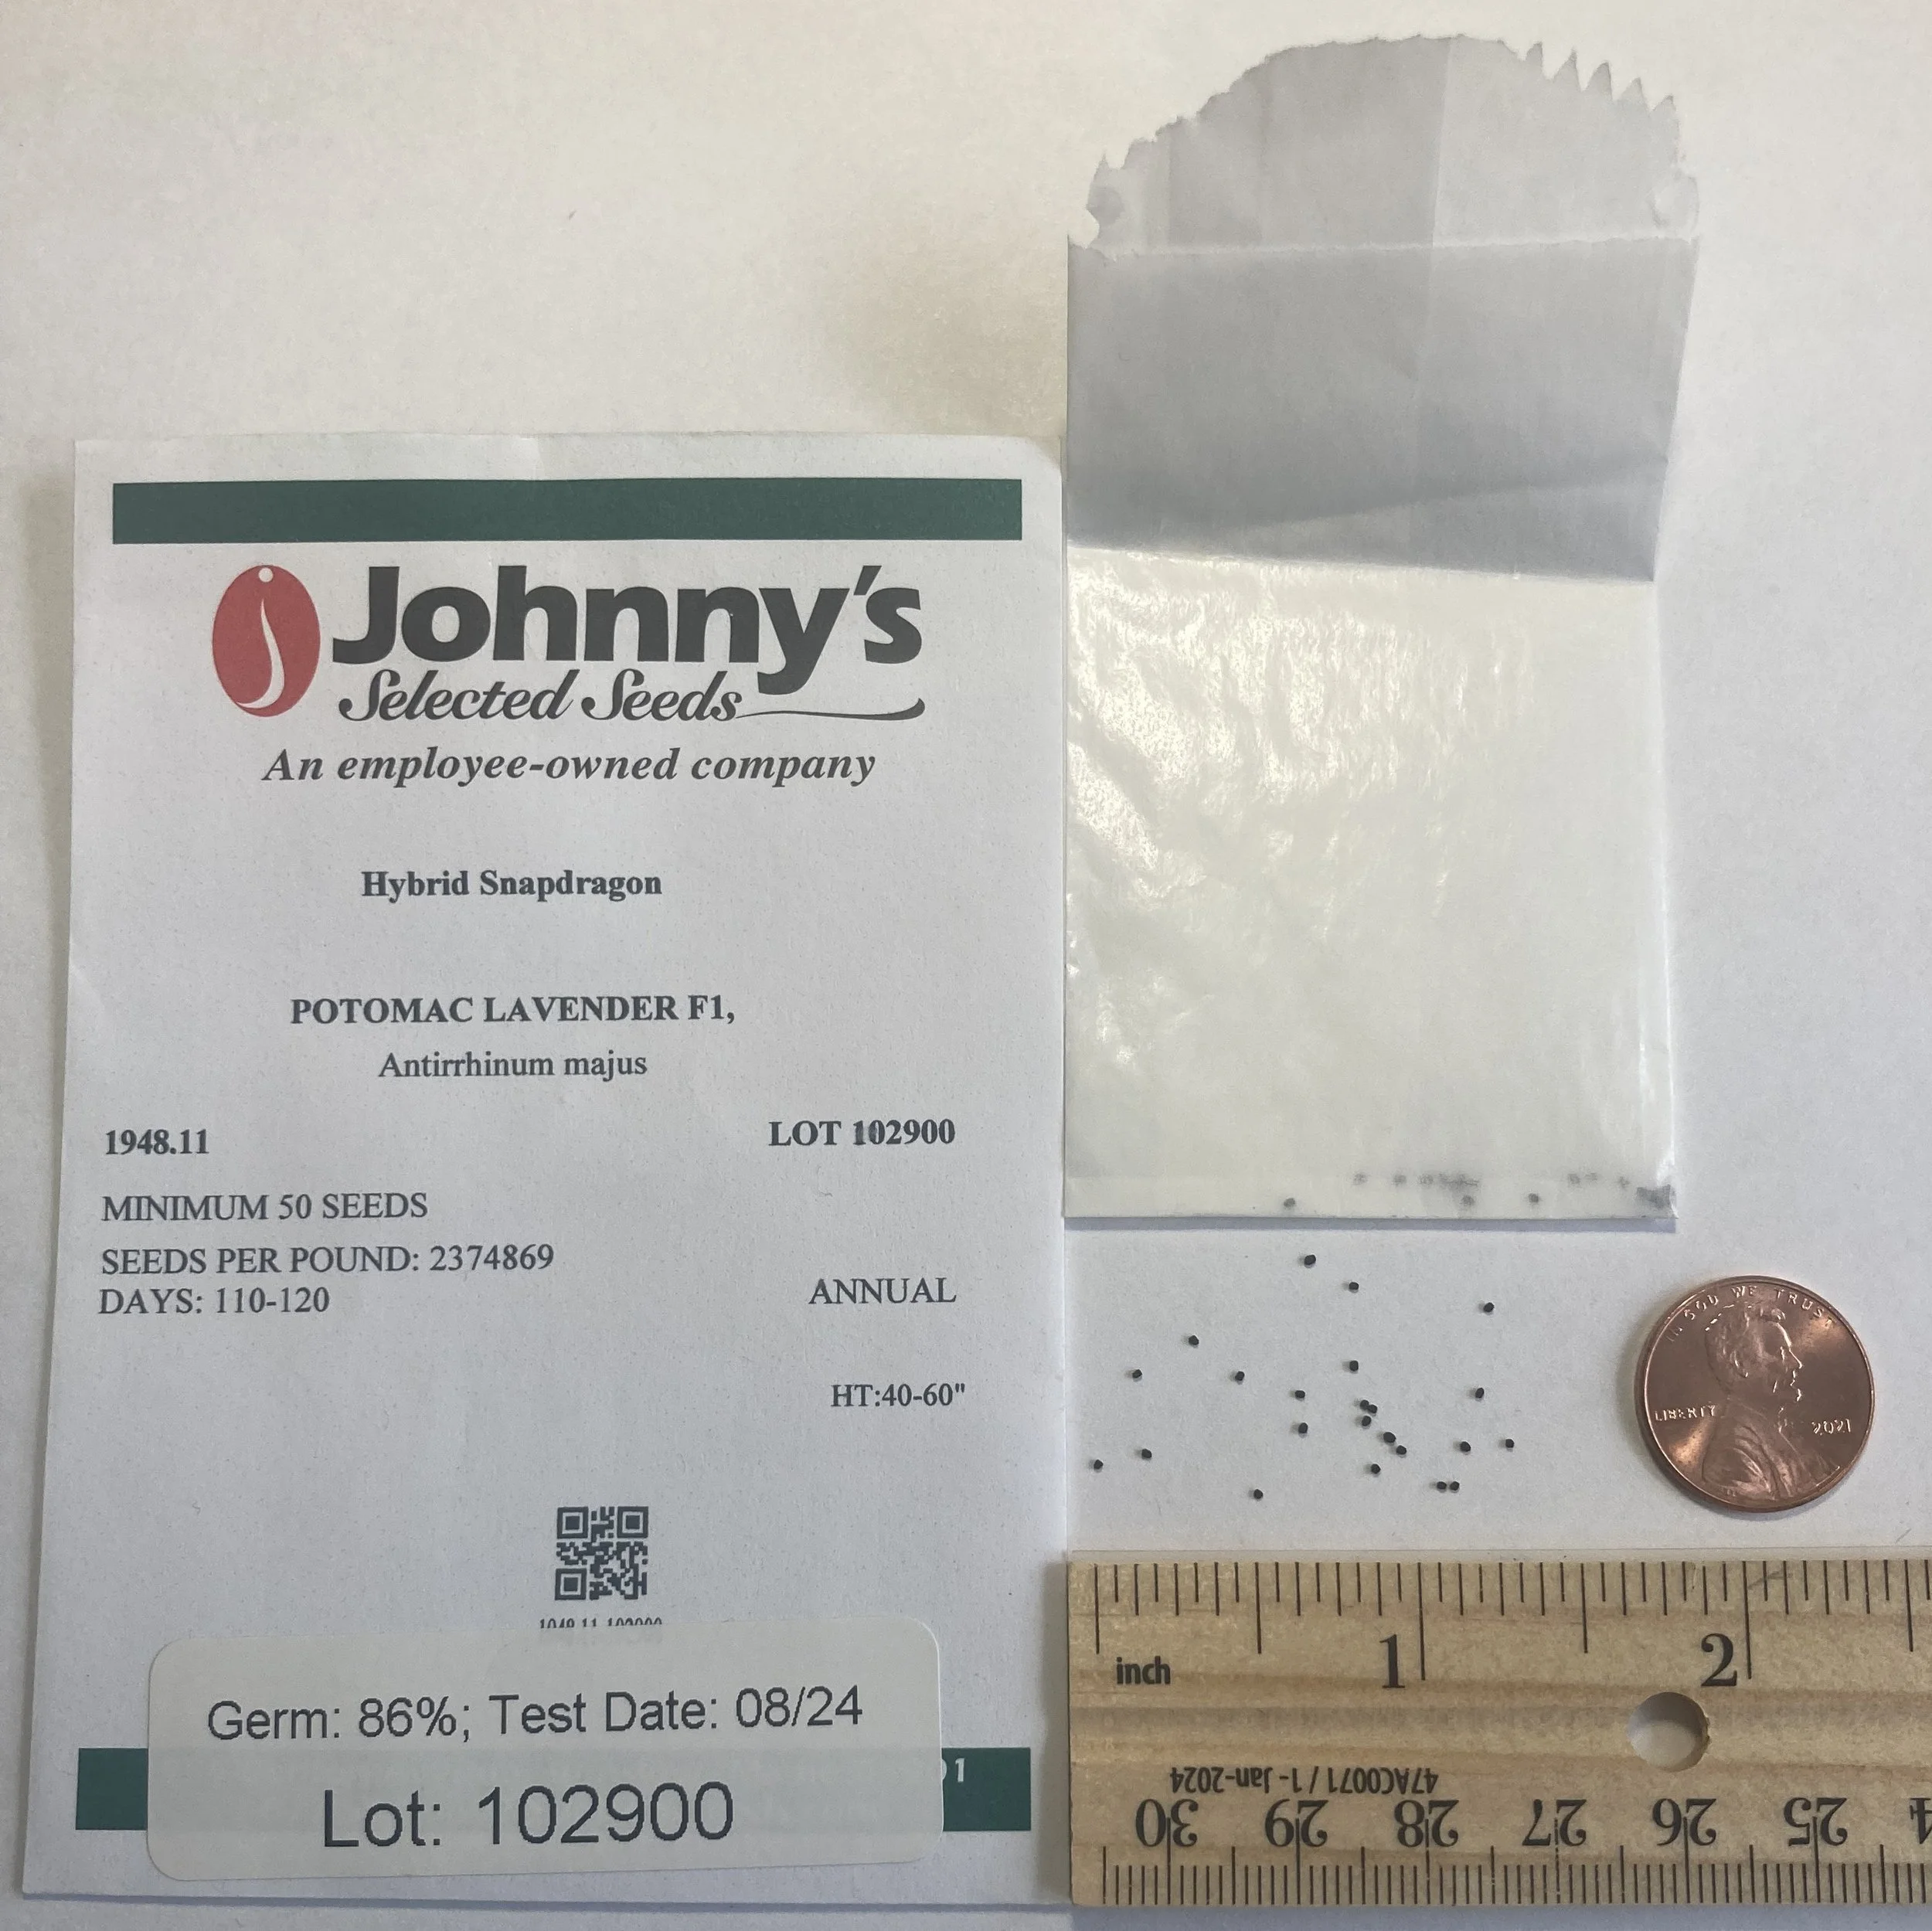
tiny snapdragon seeds non pelleted come in a small bag
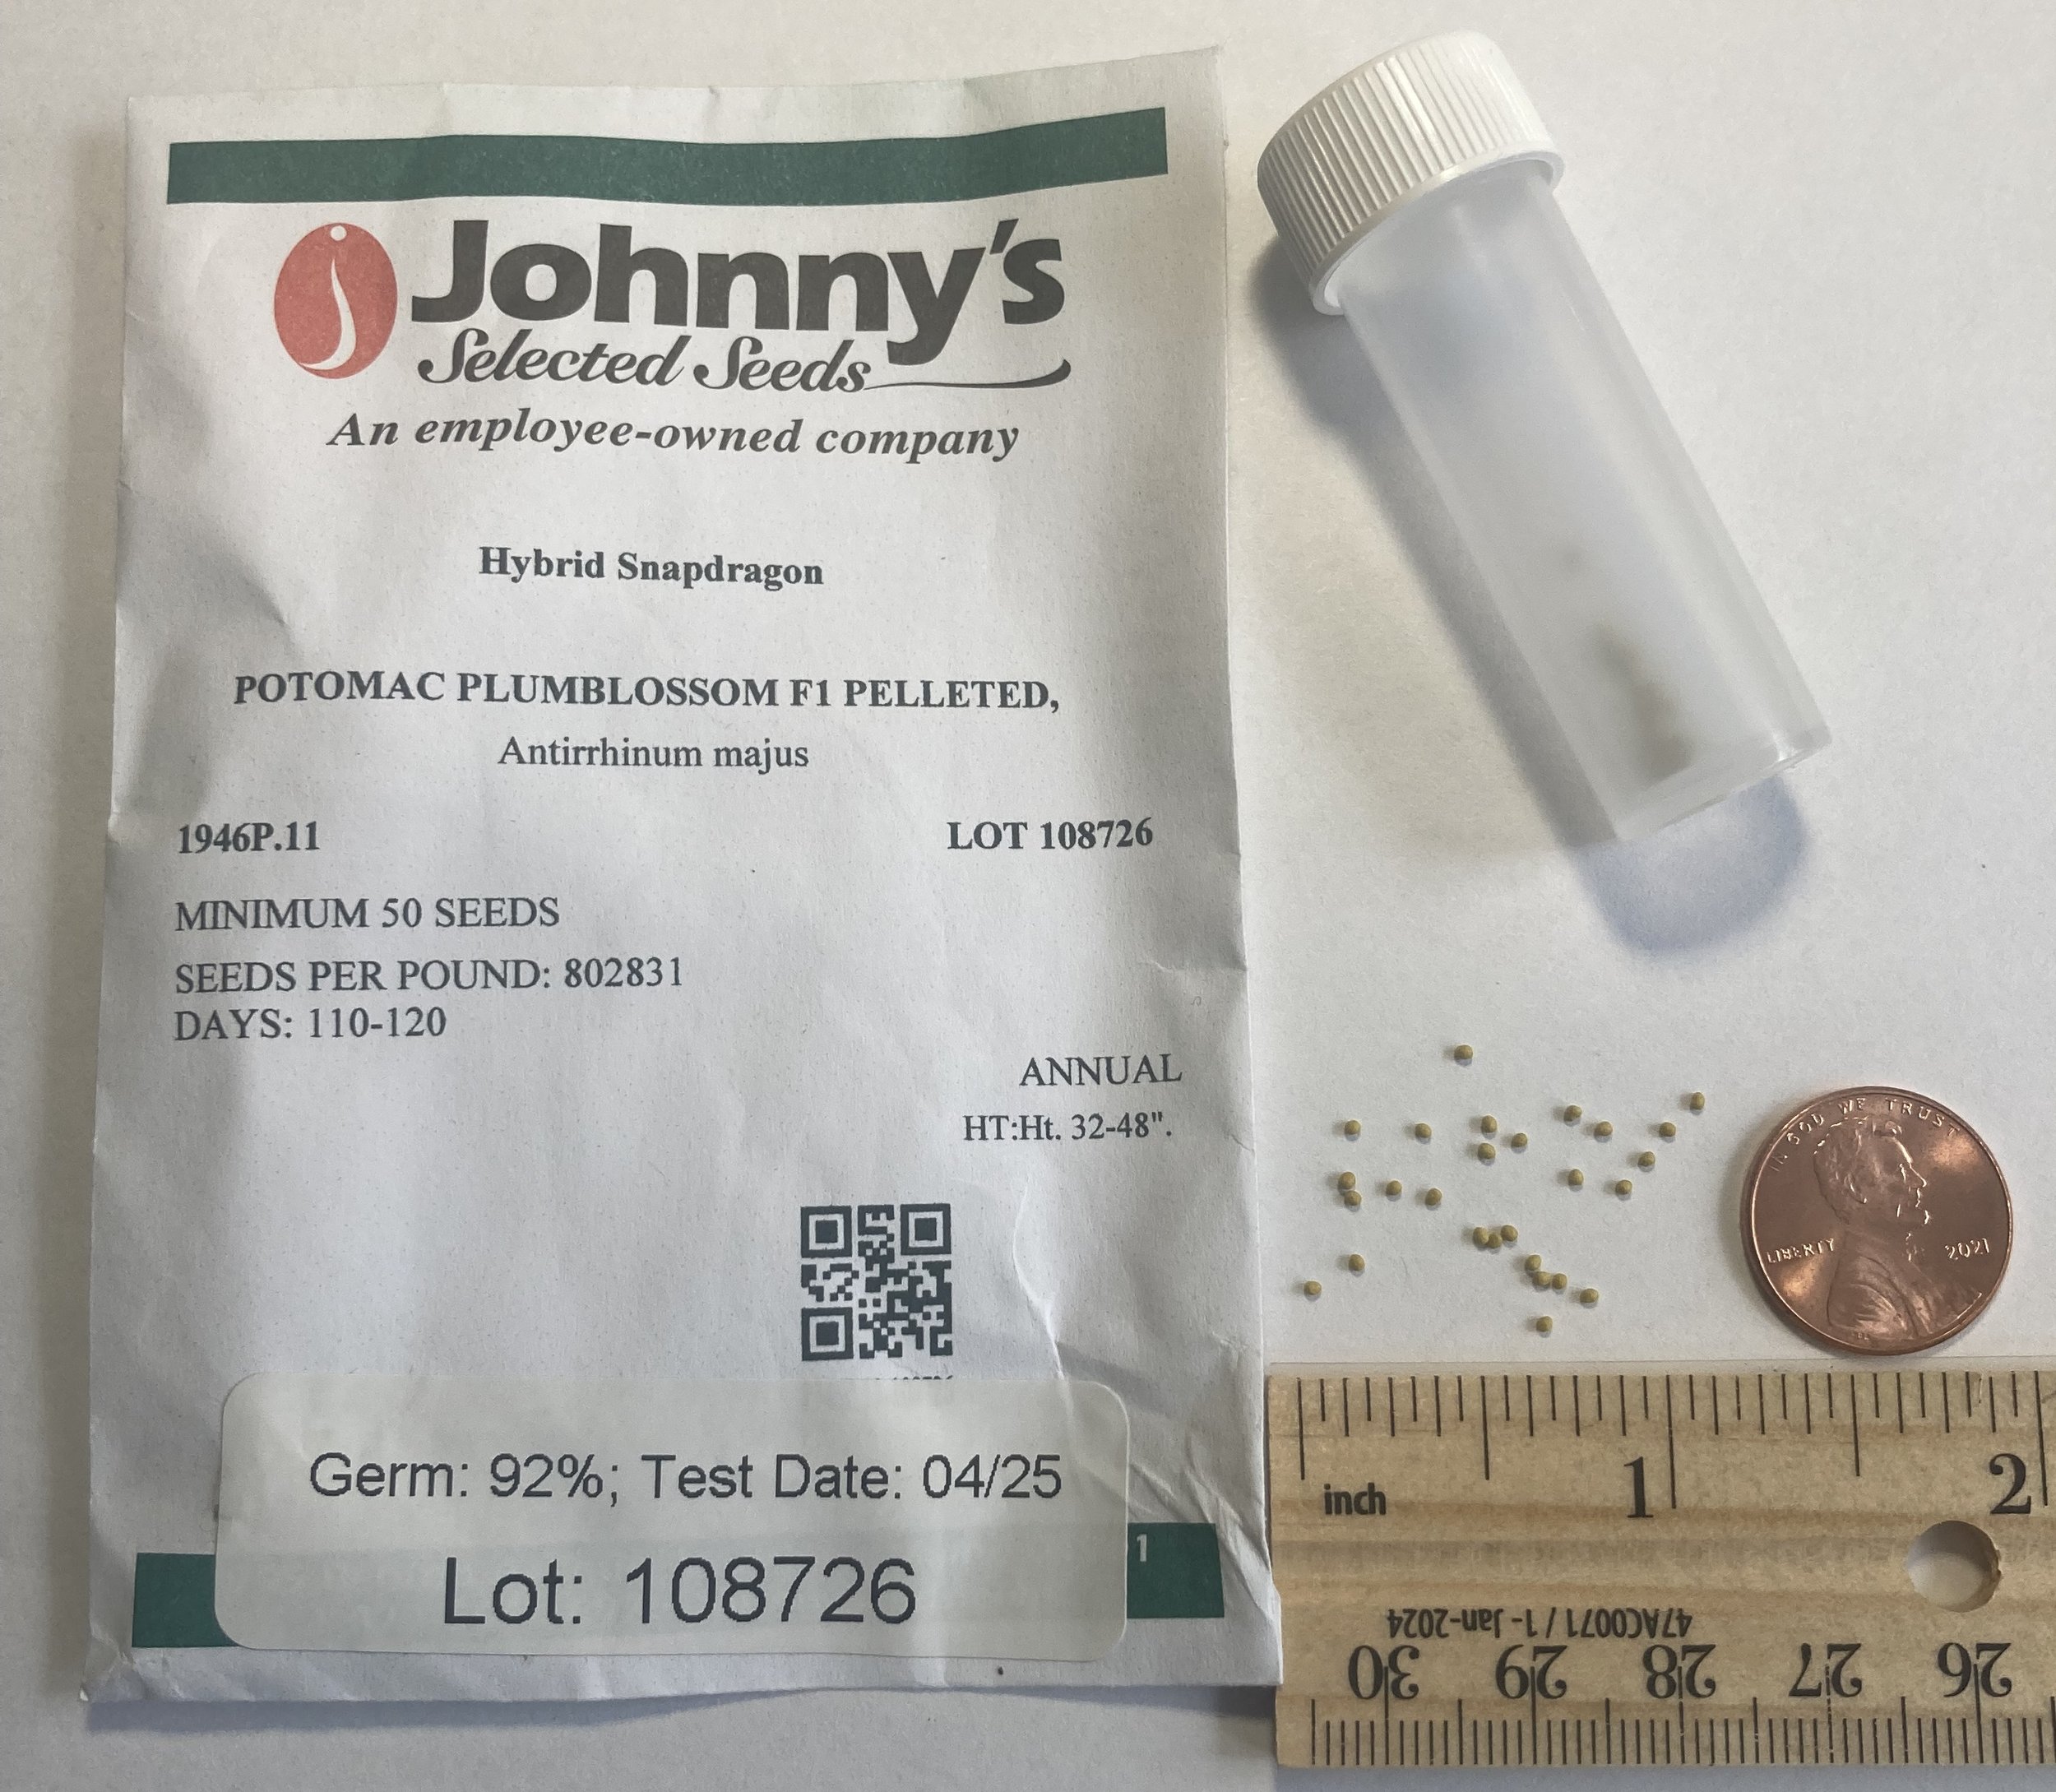
tiny snapdragon seeds pelleted come in a small plastic tube
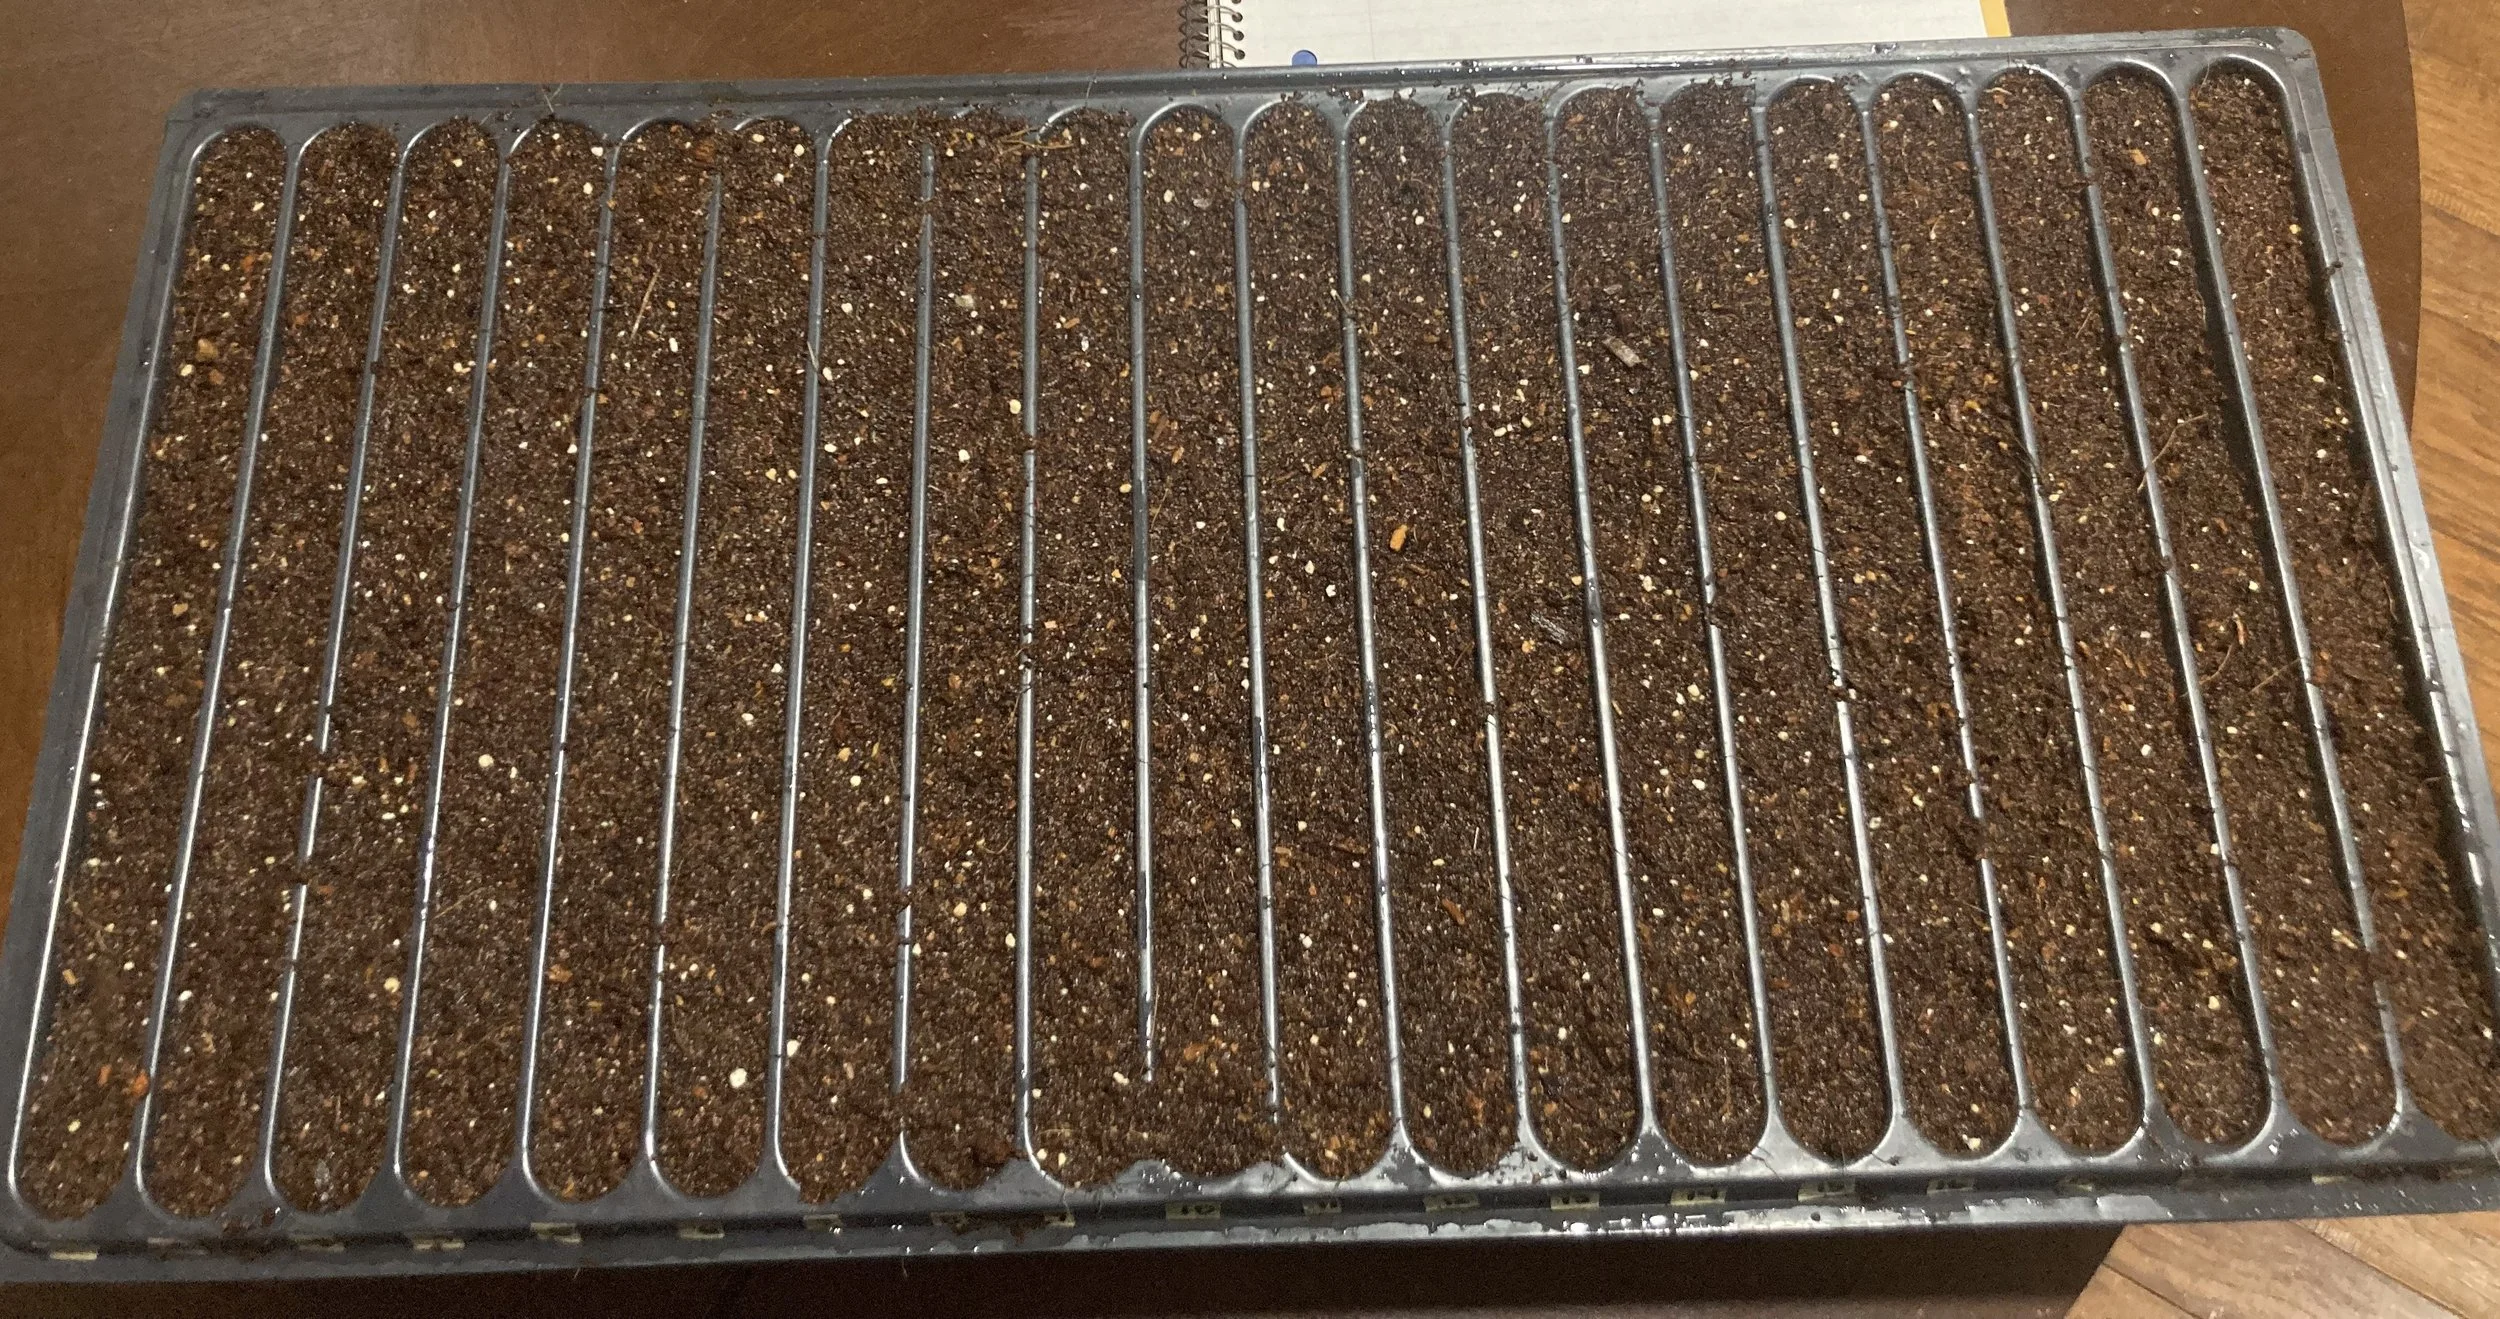
20 channel tray
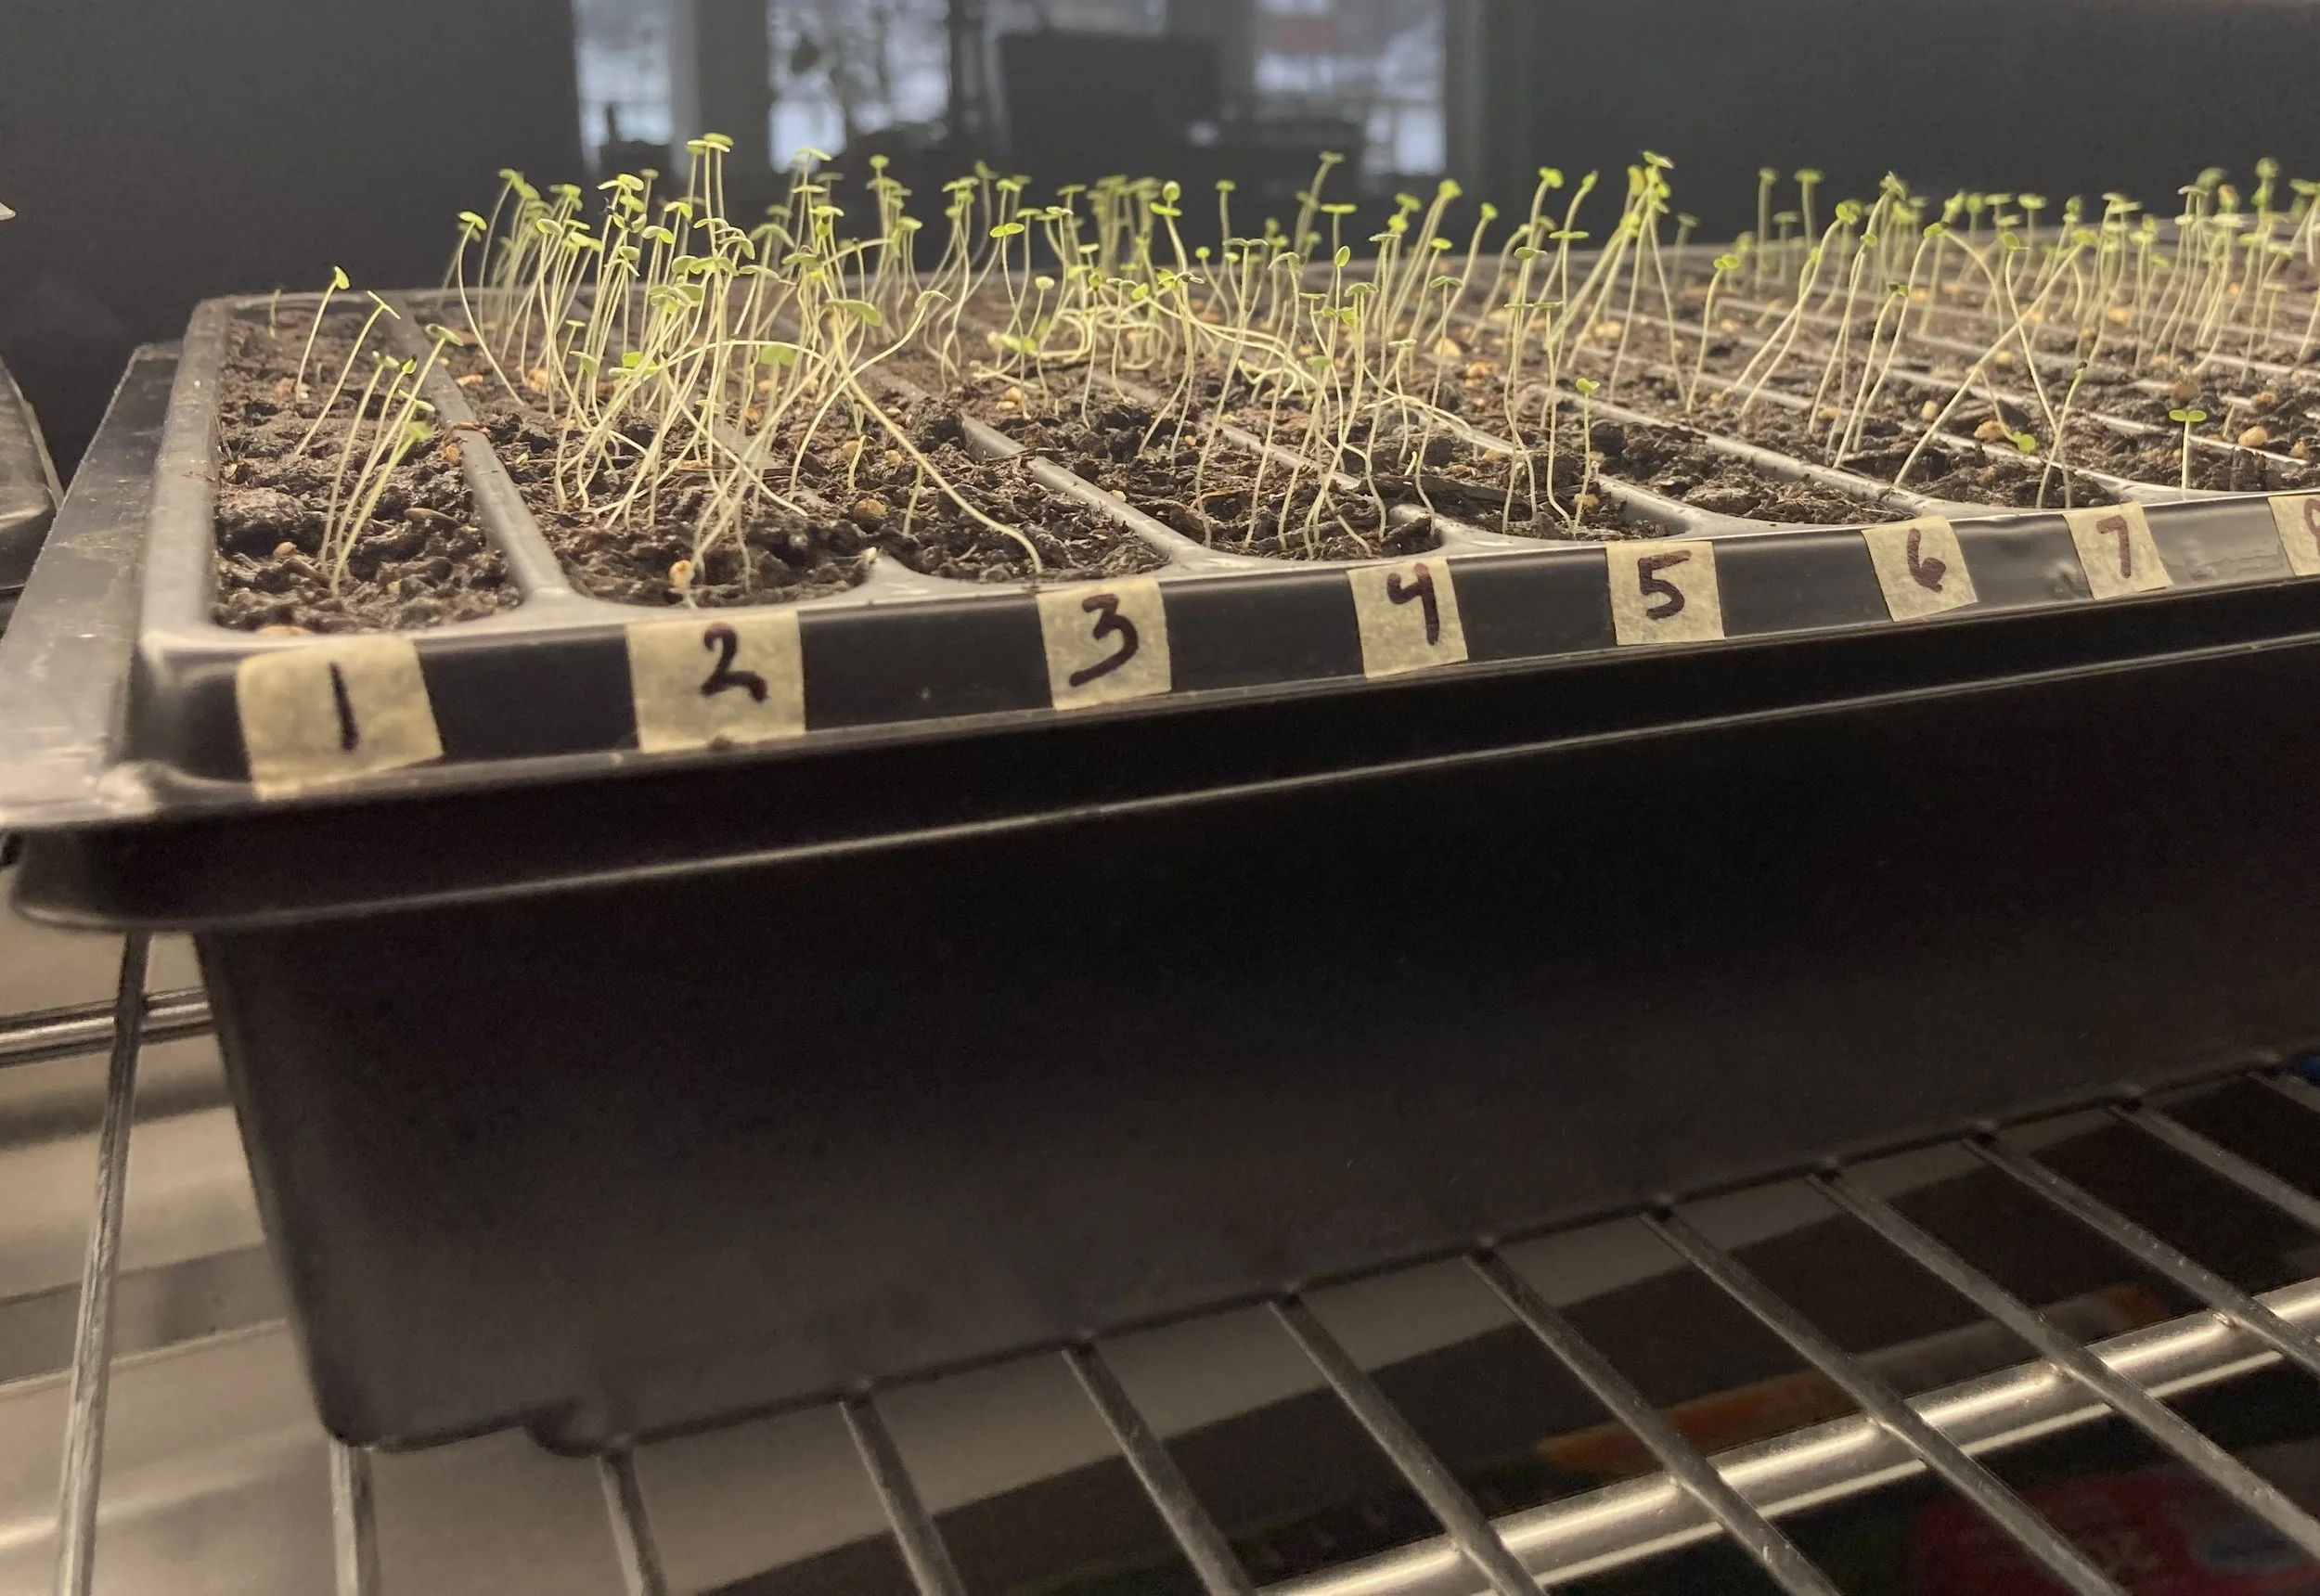
March 5th - snapdragons - I left the humidity dome on too long and they became spindly
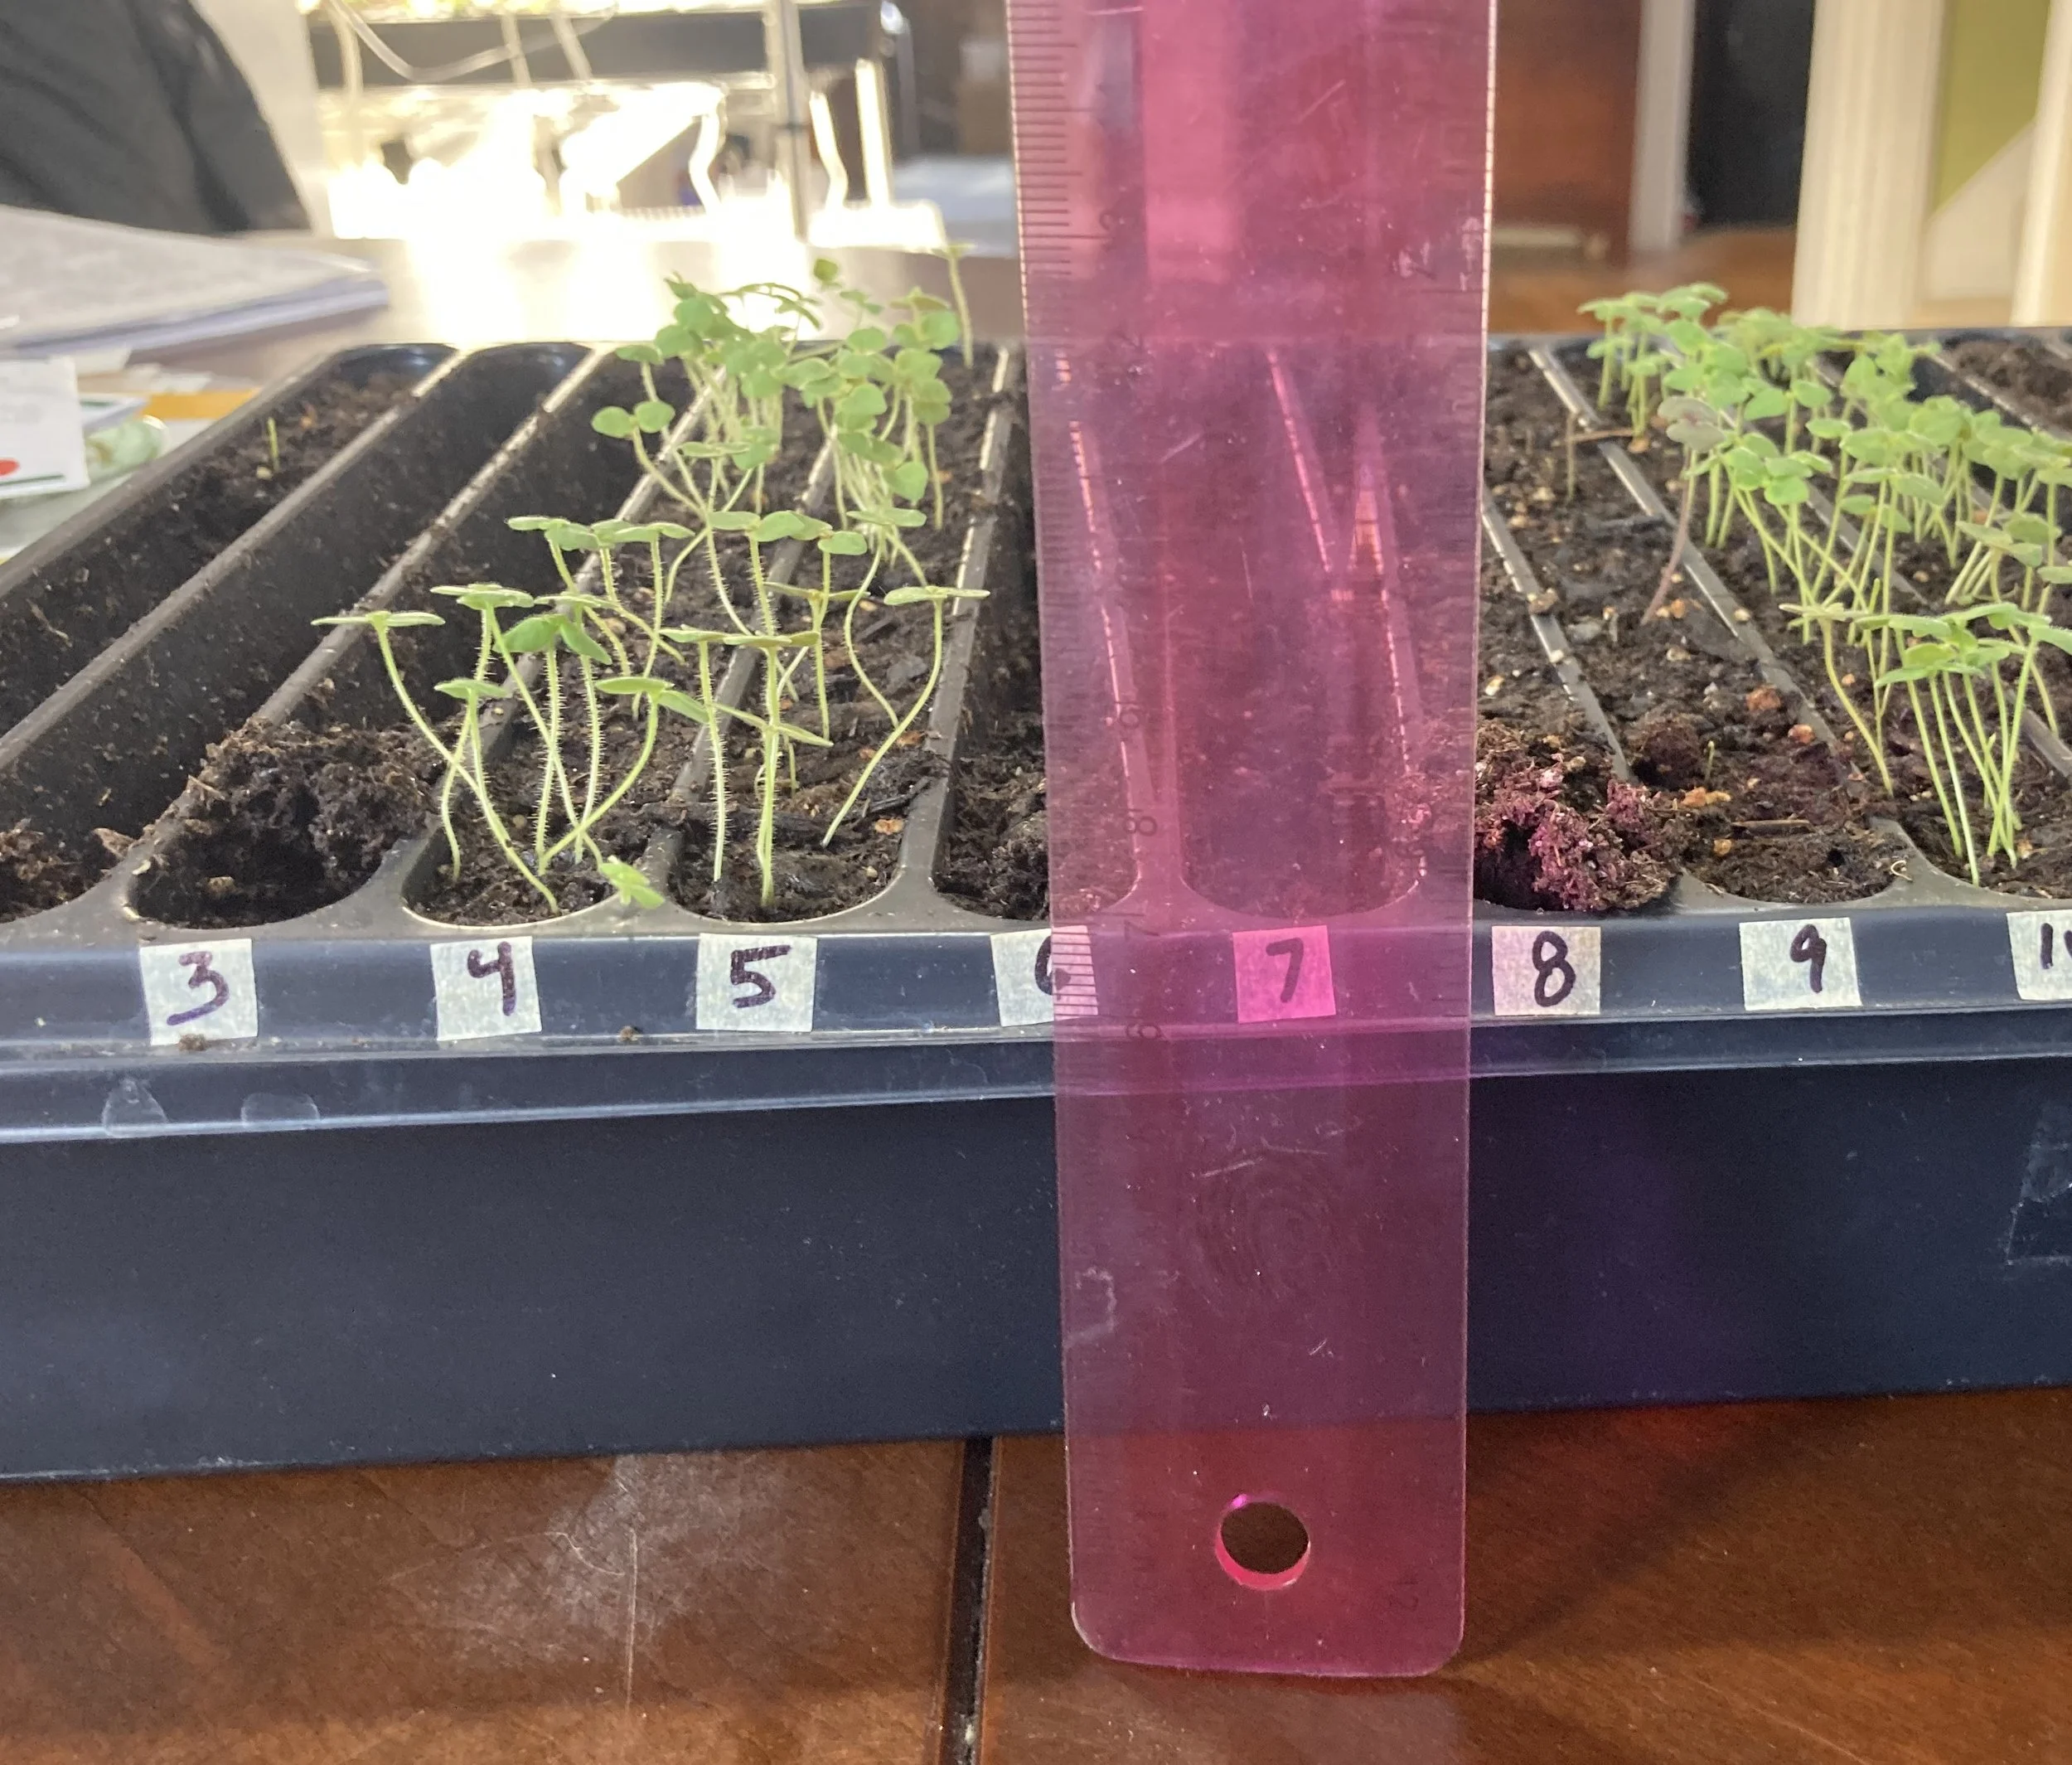
March 12th - look how much they've grown in one week, the pink stripe is a ruler
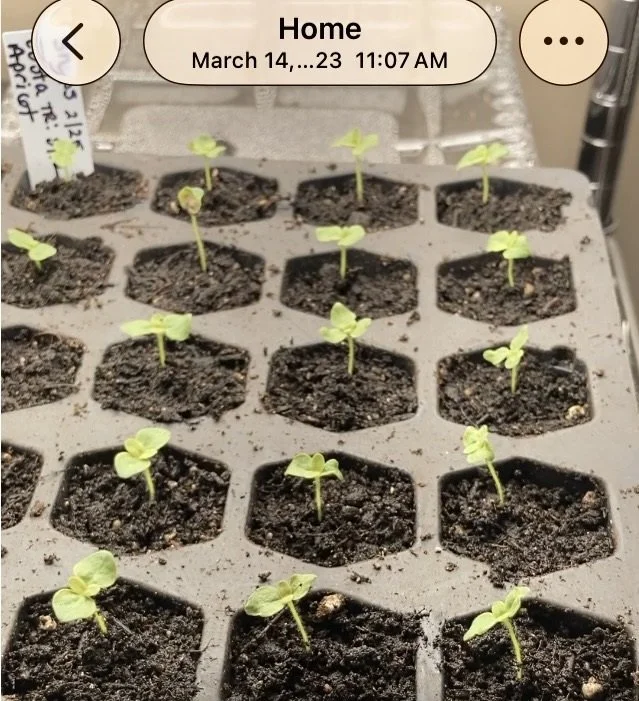
March 14 - transplanted into 72 cell tray, I planted them deep so no more spindly, stretched necks
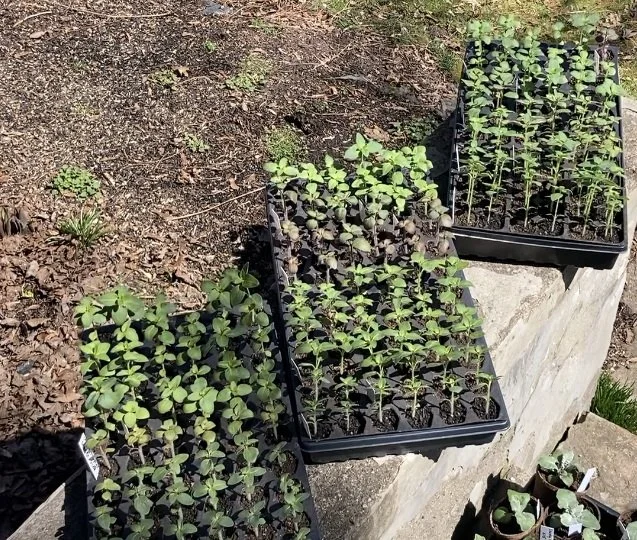
April 1 - hardening off
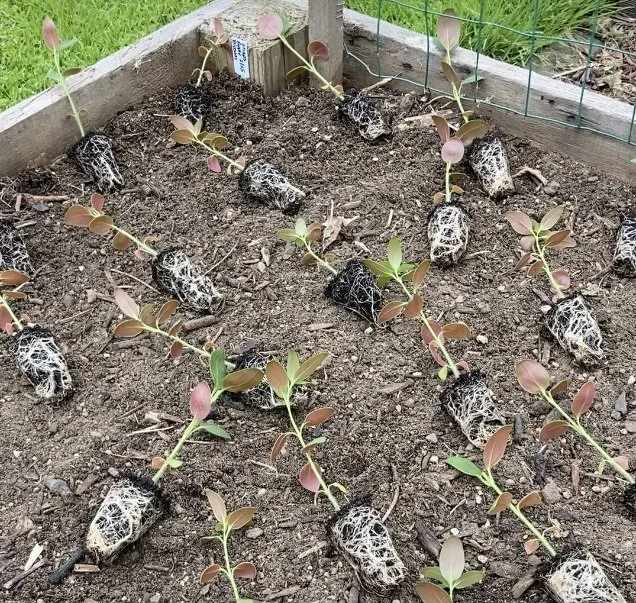
April 28 - snapdragon seedlings ready to plant out, see all the roots?
April 28 - all planted
May 22 - snapdragons with support netting
June 11 - snapdragons getting big

June 21 - starting to form buds
July 6 - snapdragon video, looks best full screen on a monitor
Marigolds
Marigolds have bright, bold colors that mix well with a lot of other flowers. They have a long vase life and bloom early in the summer. The varieties I grow are the Giant Yellow, Giant Orange, and Coco Gold.
I started the marigolds from seeds that I bought from Johnny’s Selected Seeds website, they cost $5.95 for a packet of 50 seeds (in 2025). This year, for the first time, I used coco gold marigold seeds that I saved from last year’s flowers, and it worked! YAY! I wasn’t sure if they’d germinate because my seeds didn’t have the dark color like the seeds I bought from Johnny’s. The interesting thing is that I got several coco gold plants, but, because of cross pollination, I also got a couple varieties that are completely different and they’re pretty cool. Check out the pictures to see what I mean. I got one plant that has a single row of petals, and another plant where the blooms looks like a hairy puff ball. How cool is that!?!
For me, the Giant Yellow bloom first, then the Giant Orange, then Coco Gold shortly after. I harvest marigolds when the center still has a hint of green in order to get the best vase life. Some people don’t like the smell of marigolds, but it’s actually the foliage that carries most of the scent. I remove all the leaves when I use them in bouquets. There is a newer variety out with no scent call Nosento, but I haven’t tried it yet. It’s a smaller plant and the blooms are yellow, not limegreen.


marigold seeds - Giant Orange

marigold seed close-up

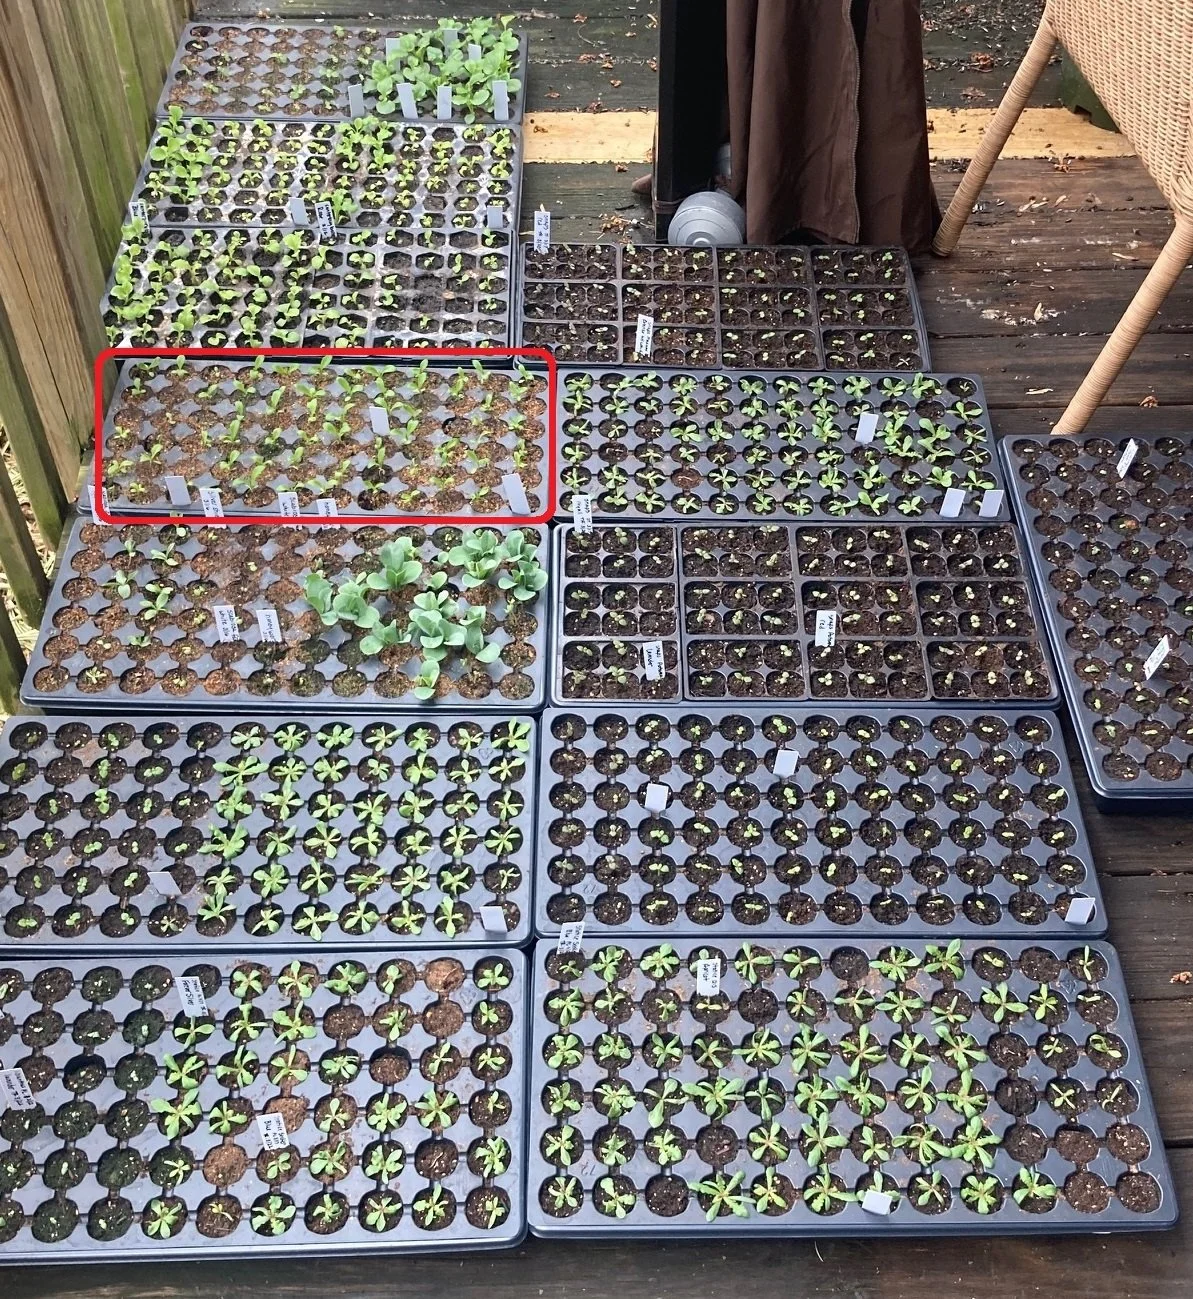
May 10th - started some Coco Gold marigolds from seeds I saved, I put 2 in each cell
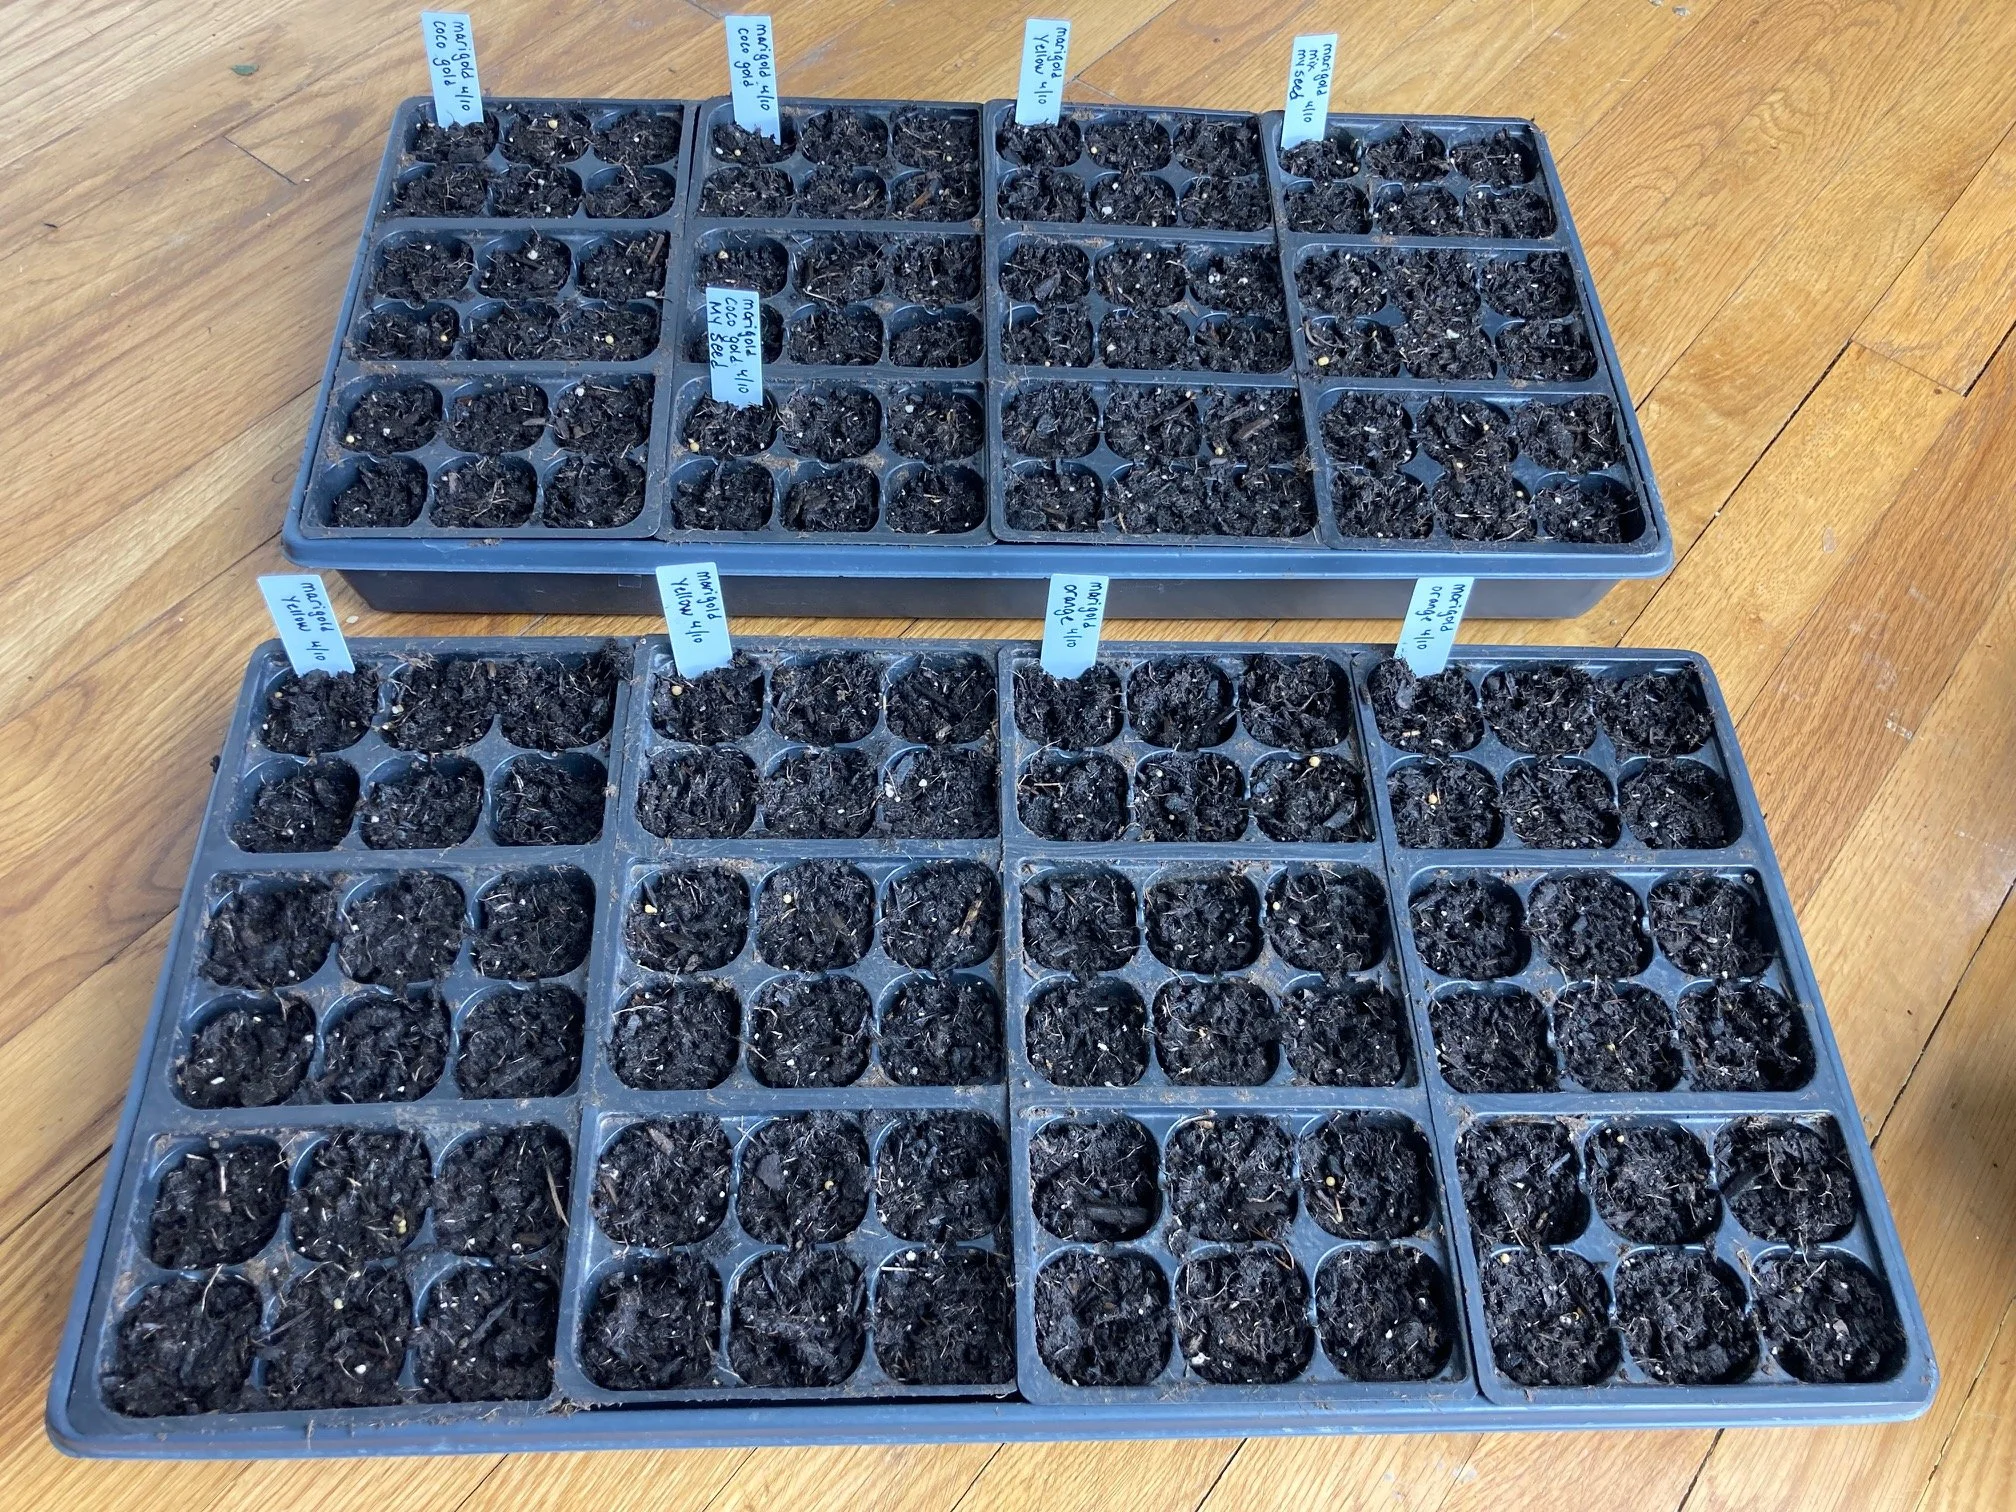
2 trays of marigolds started May 10th

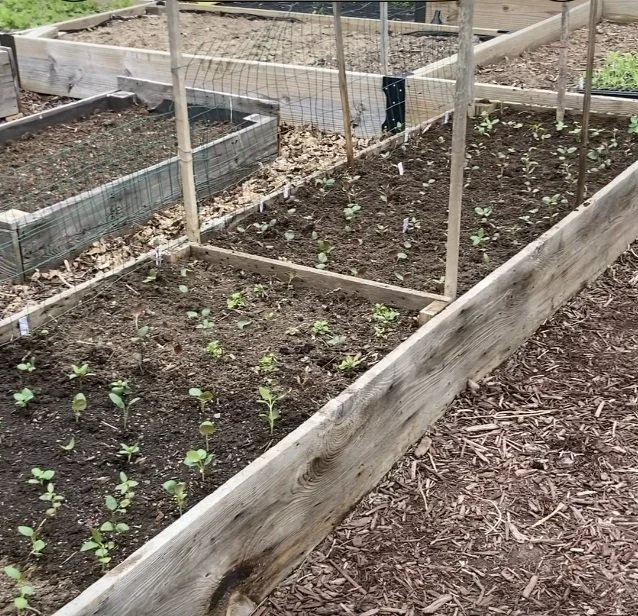
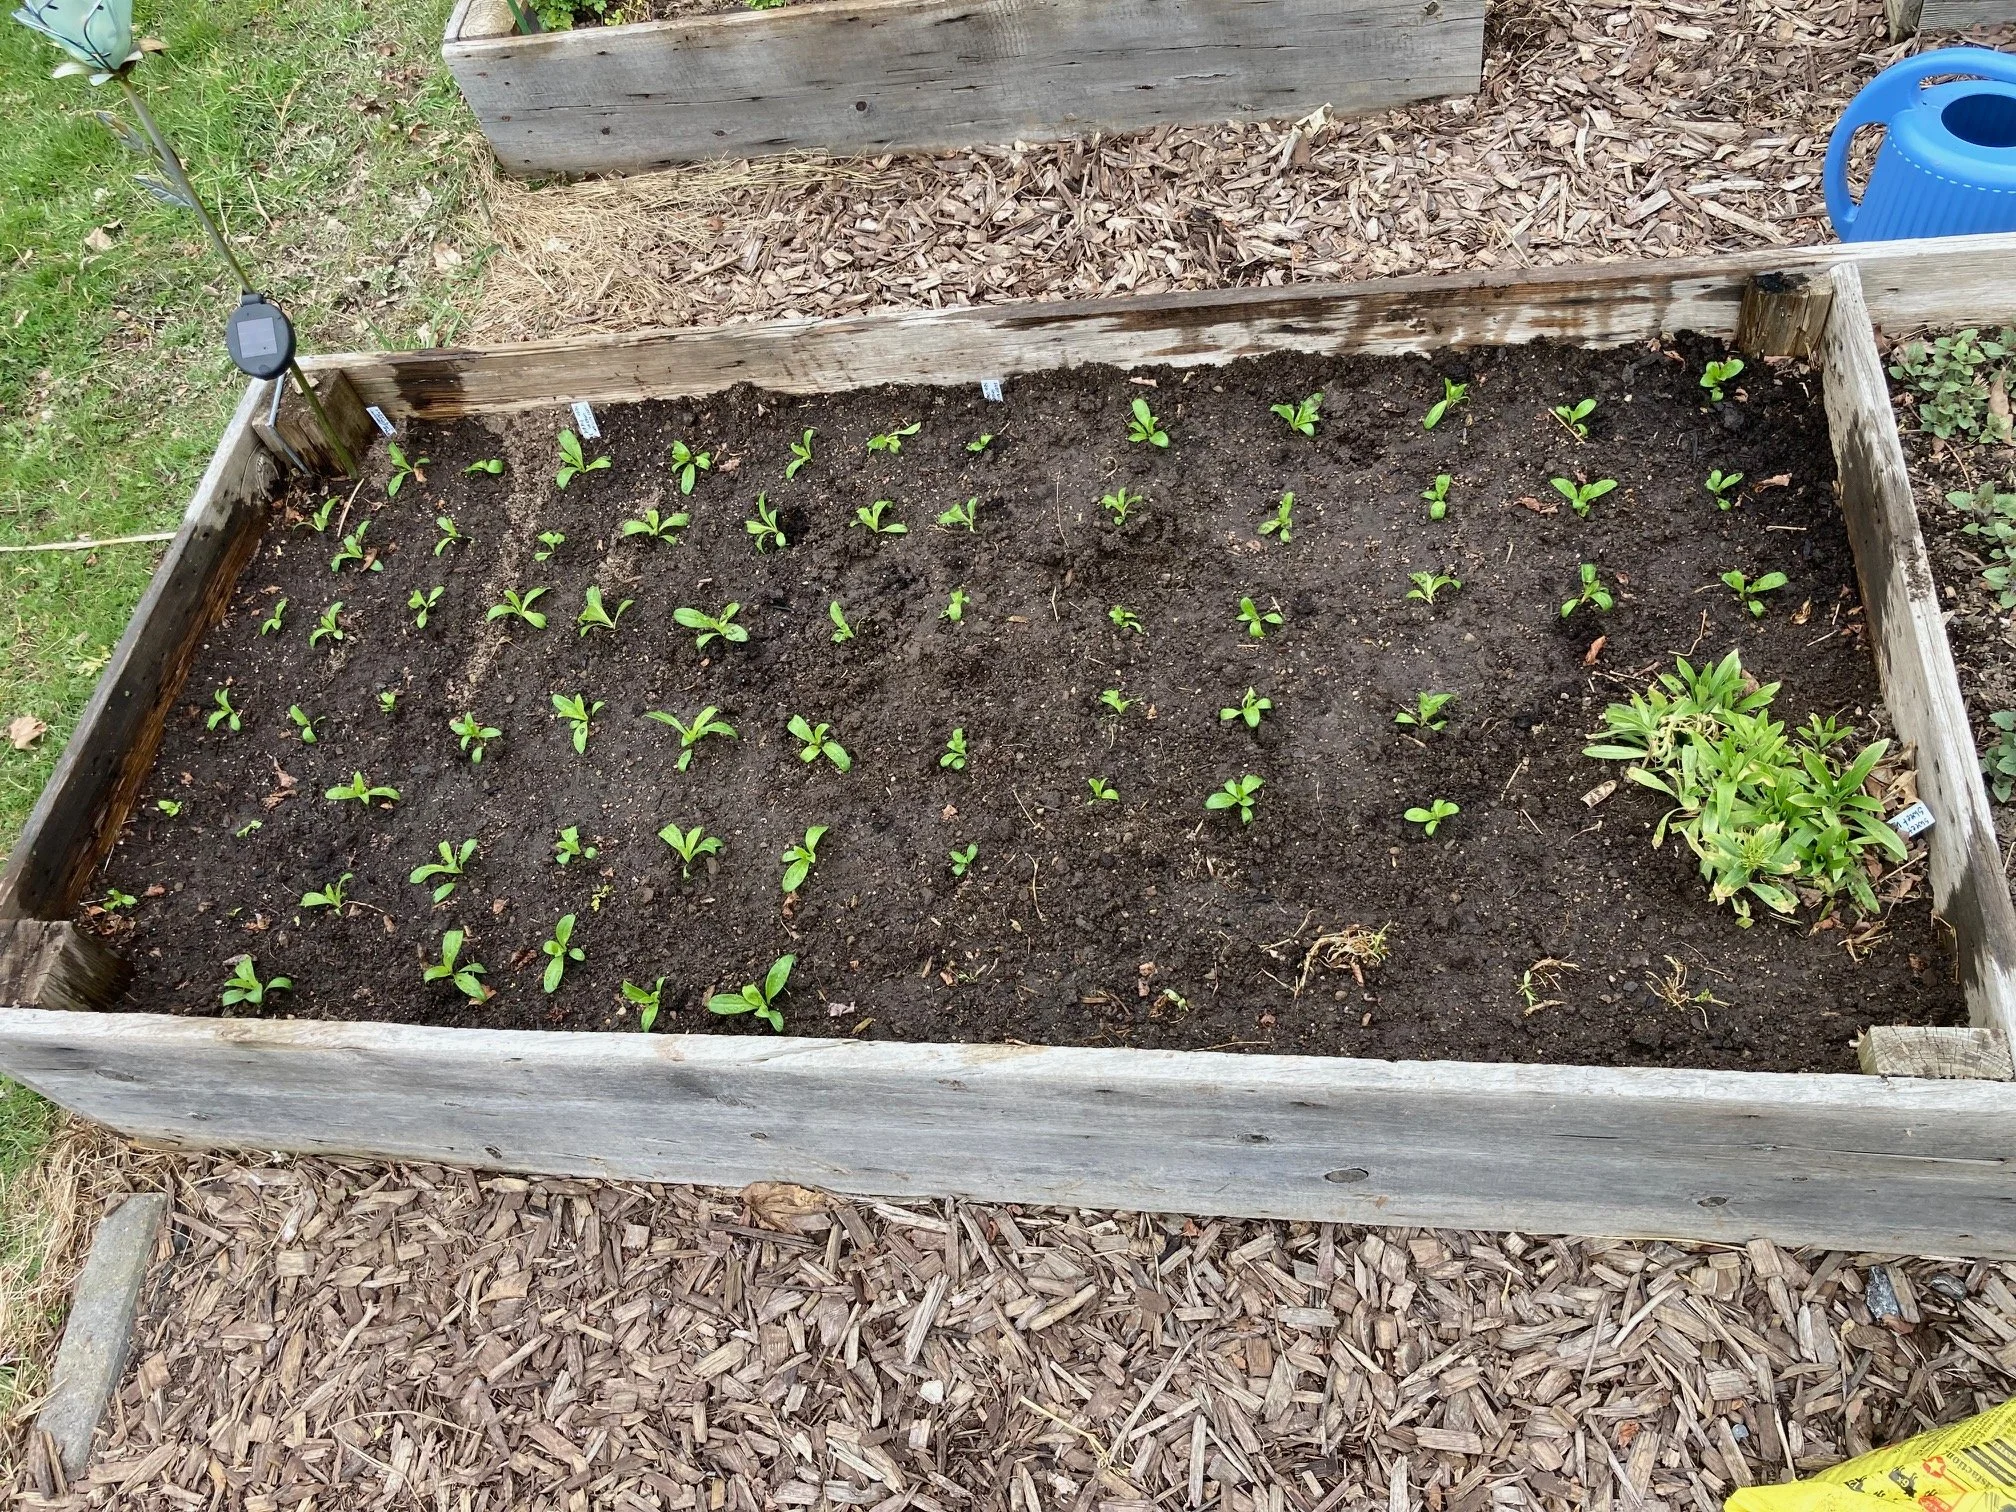
May 23 - planted marigold seedlings out in garden after hardening them off

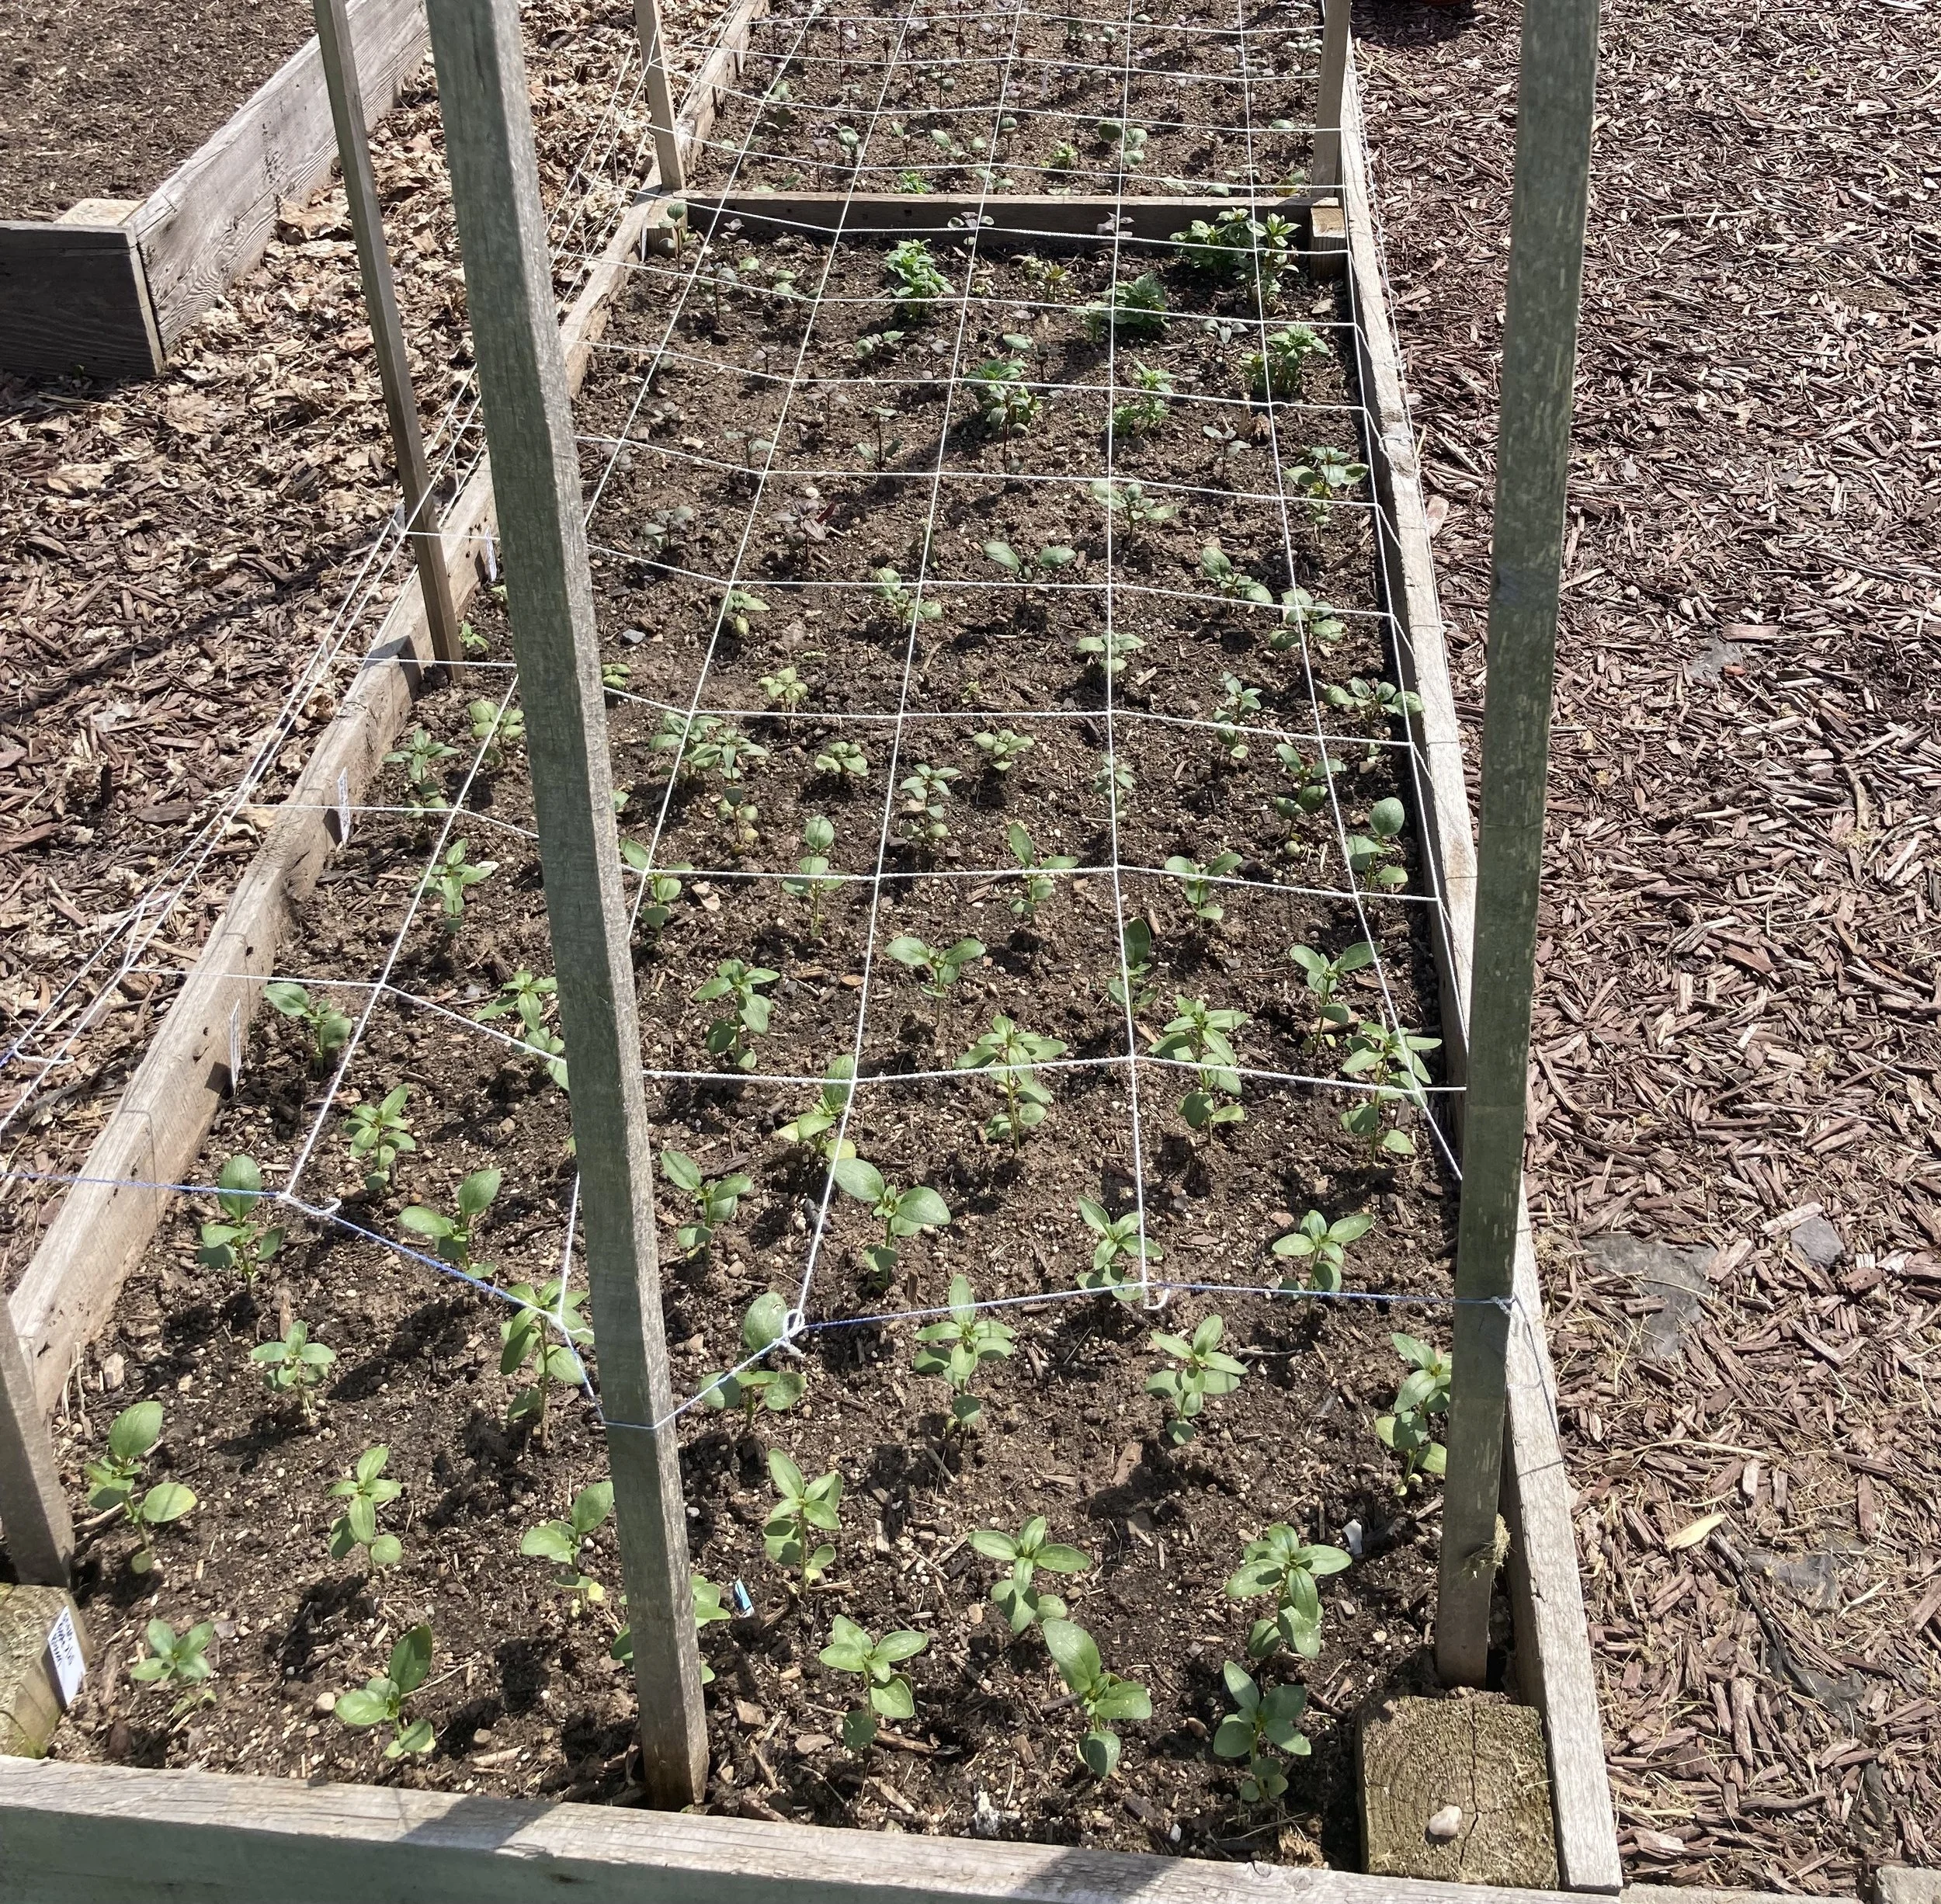
June 1 - marigolds

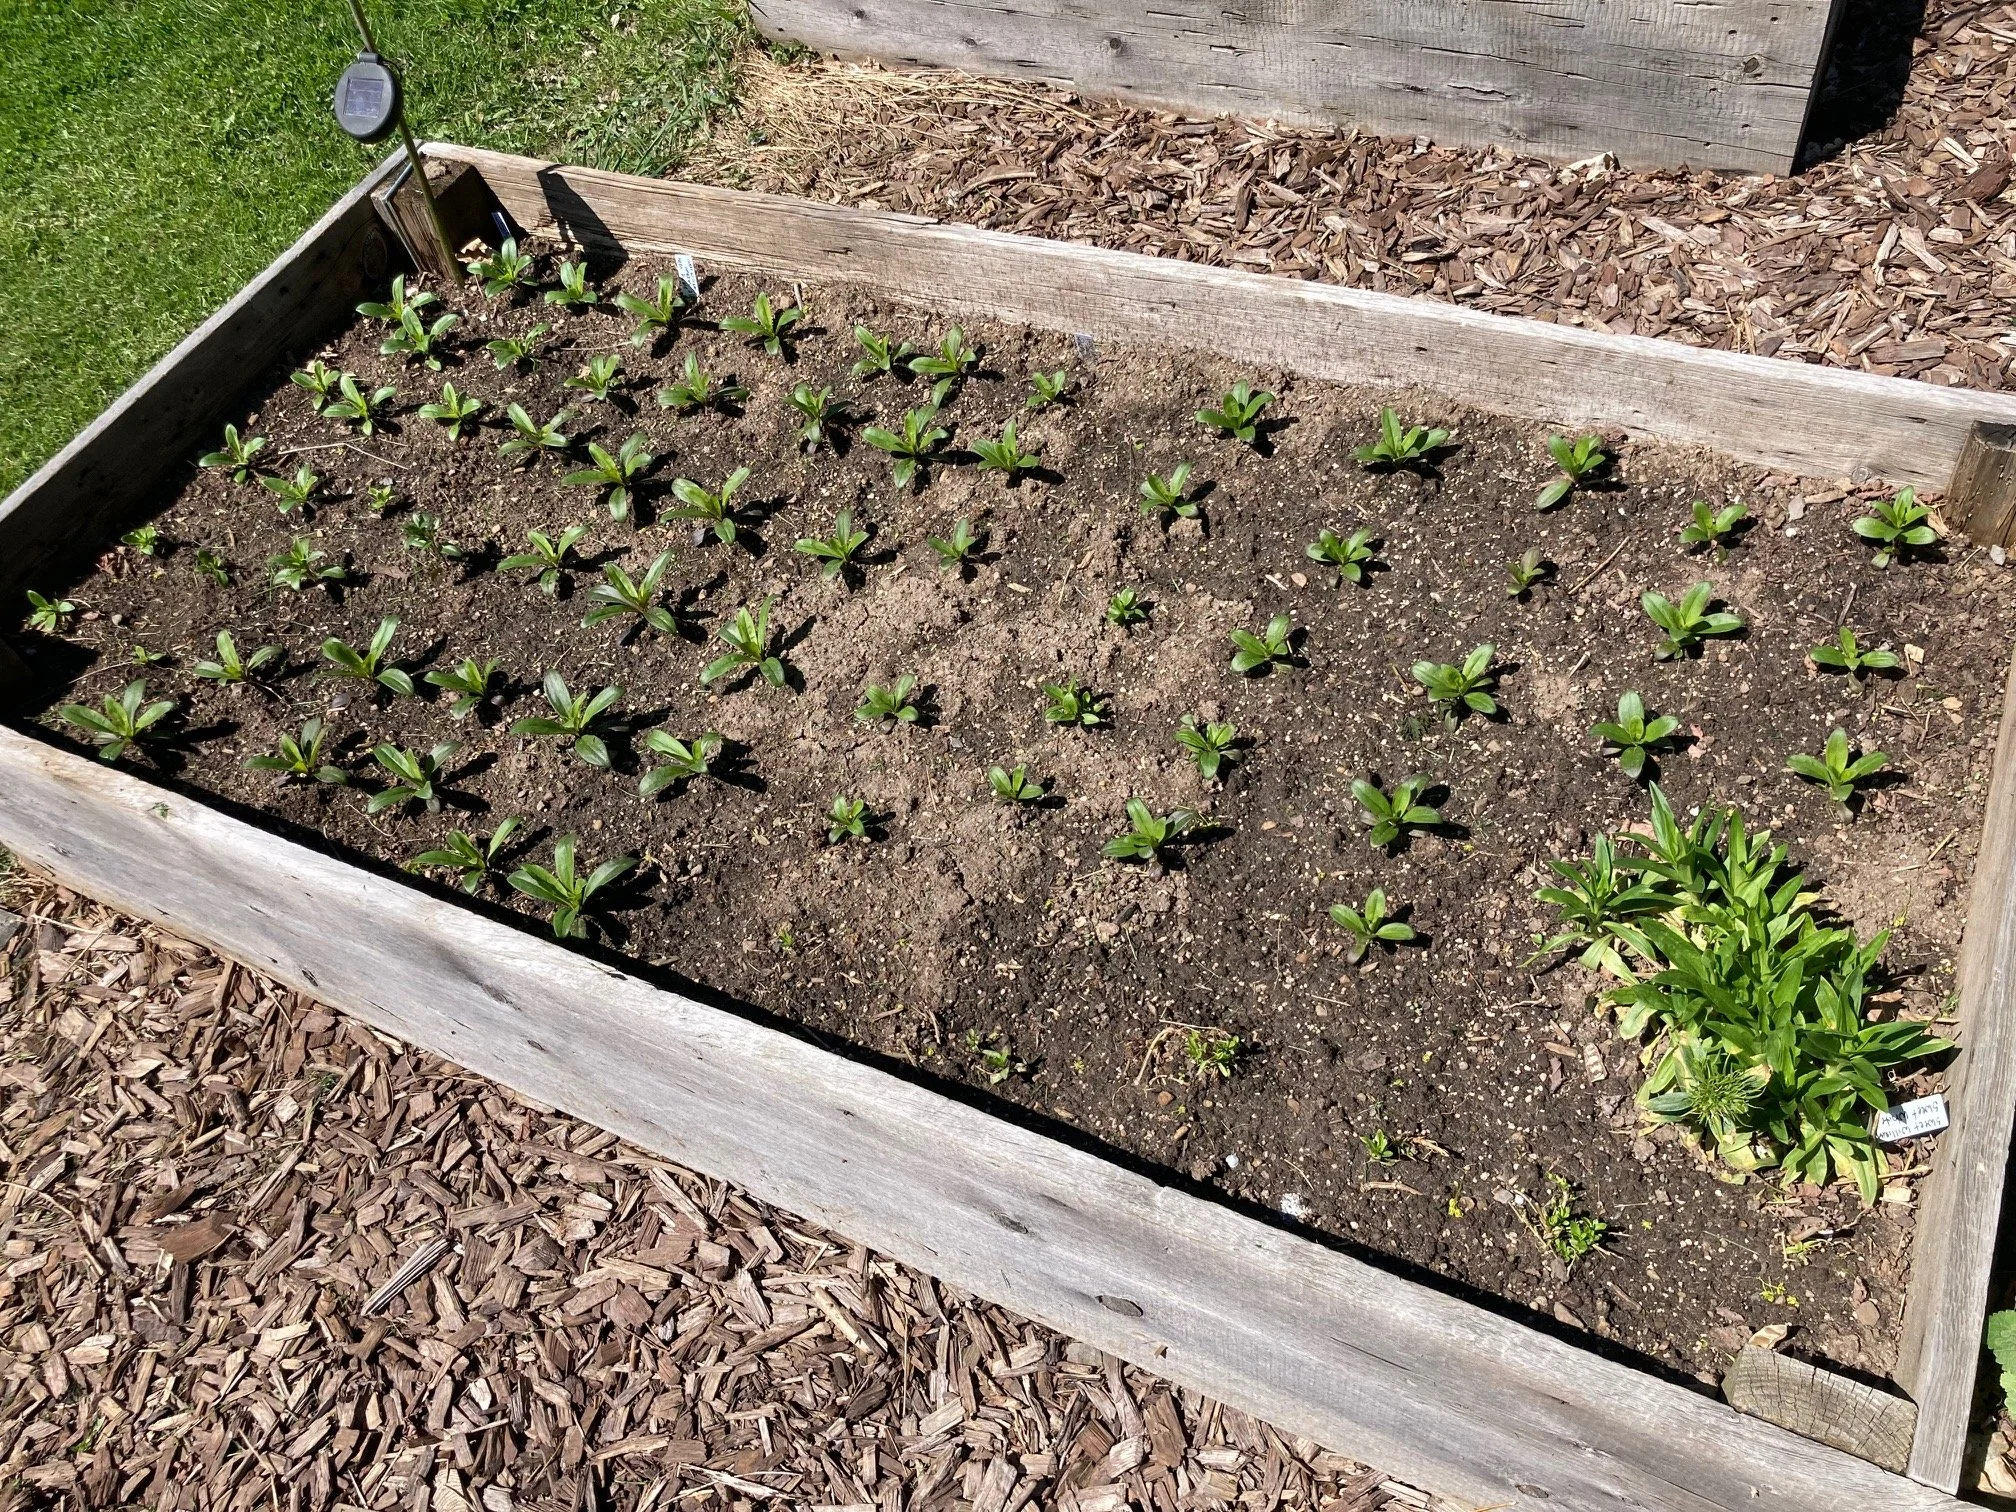
June 15 - marigolds - I pinched the 3 rows on the left (pinching is when you cut off the top part of the plant in order to encourage more branching - more branching means more flowers but it delays the bloom time, that's why I only pinch half.)

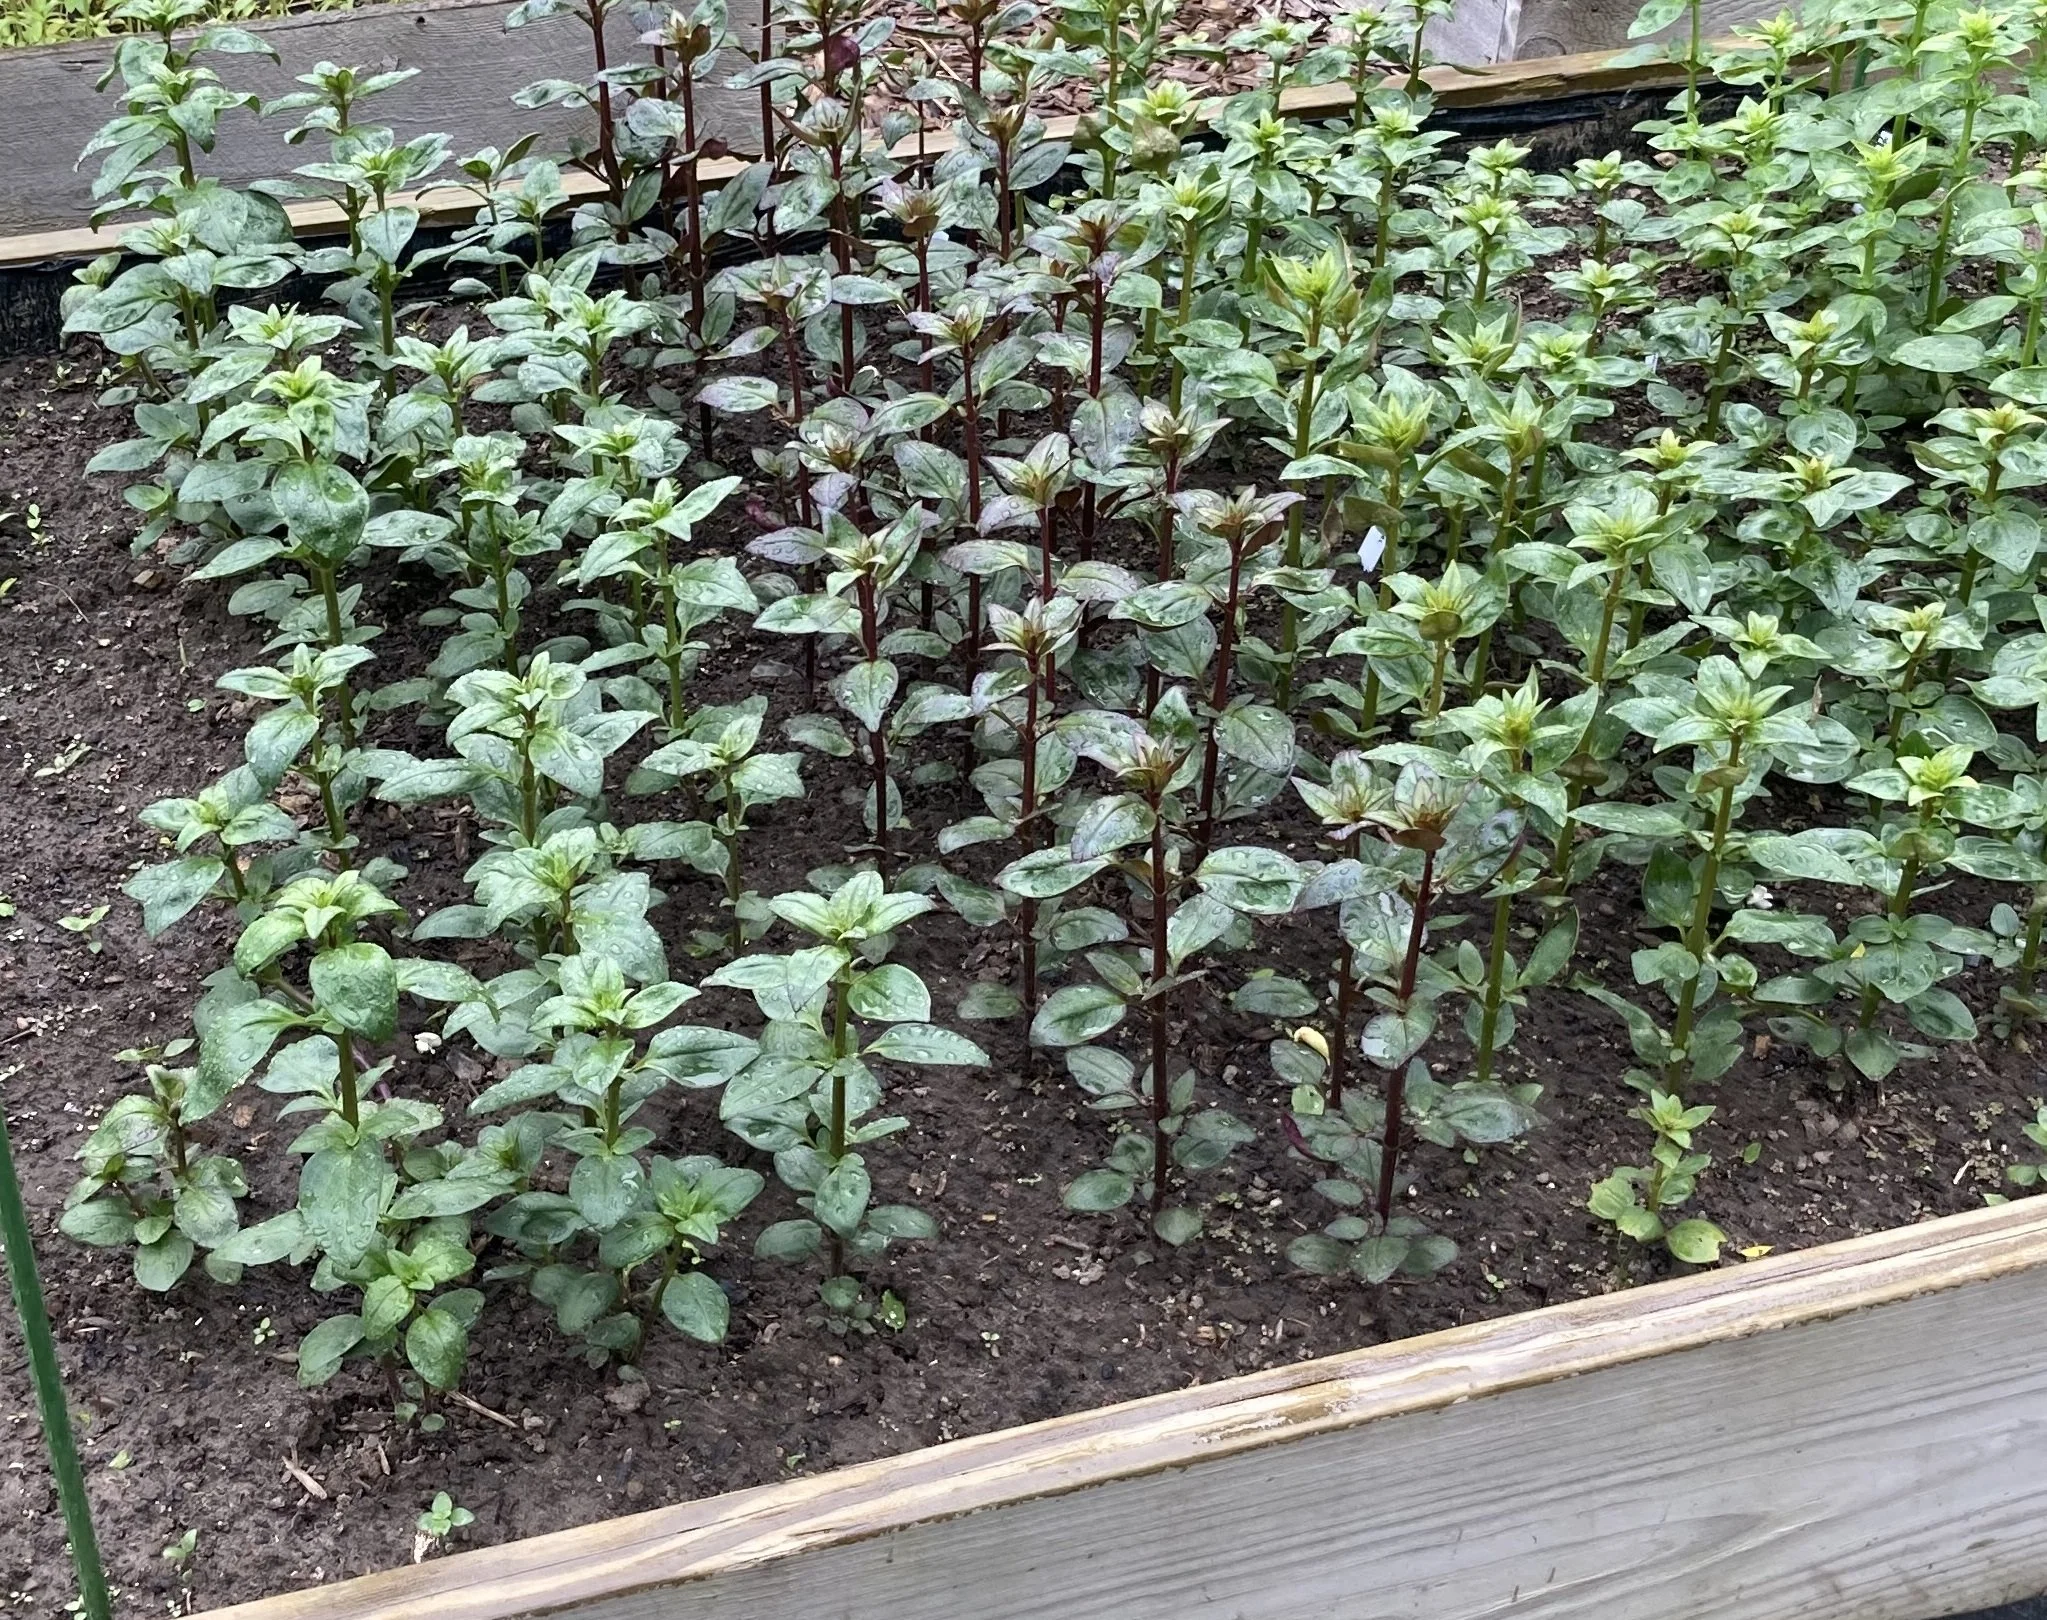
June 30 - marigolds - just starting to bloom, the Giant Yellow bloomed first

July 7 - marigolds
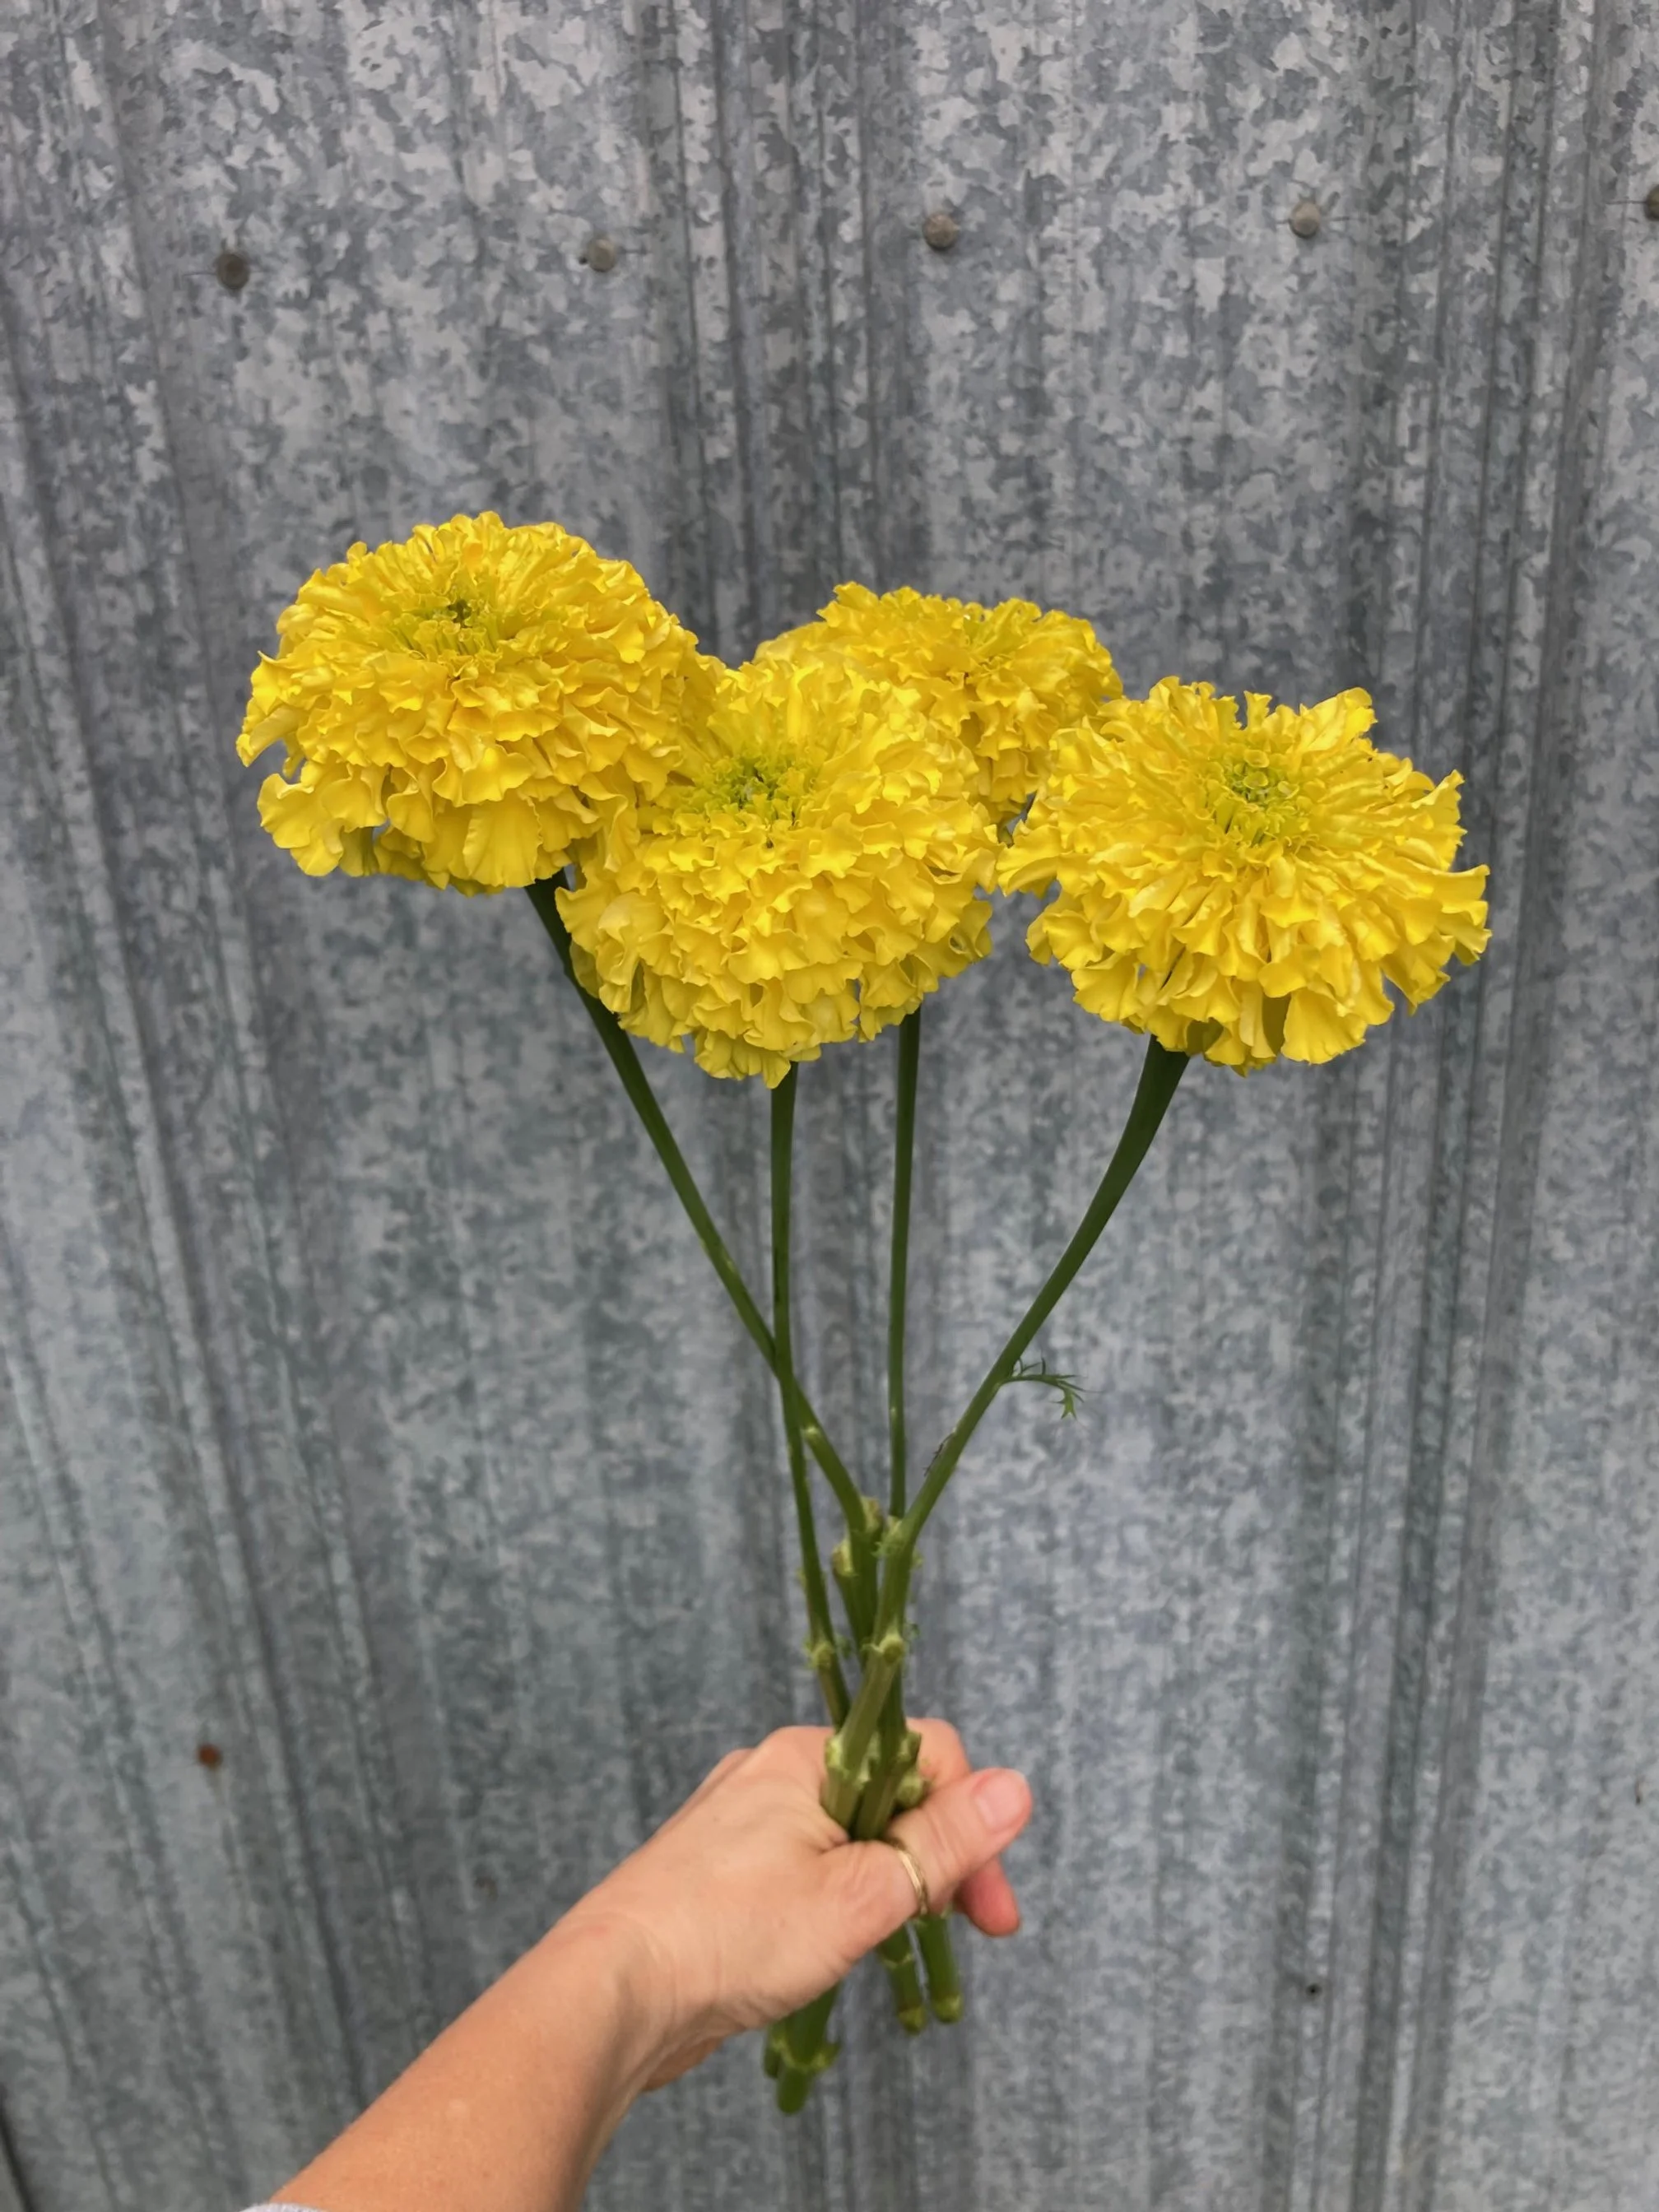
Giant Yellow marigolds
marigolds - Coco Gold on top, Giant Orange in middle, and Giant Yellow on bottom

single petal marigolds that grew from seeds I saved from last year's flowers

marigolds that look like hairy puff balls, these grew from seeds I saved from last year's flowers
Sweet William
Another one of my favorite early summer flowers is Sweet William (in the Dianthus family, cousin to carnations). The bloom heads are really big and full and are made up of several smaller flowers clustered together. Check out the pictures below. They are a ‘cool flower’ so can be planted out BEFORE our last frost in the early spring. It is a tough plant. As you’ll see in the pictures, the baby seedlings endured a snow storm when they were on the deck hardening off. It didn’t bother them at all, and I planted them out in the garden 2 days later.
There are several different varieties of Sweet William. I use mostly the Amazon series. In the past, I have also tried the Sweet series which are a little shorter. This year (2025) I bought my Sweet William seeds from Lisa Mason Ziegler. They cost $5.95 for a packet of 25 seeds. Lisa’s website is called The Gardener’s Workshop. Lisa wrote a fantastic book about cool flowers called..….wait for it…..Cool Flowers. :) If you’ve never heard of cool flowers, or if you’d like to learn more about them, I highly recommend her book. It’s a small little book with great pictures, and although it contains a ton of information, it’s very easy to understand.
The varieties I grew this year are the Amazon Neon Purple, Amazon Neon Rose and Amazon Lavender Magic. I started the seeds in a 72 cell tray. I only started one tray, and I wish I had started more. I think next year I might convert one of my other beds to Sweet William. All 72 seeds germinated, I didn’t lose any! YAY!
When I planted them out in the garden, there were a few Sweet William plants that over-wintered from last year. Some people have good luck over-wintering their Sweet William, but I usually don’t. Of the 5 or 6 plants that survived the winter, most died and never bloomed. The only one that did bloom was the variety called Sweet Purple/White Bicolor. It’s one of my favorites because it has a really cool bloom. The individual flowers that make up the big bloom heads are white and each one has a ring of purple, very eye catching. In the photo taken April 18th (when I planted them out) it’s the large clump to the far right. For some reason, I didn’t get pictures of the blooms after I harvested them, so I included a couple pictures of bouquets where it was used. Love it!!


March 16 started Sweet William seeds - Amazon Neon Cherry - got seeds from The Gardeners Workshop website - seeds come in small plastic vile

March 16 started Sweet William seeds - Amazon Neon Purple

March 16 started Sweet William seeds - Amazon Lavender Magic

March 16 - tray of Sweet William, sprinkled with vermiculite to help hold in moisture

March 22 - Sweet William germinated
April 3 - Sweet William hardening off

April 11 - Sweet William hardening off

April 16 - Sweet William hardening off in snow
April 18 - planted out Sweet William - the thick patch on the far right, and a few on the bottom right, are last year's plants that over-wintered
April 28 - Sweet William bed

May 25 - Sweet William bed

June 1 - Sweet William bed

June 1 - Sweet William bed cropped to show the Sweet Purple/White Bicolor just starting to bloom

July 7 - Sweet William bed, I already harvested a few of the Amazon Lavender Magic

July 7 - Sweet William - Amazon Lavender Magic
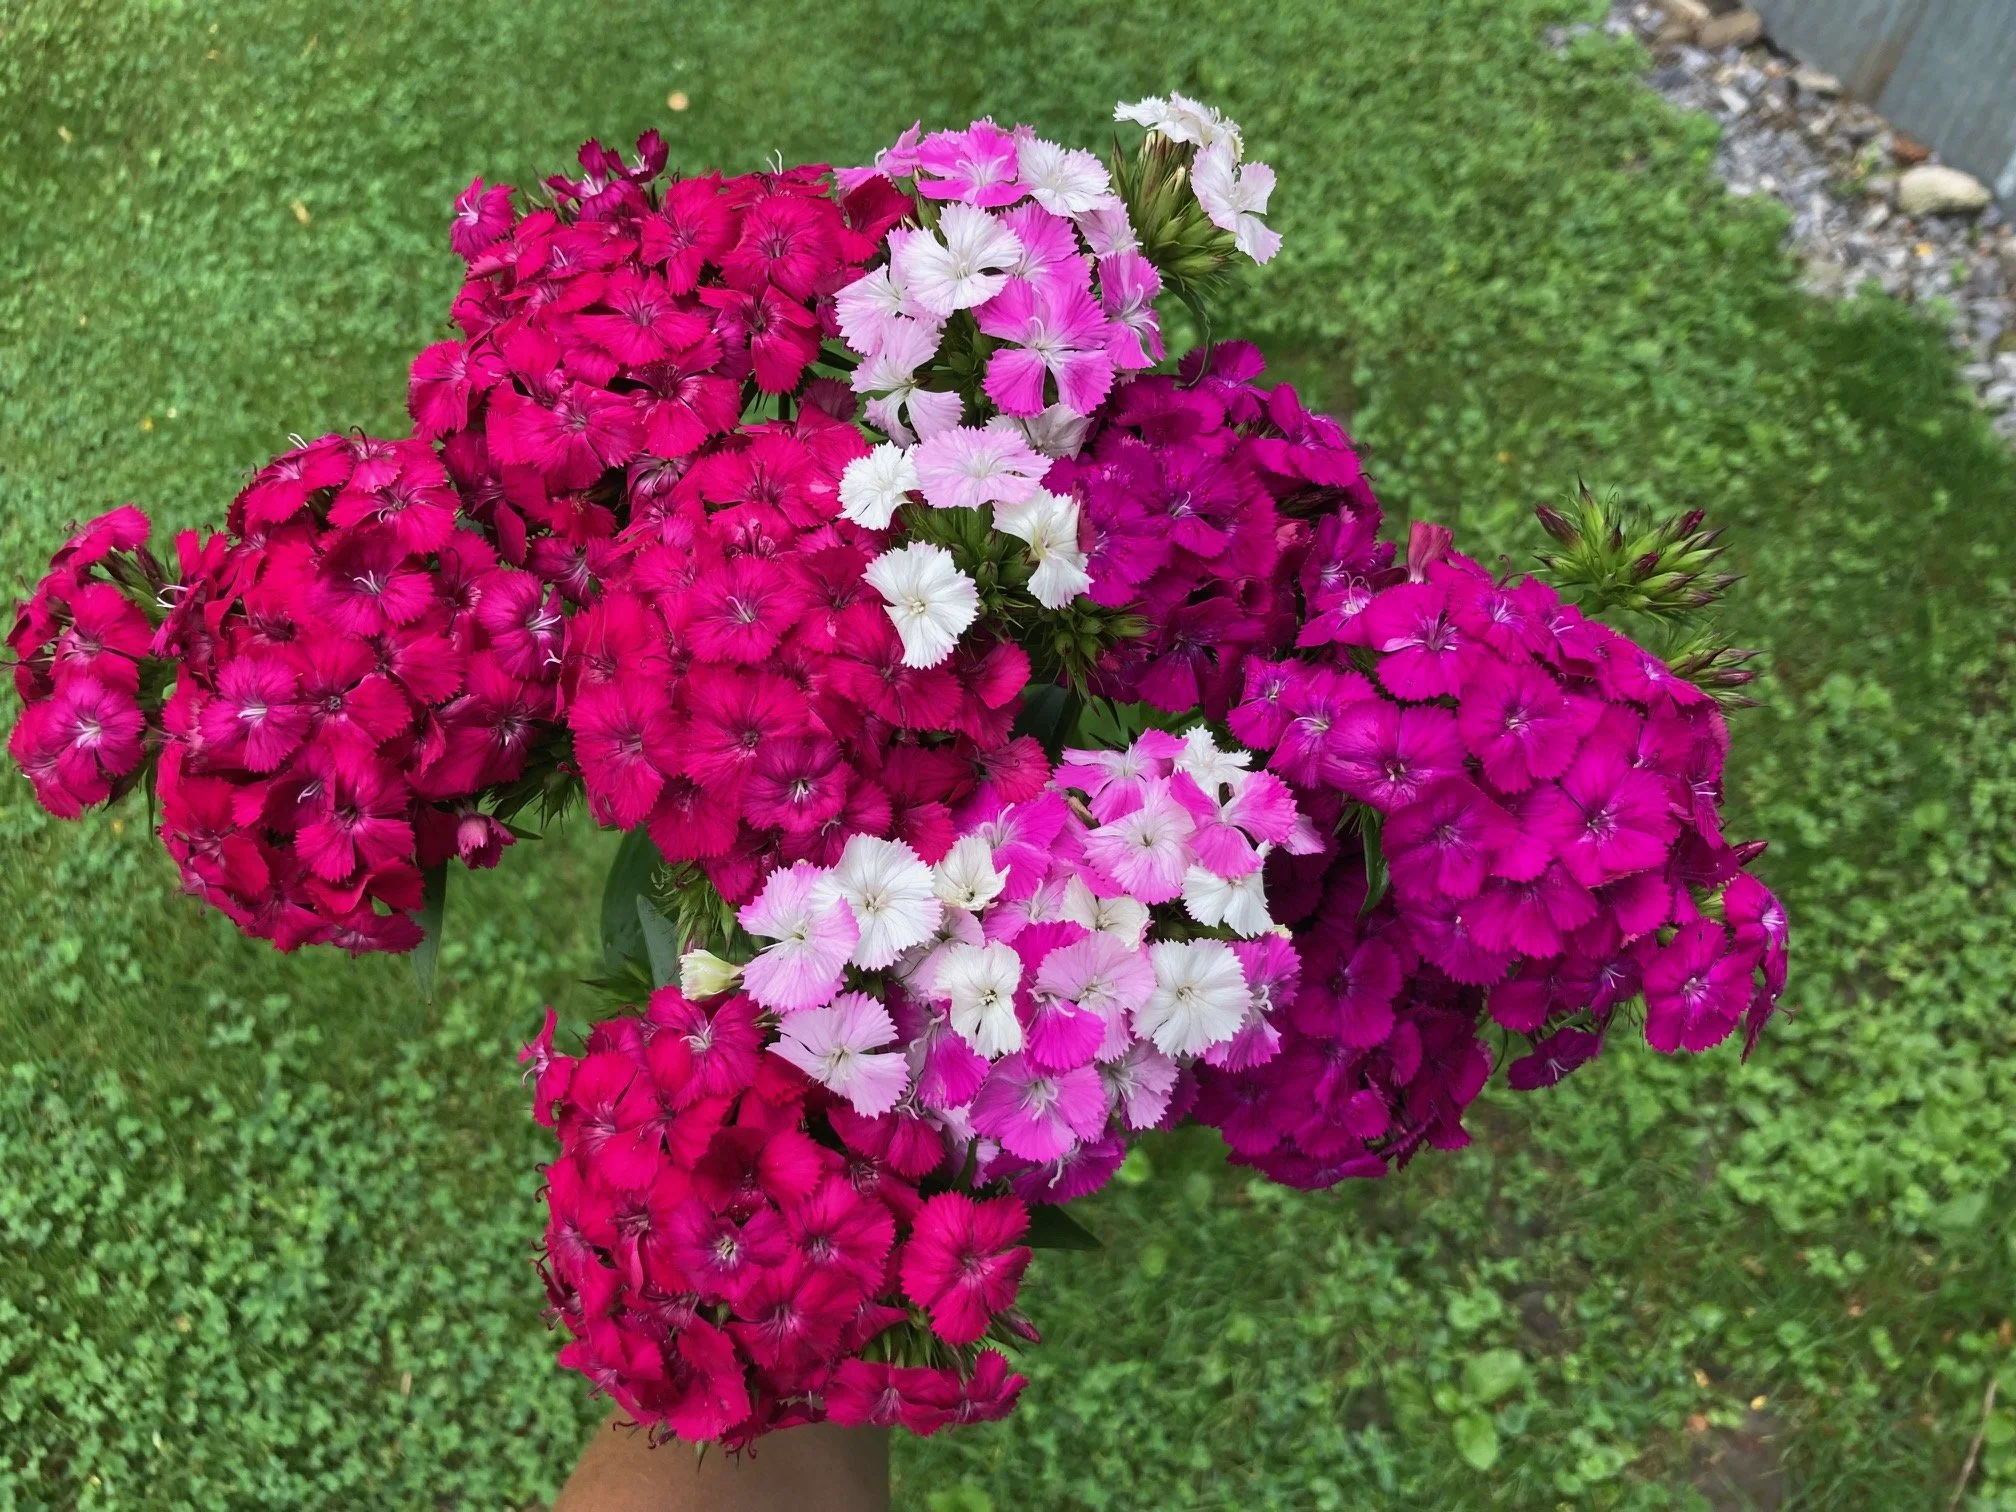
July 8 - 3 varieties of Sweet William - Amazon Rose on left, Amazon Lavender Magic in middle, Amazon Purple on right

July 13 - Sweet William - Amazon Purple on left, Amazon Rose on right

July 15 - Sweet William - Amazon Rose - large bloom in my hand

July 15 - Sweet William - Amazon Lavender Magic - large bloom in my hand

July 15 - Sweet William - Amazon Purple - large bloom in my hand
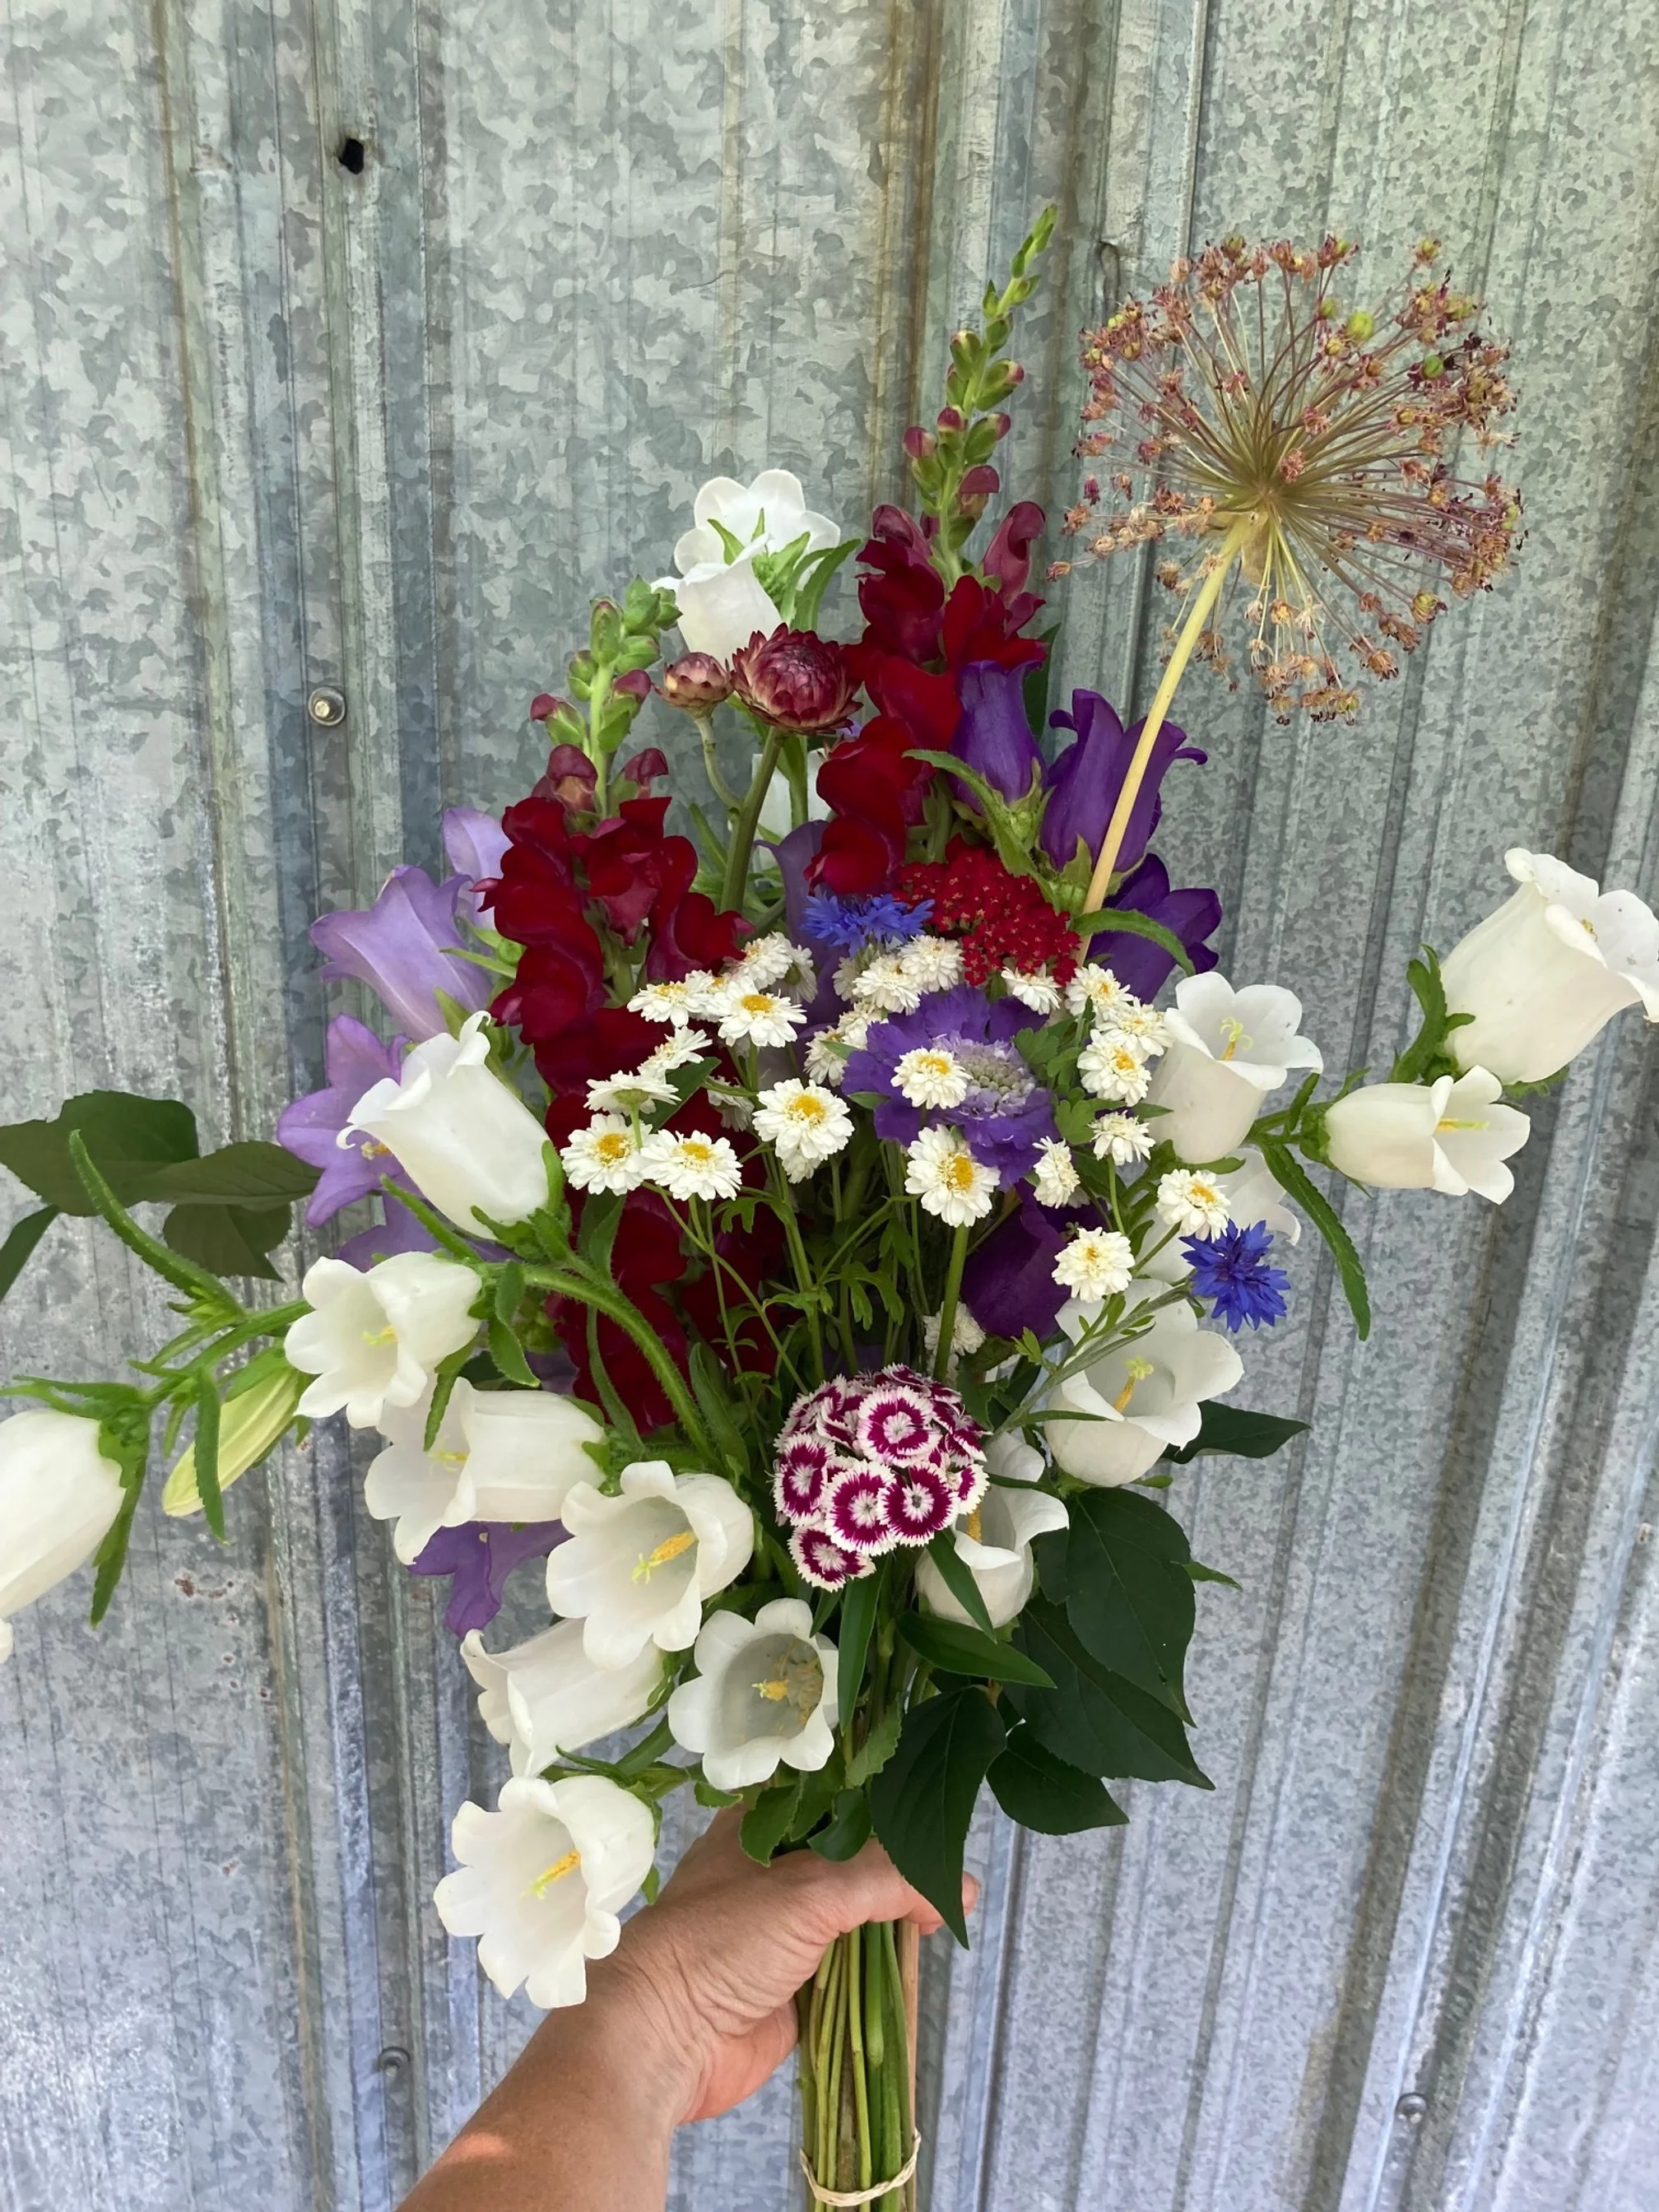
one of my famous red, white and blue bouquets with a Sweet Purple/White Bicolor towards the bottom
another red white and blue bouquet with a few Sweet Purple/White Bicolor